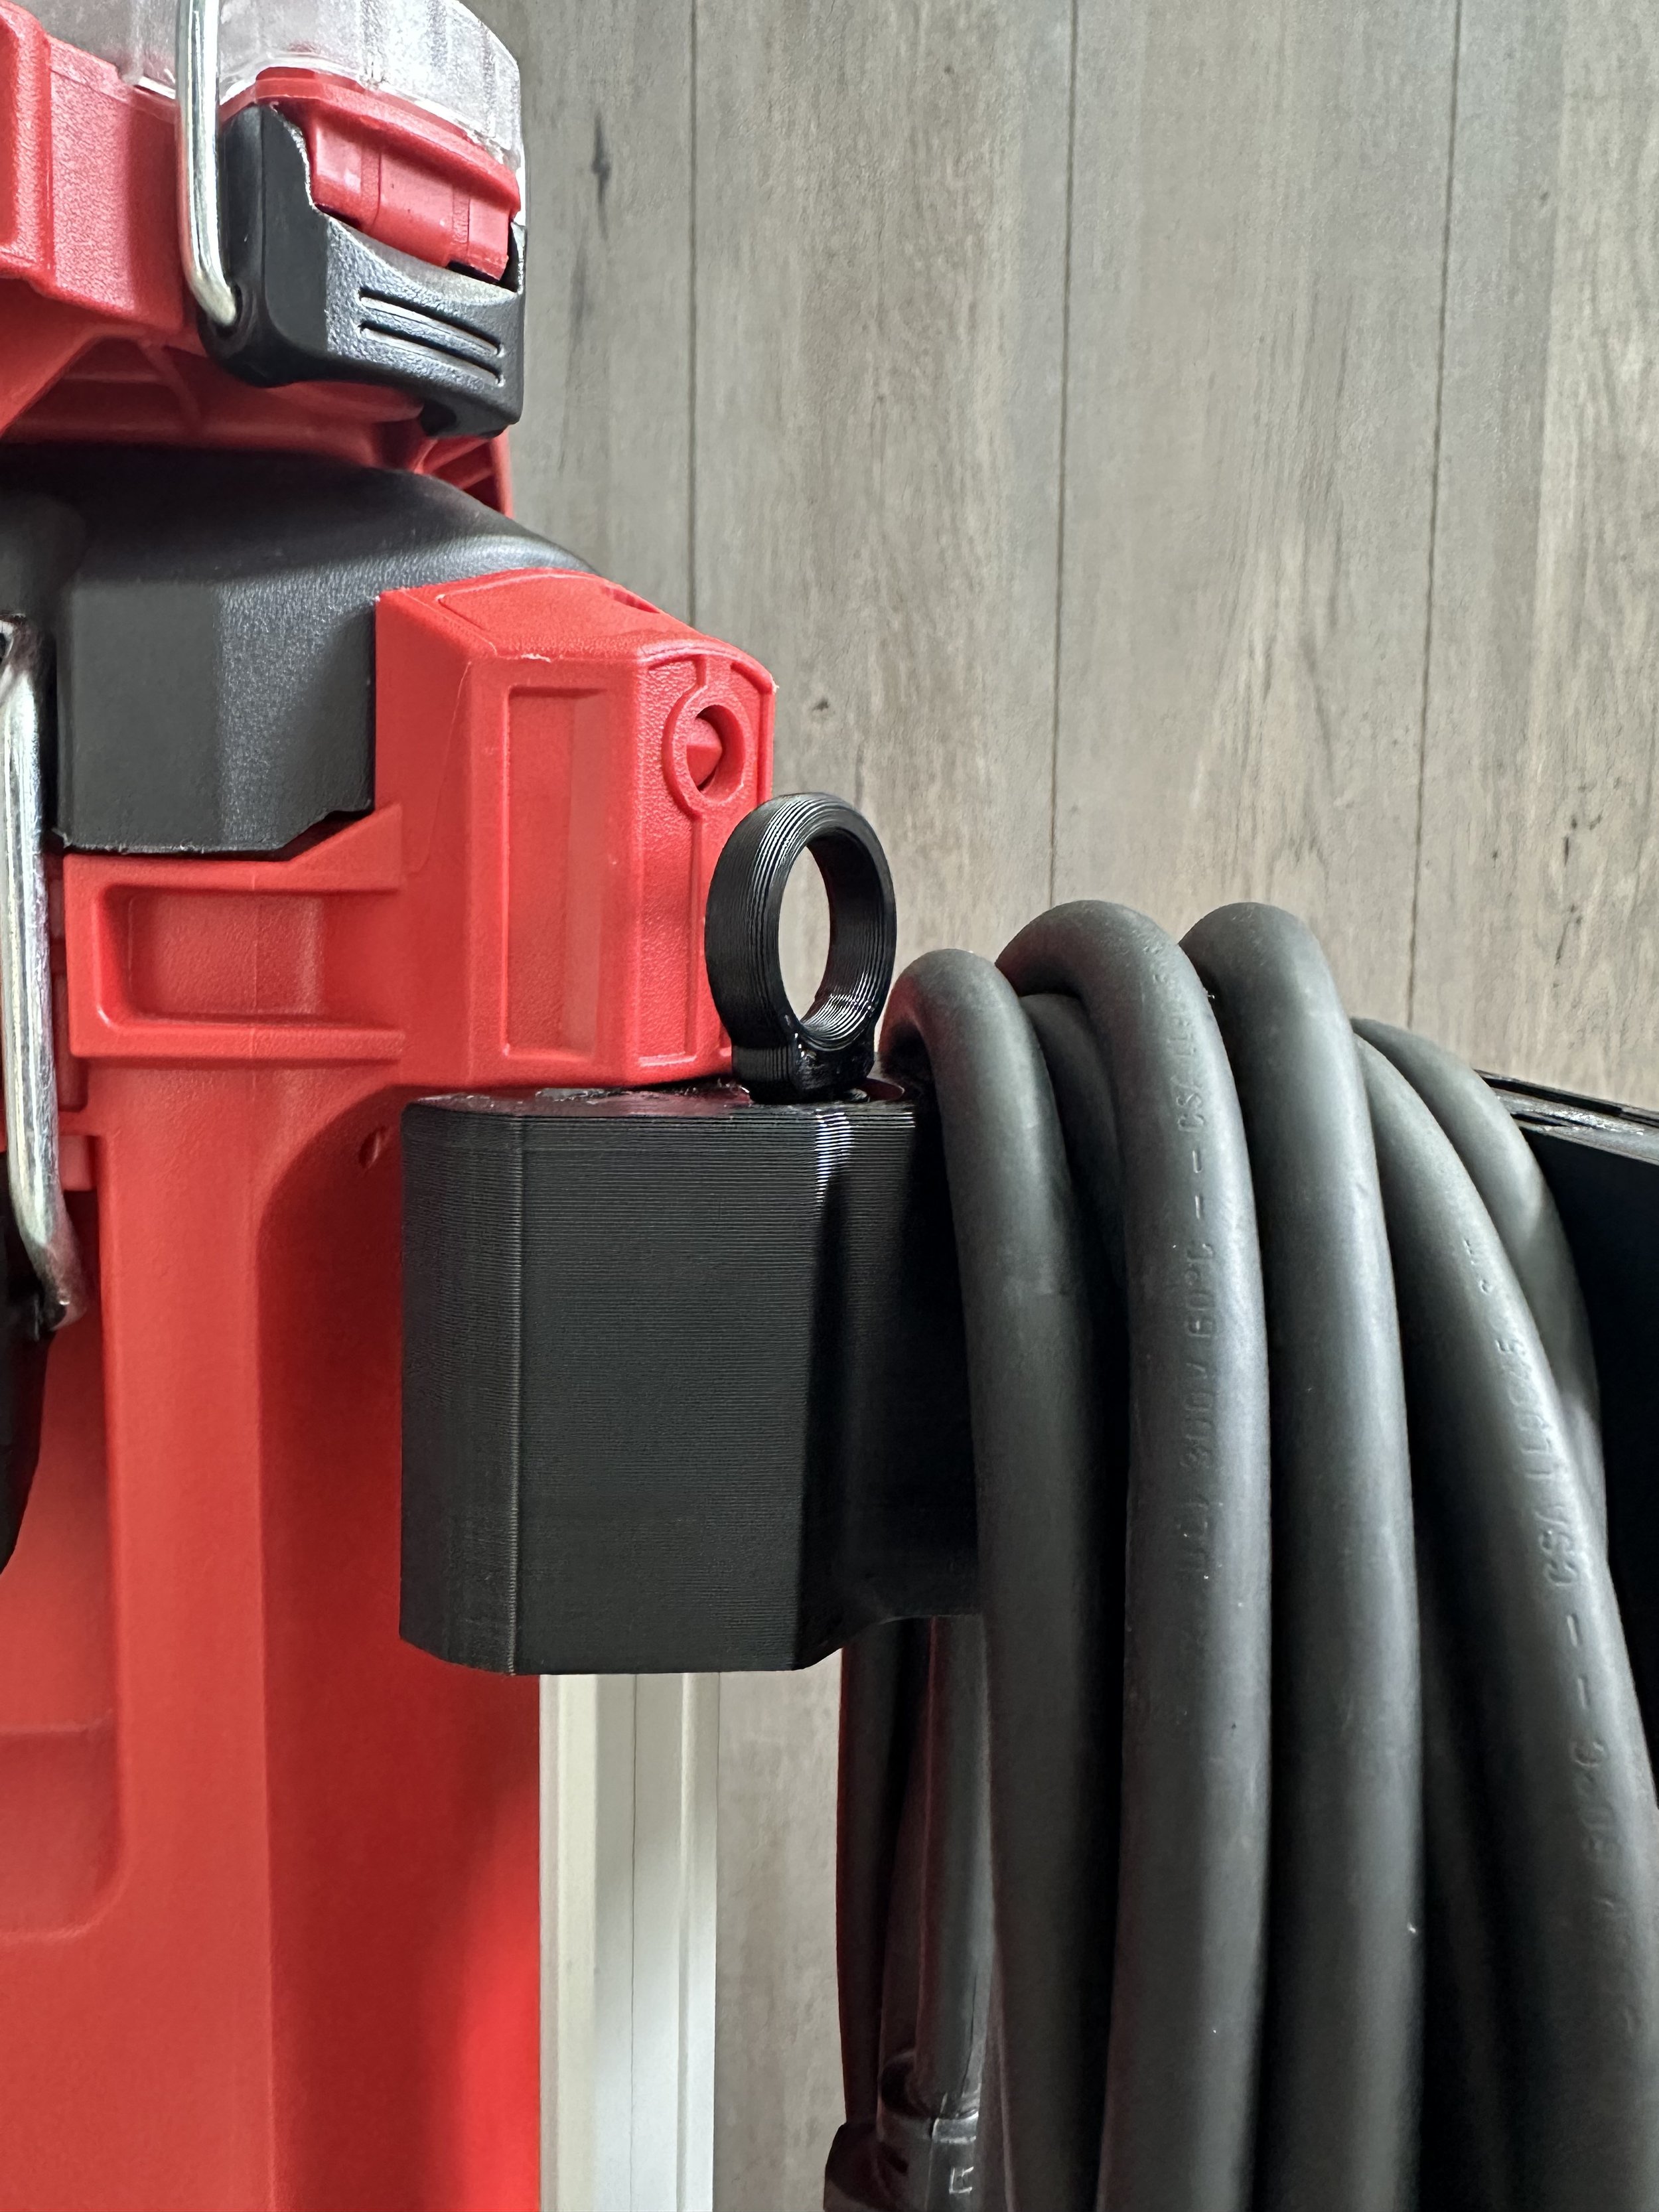
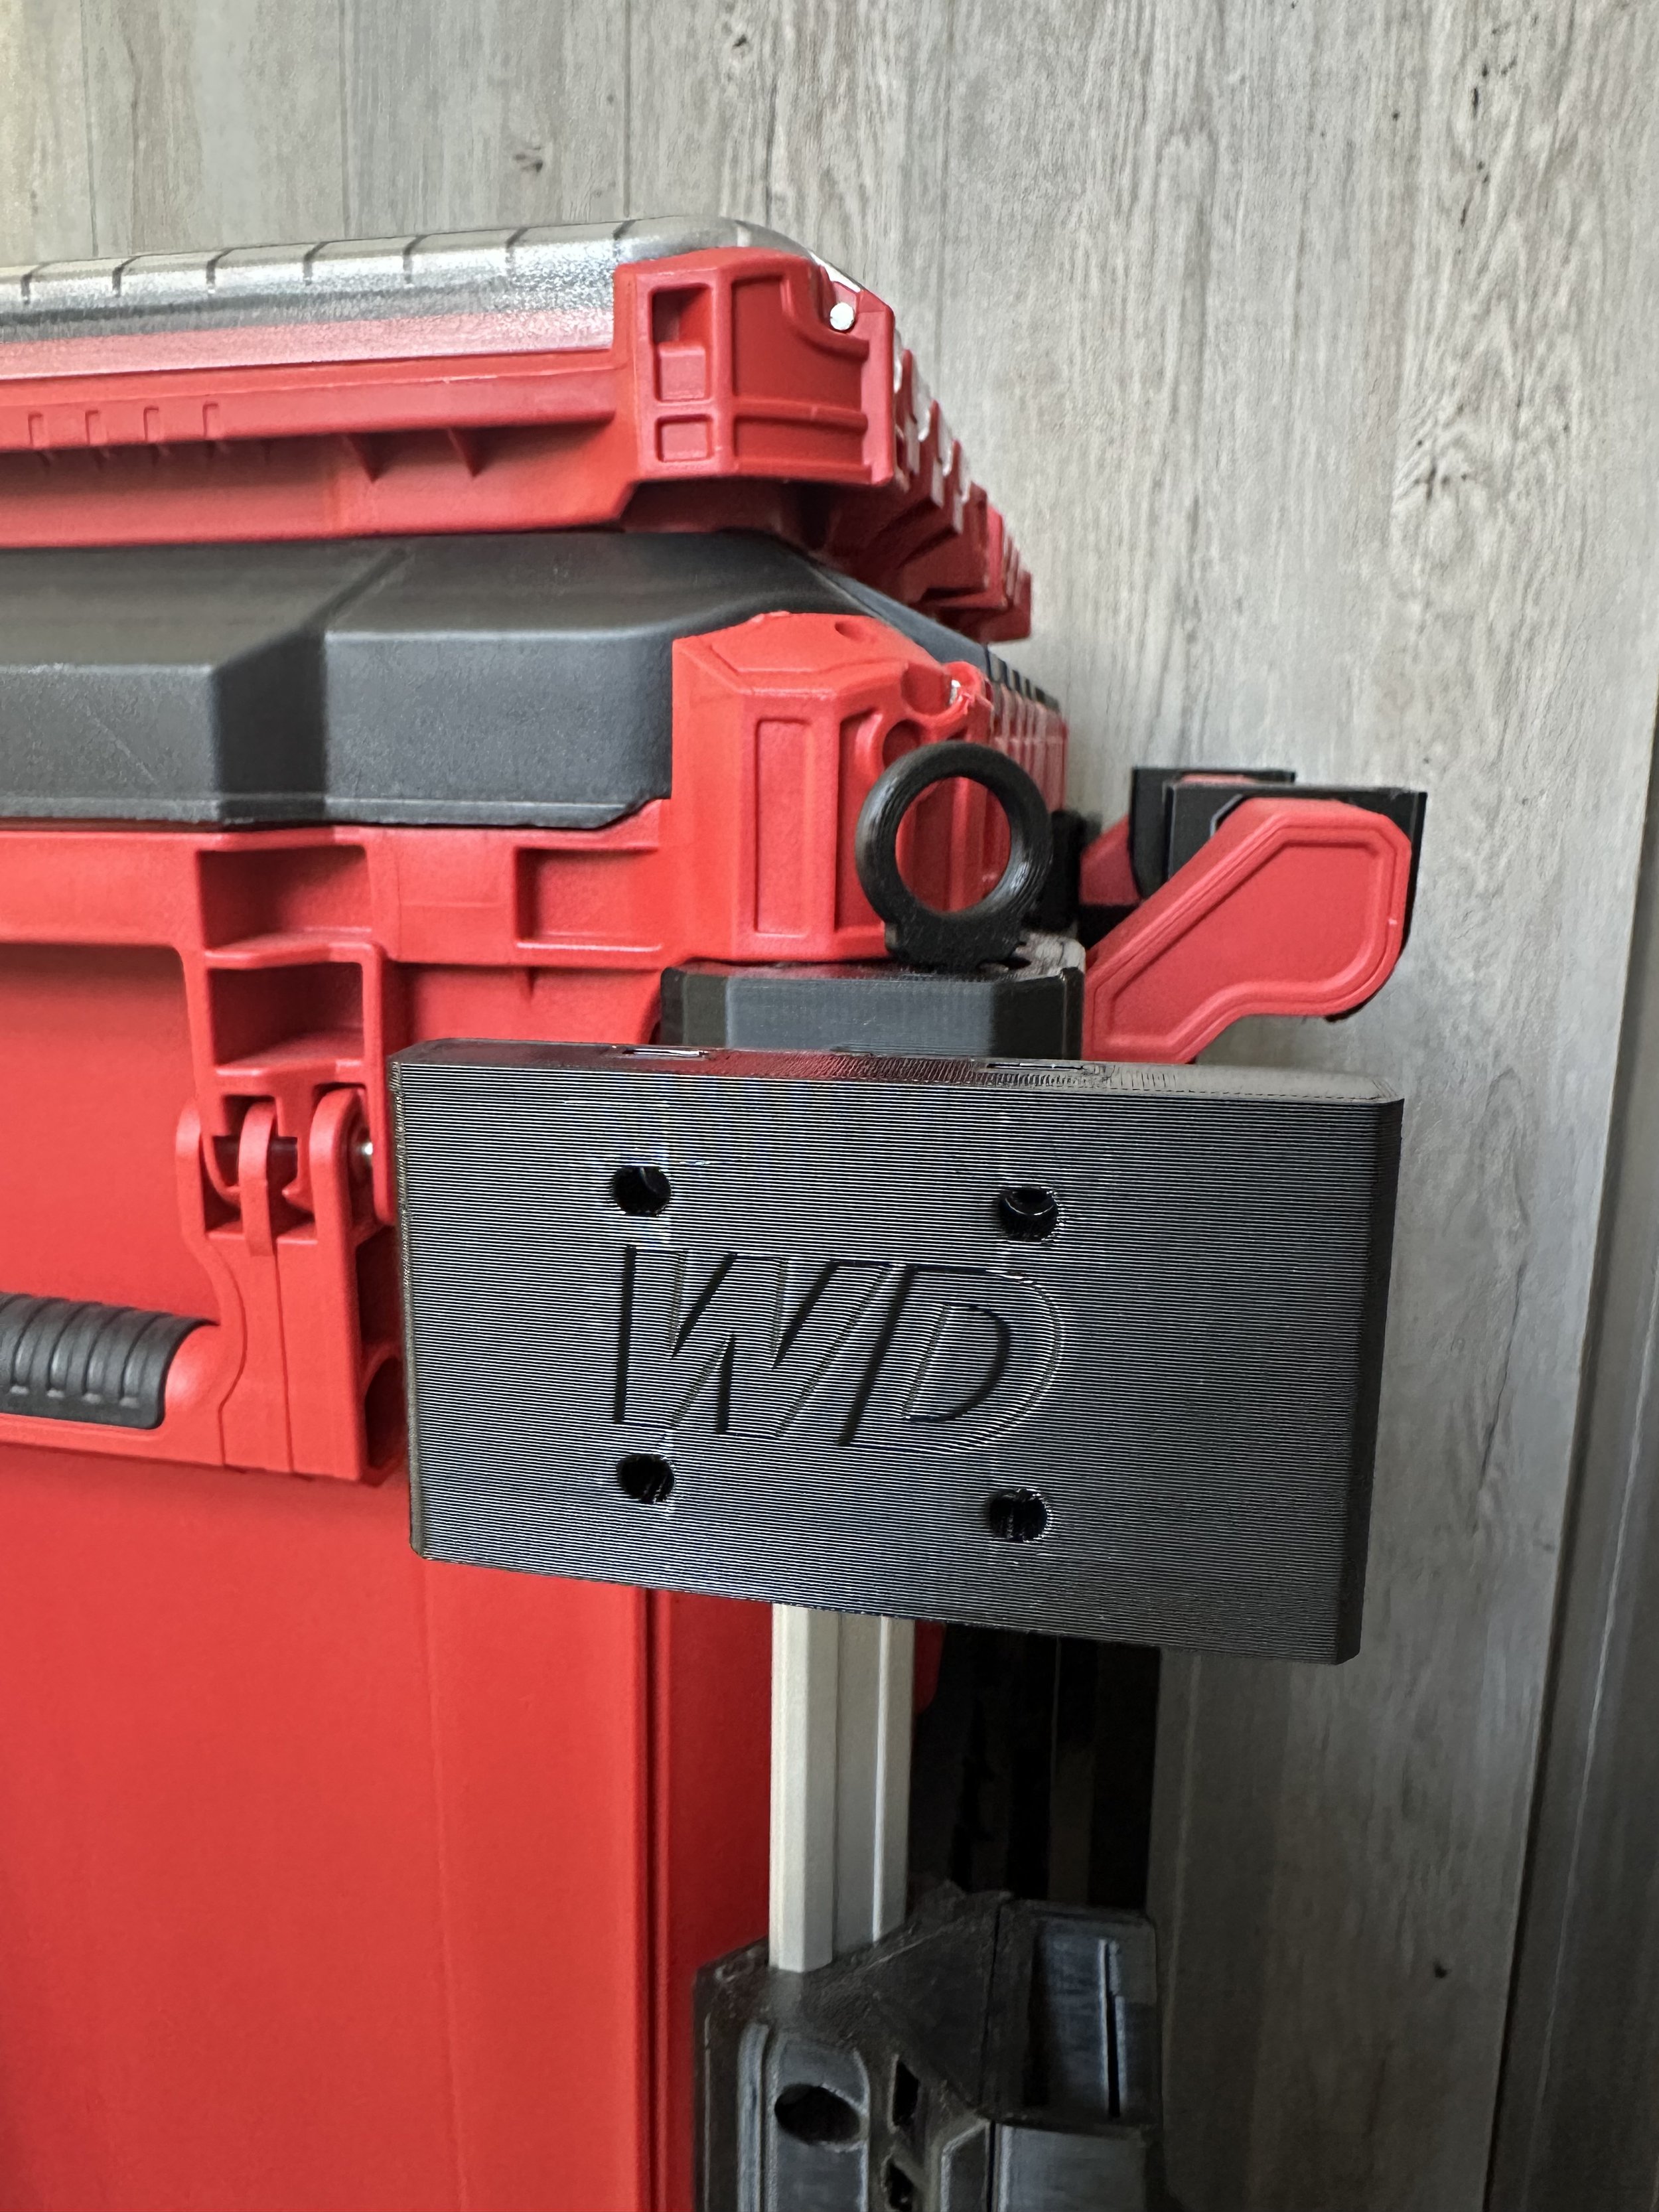
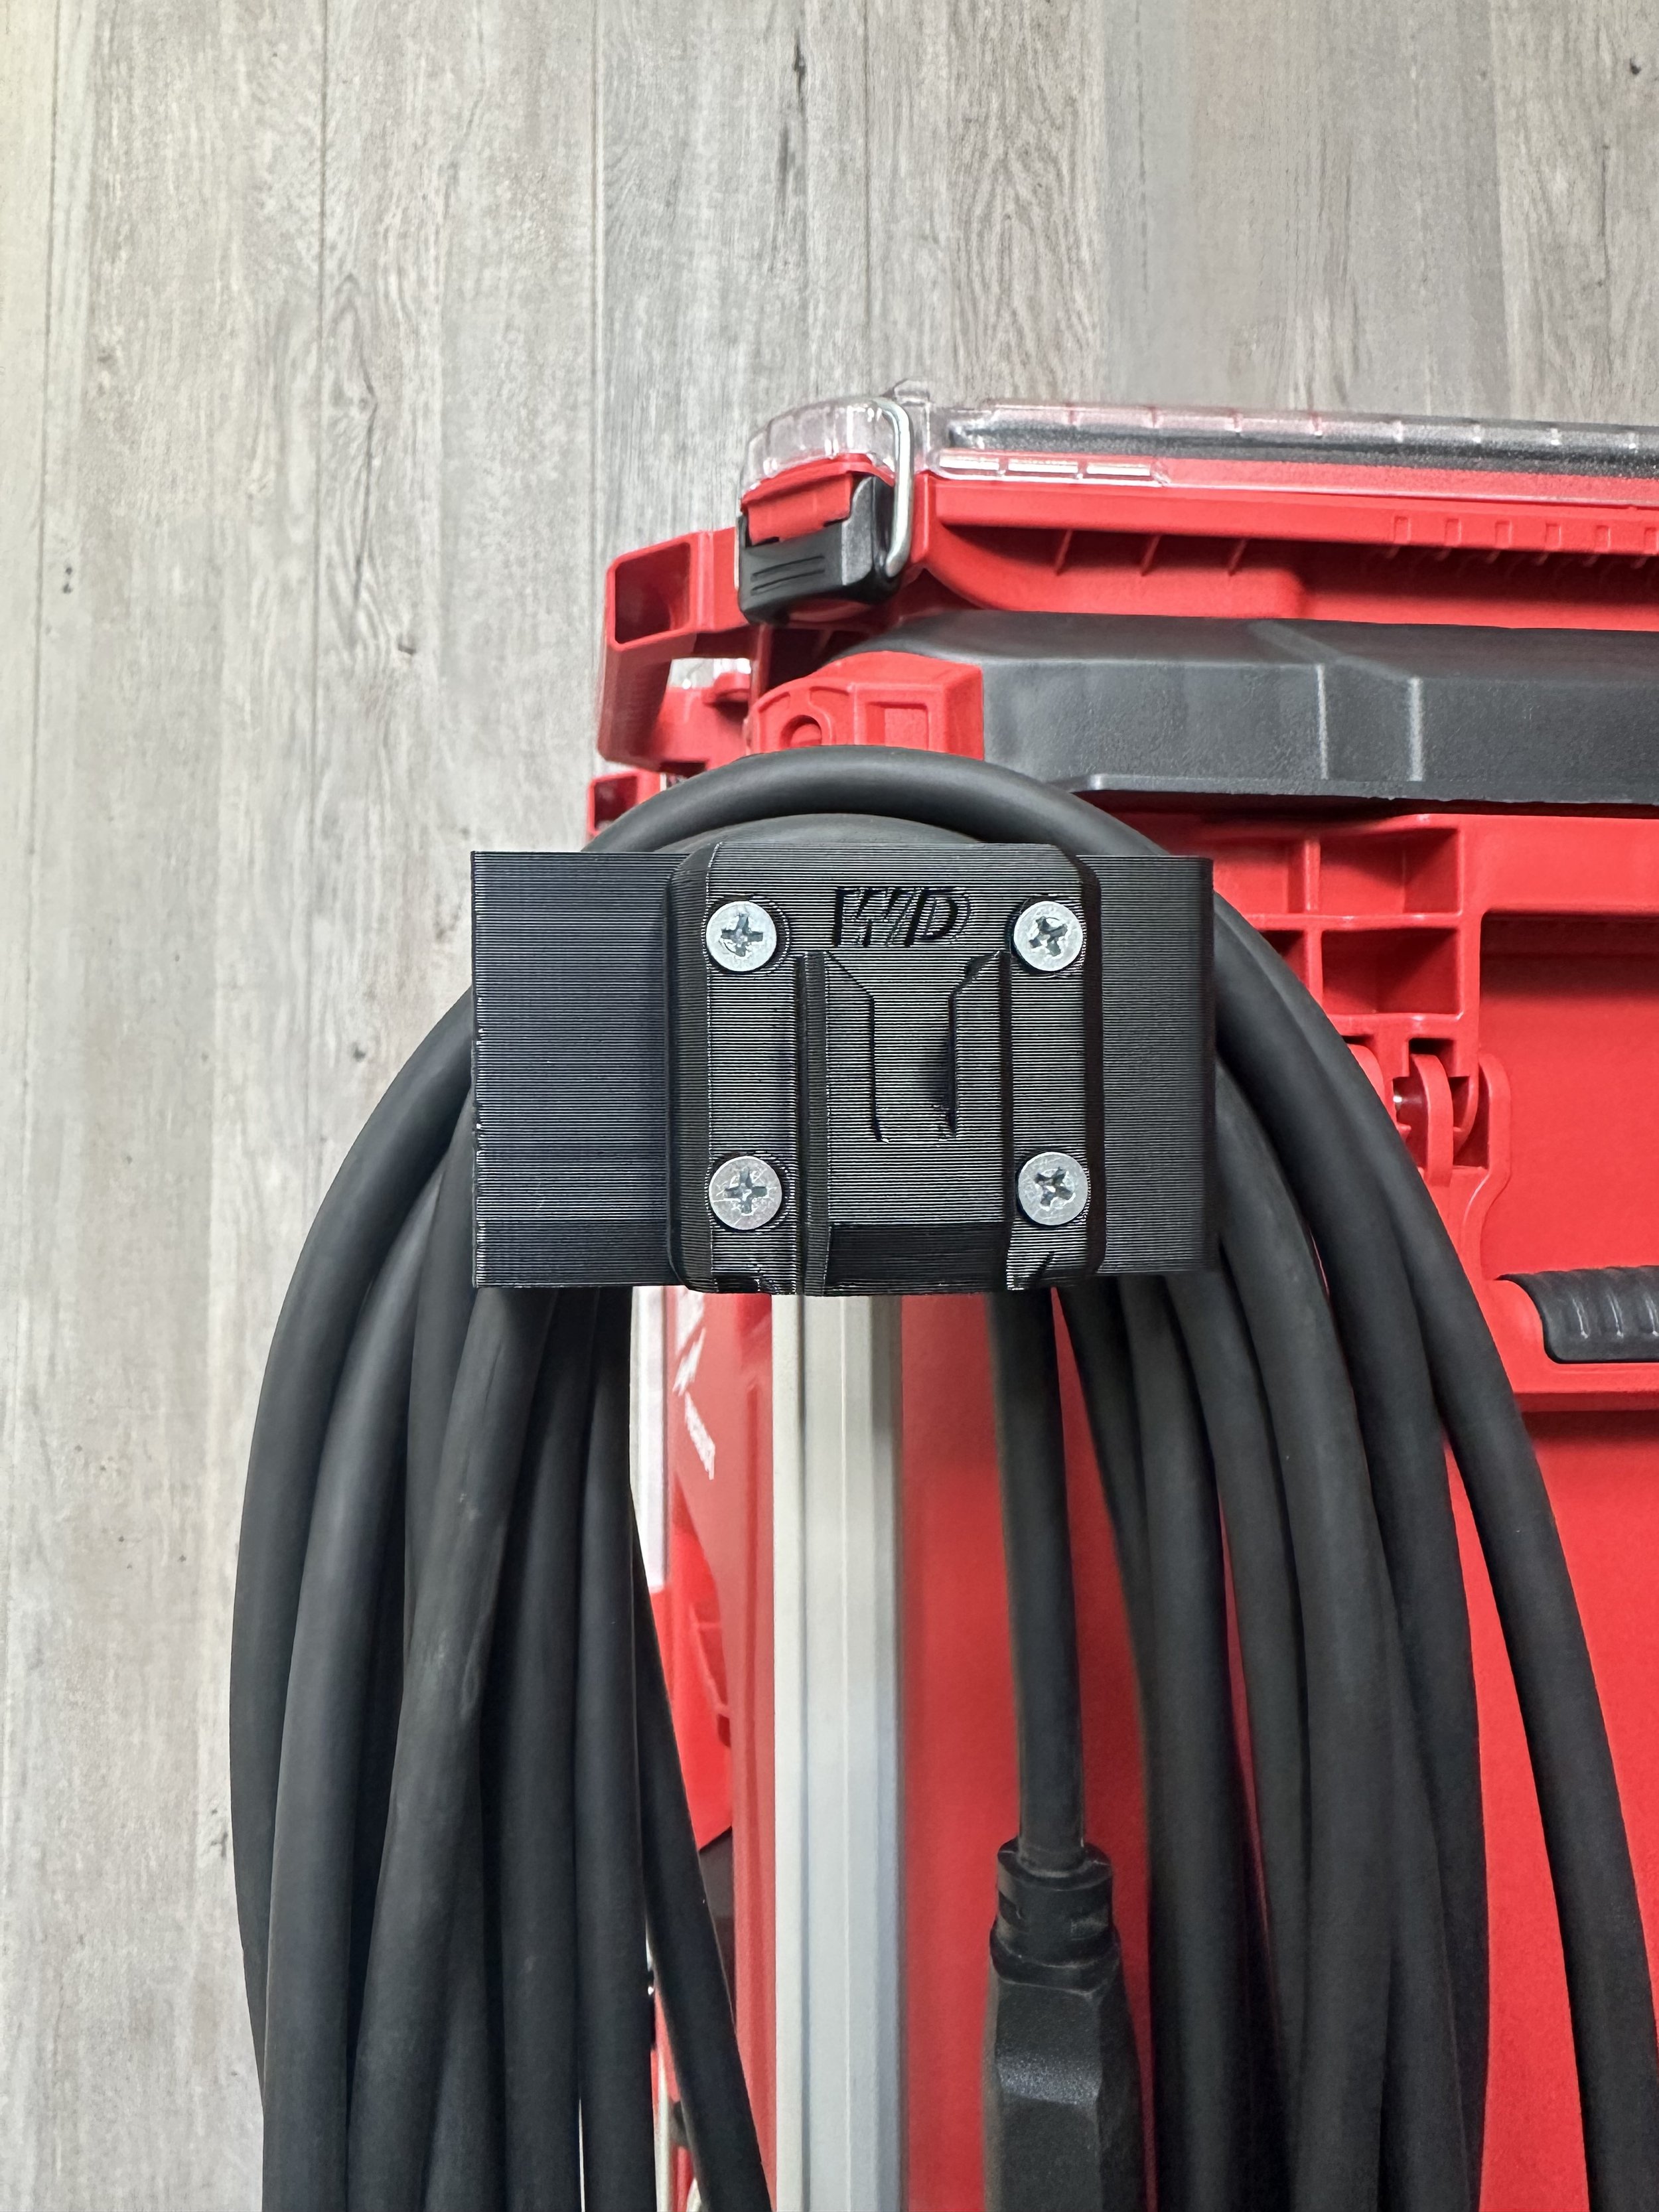
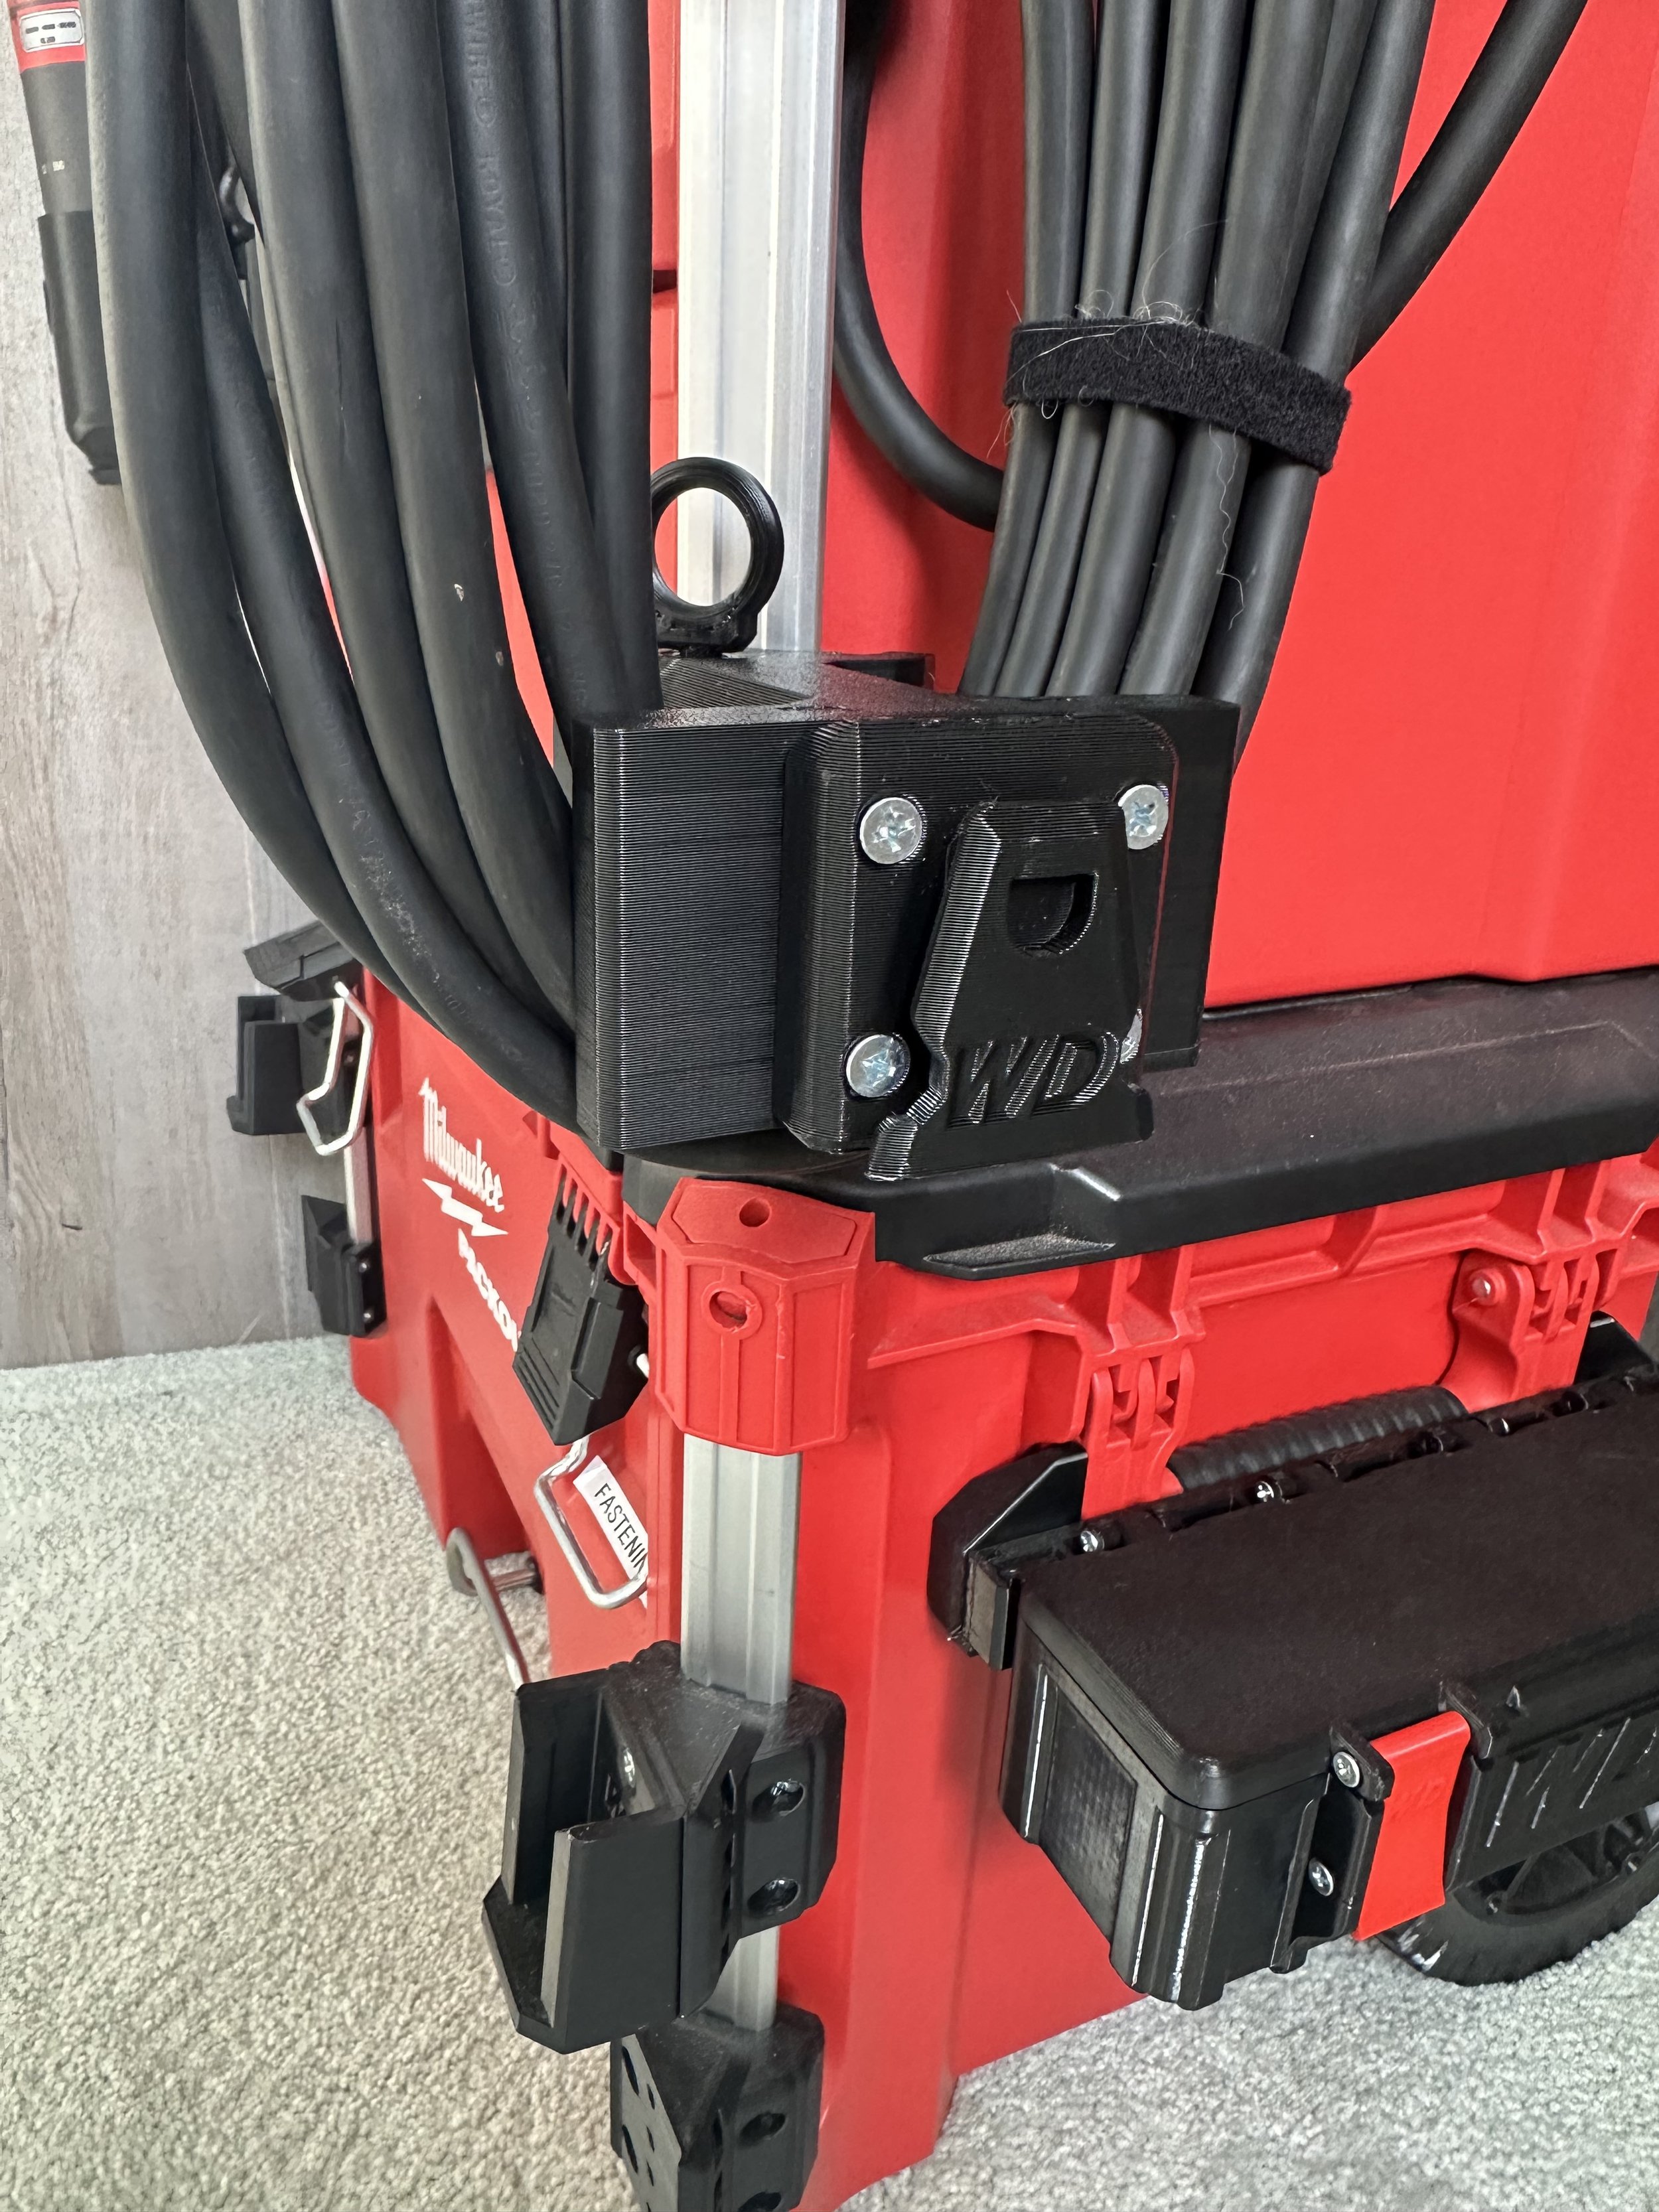
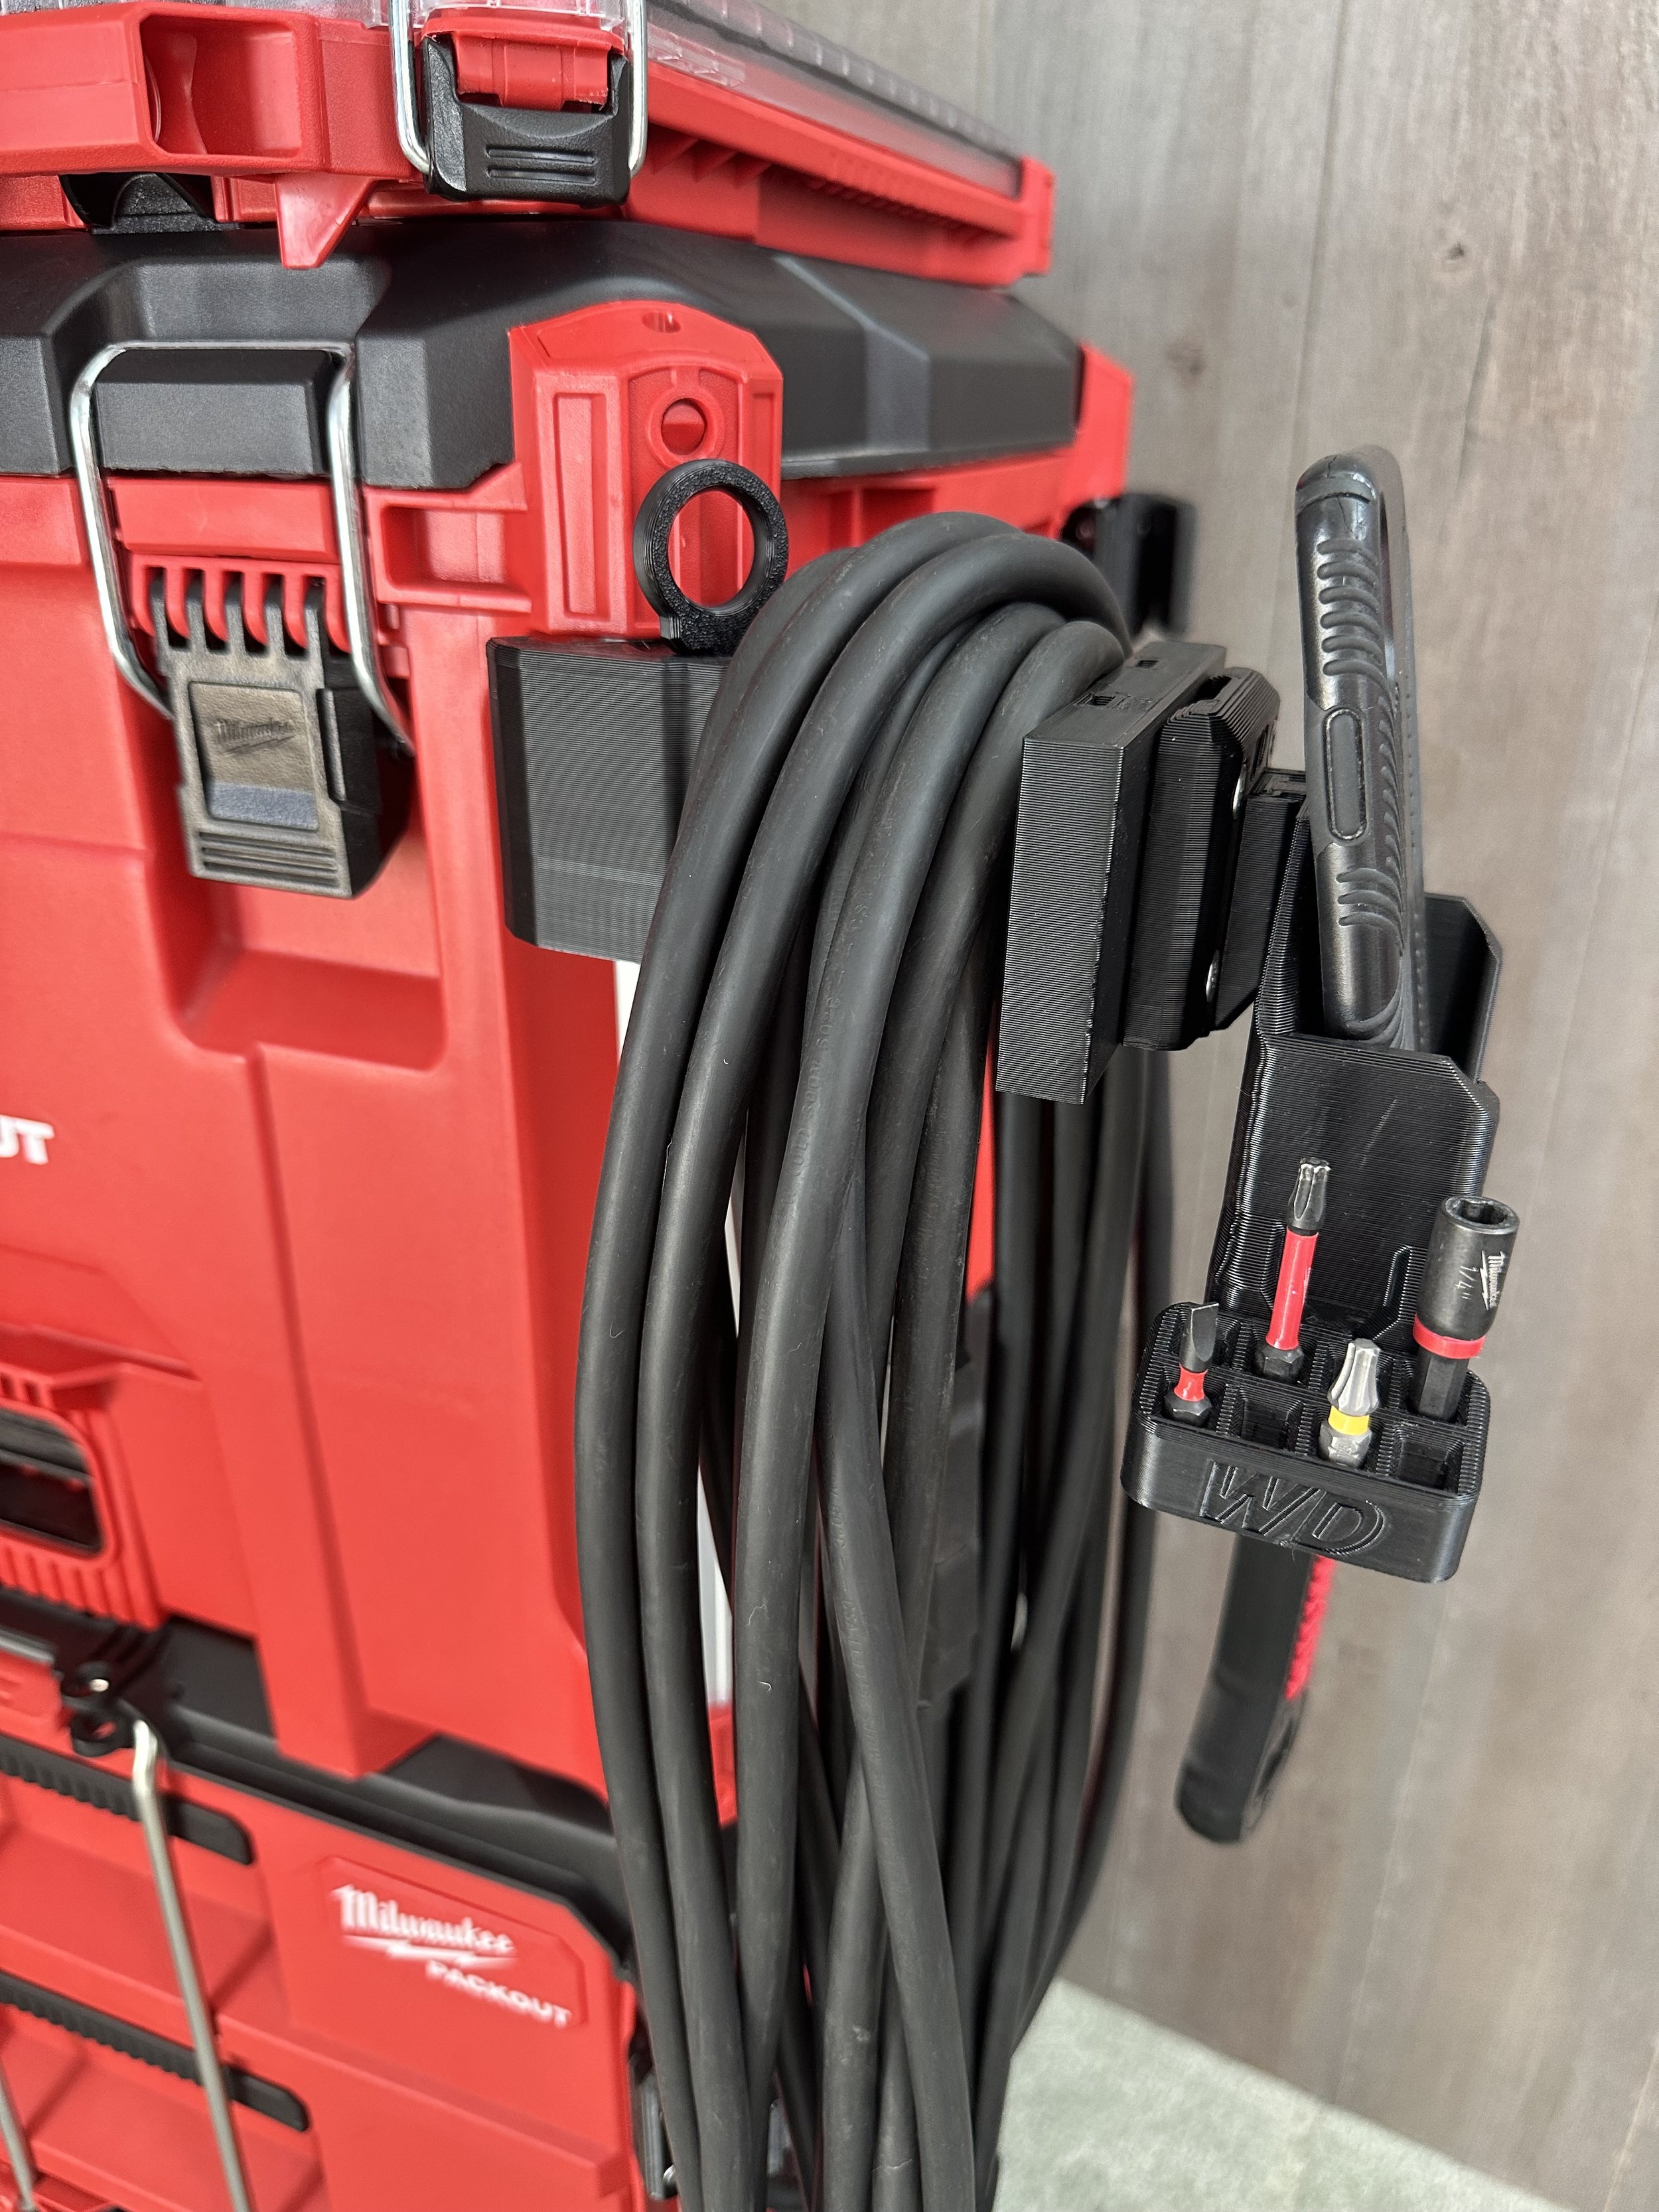
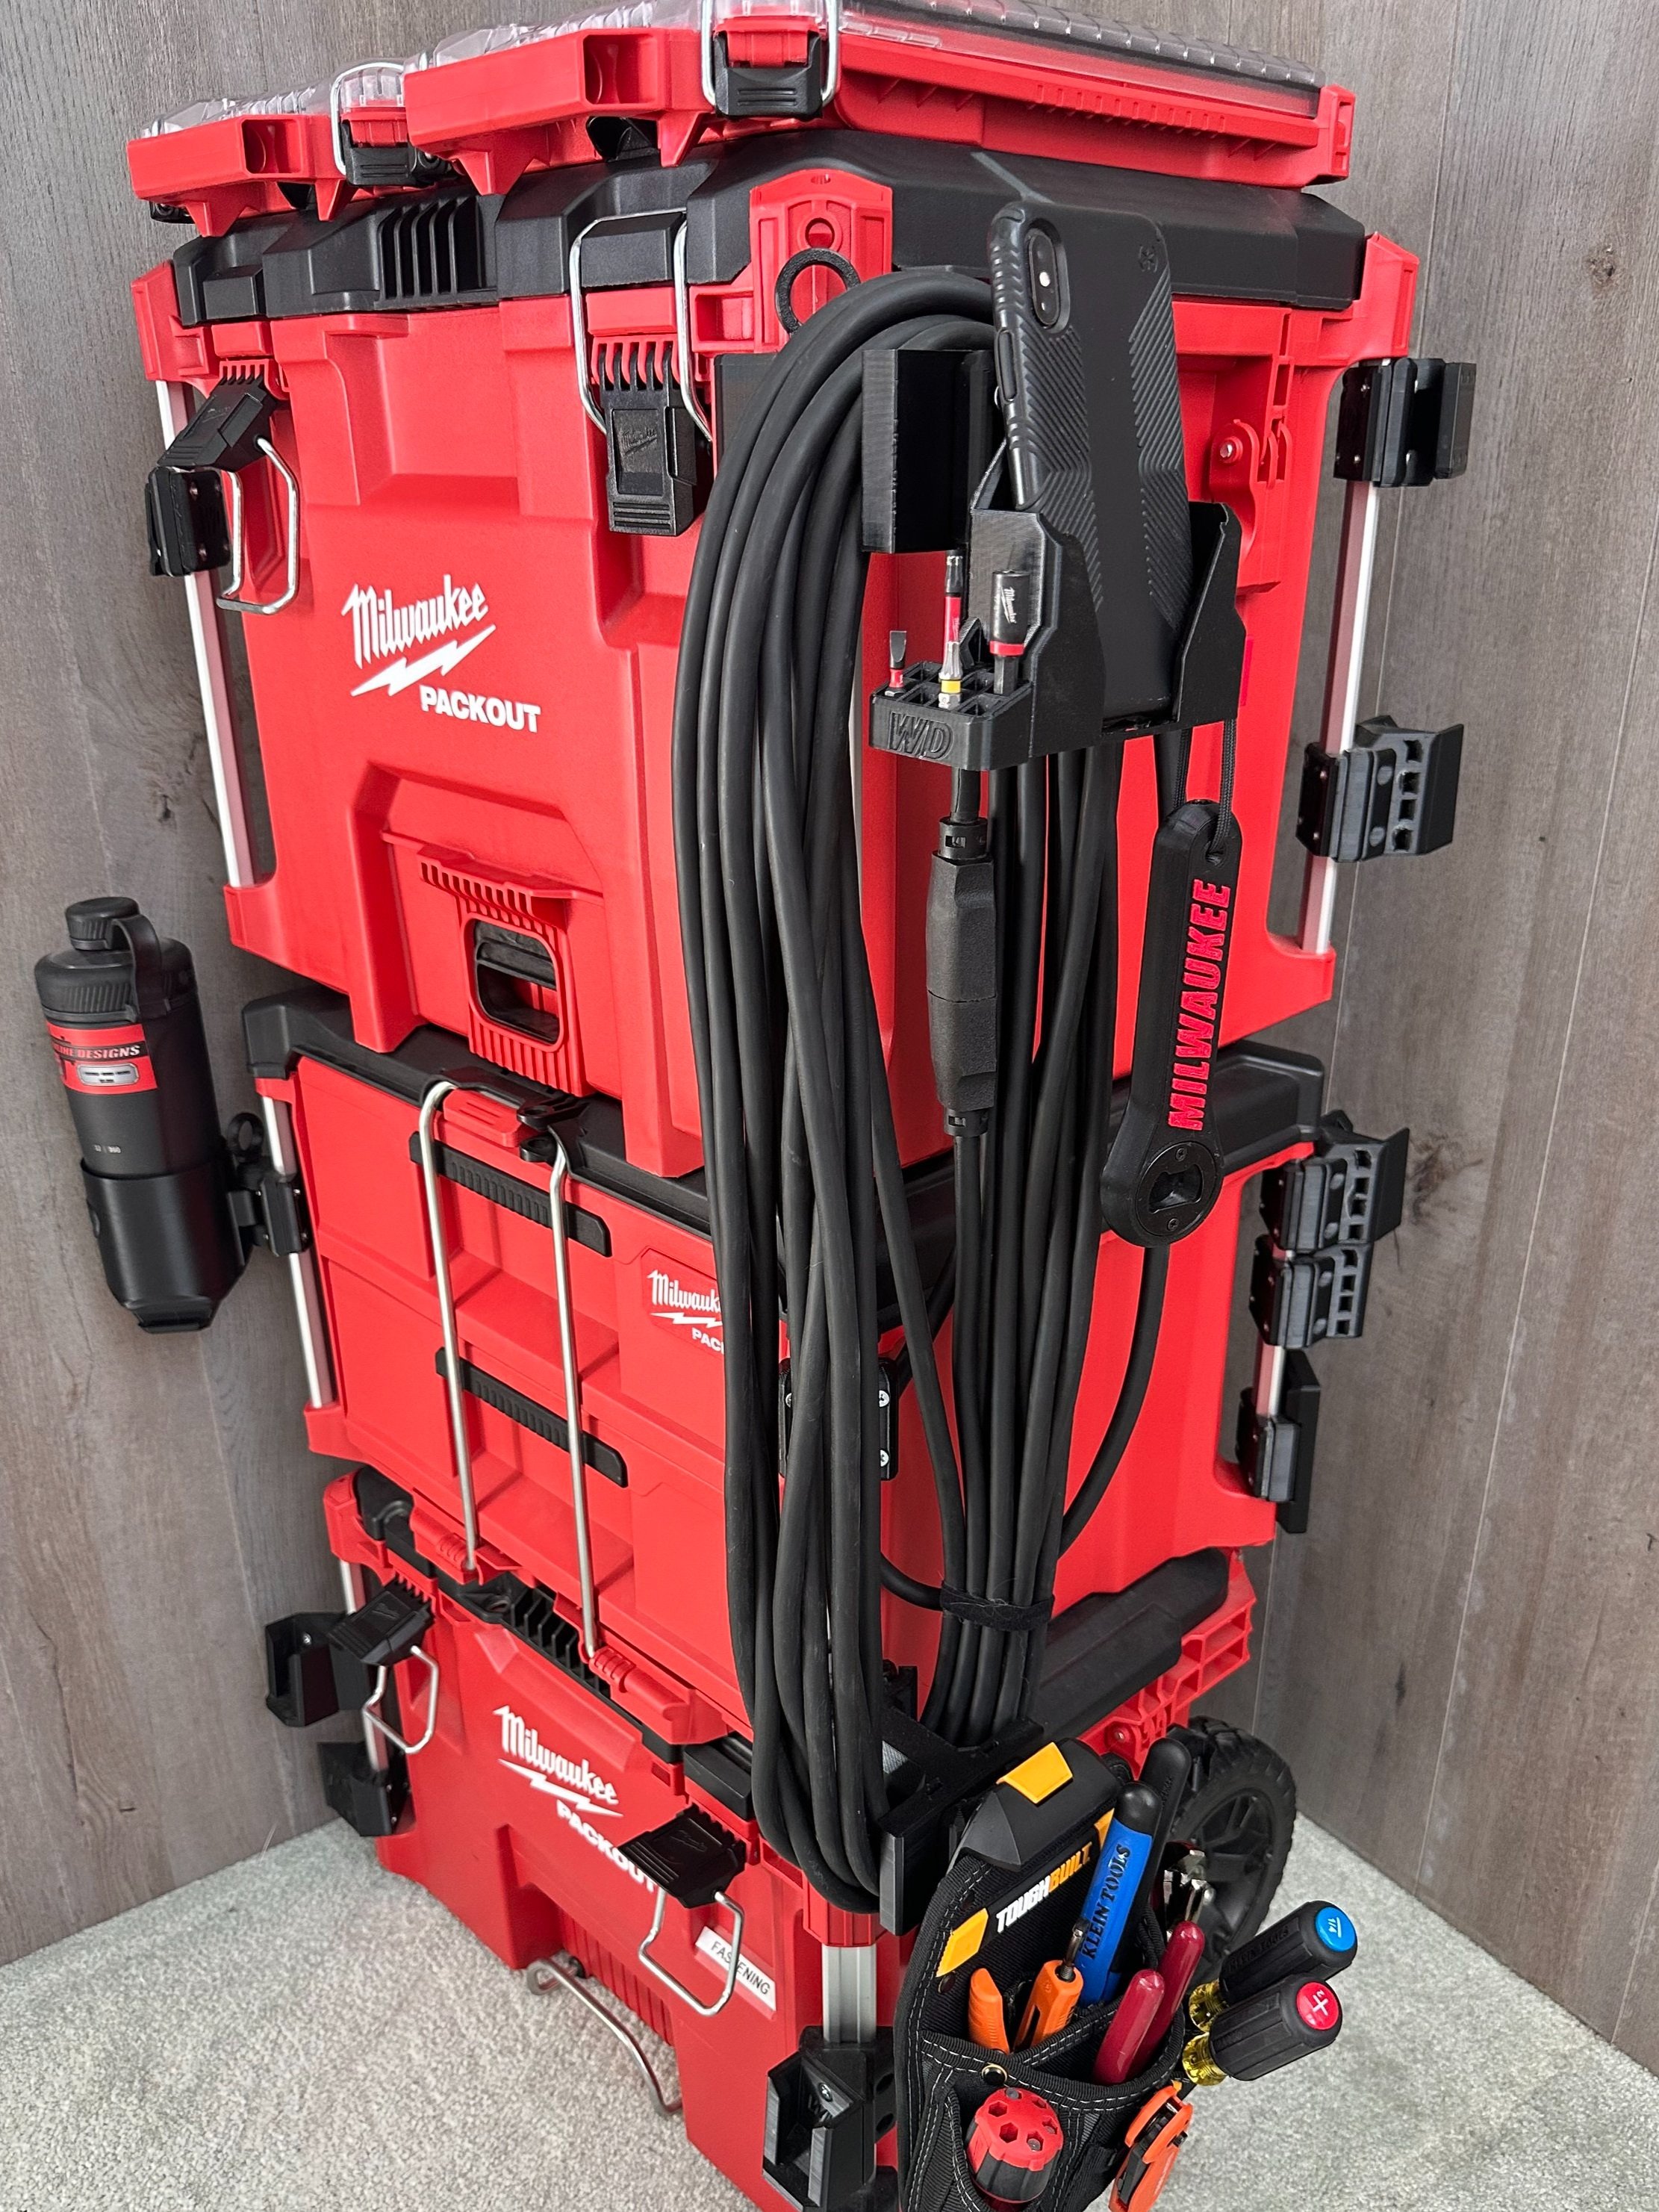
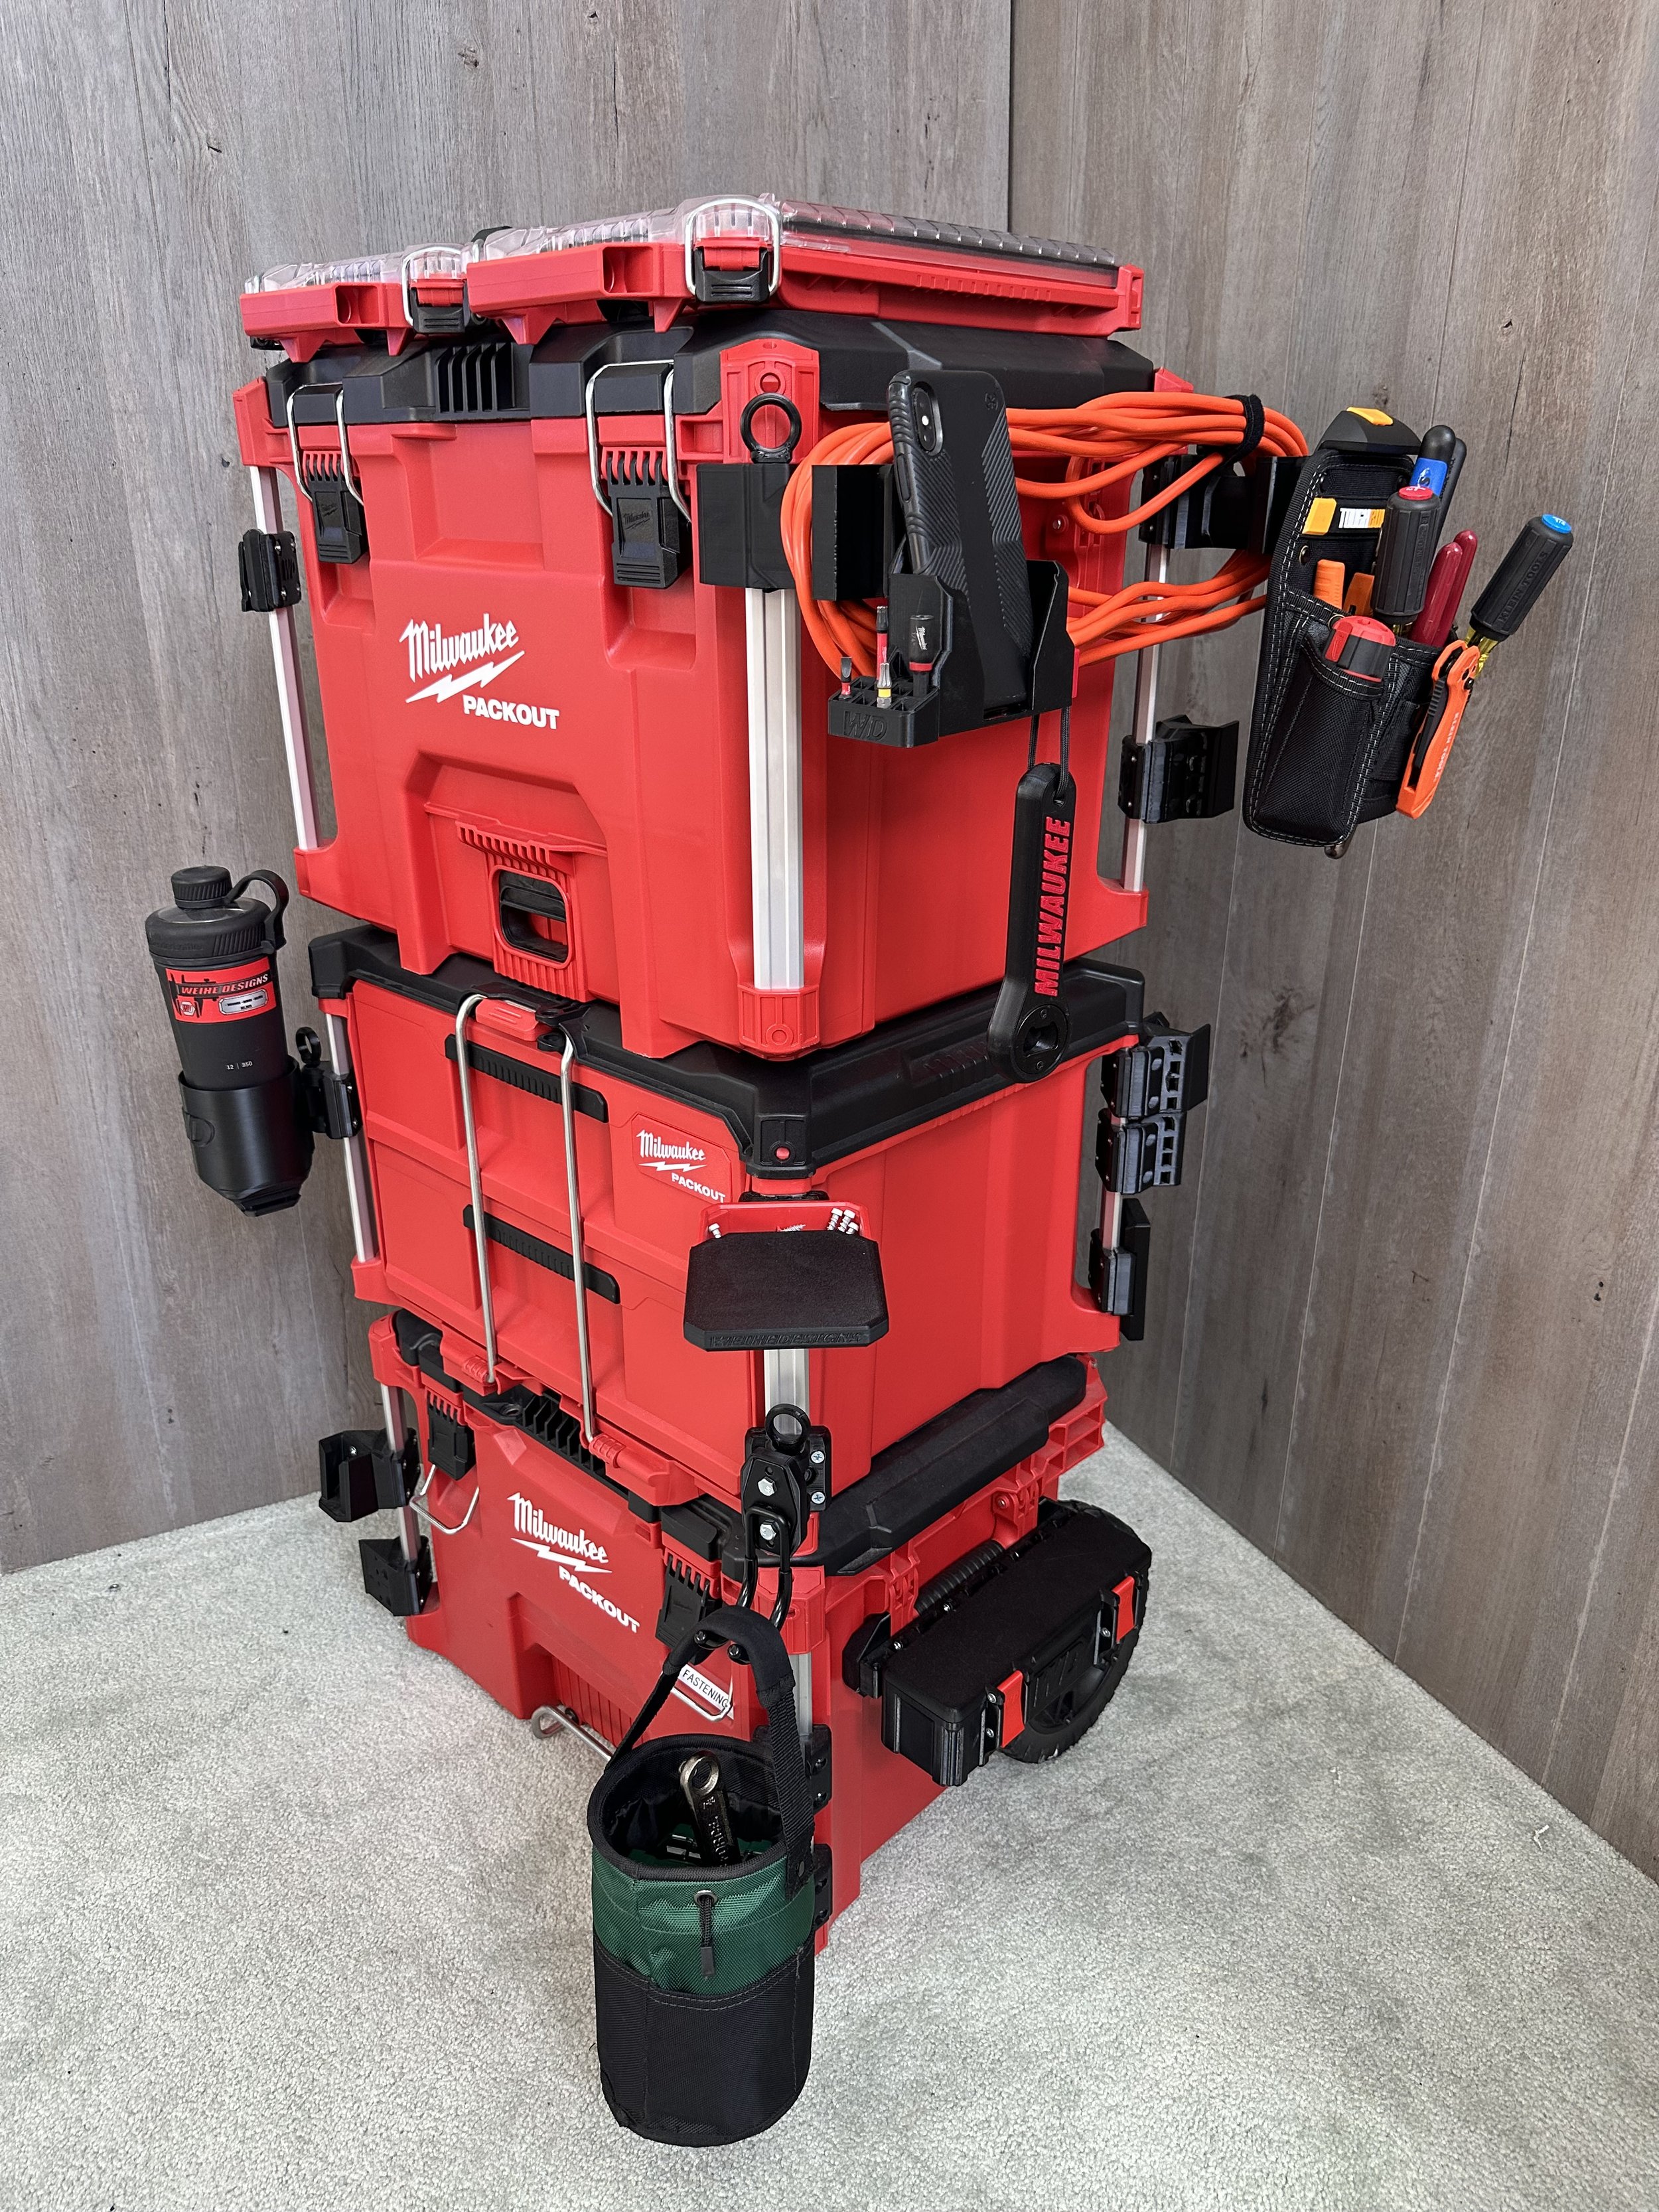
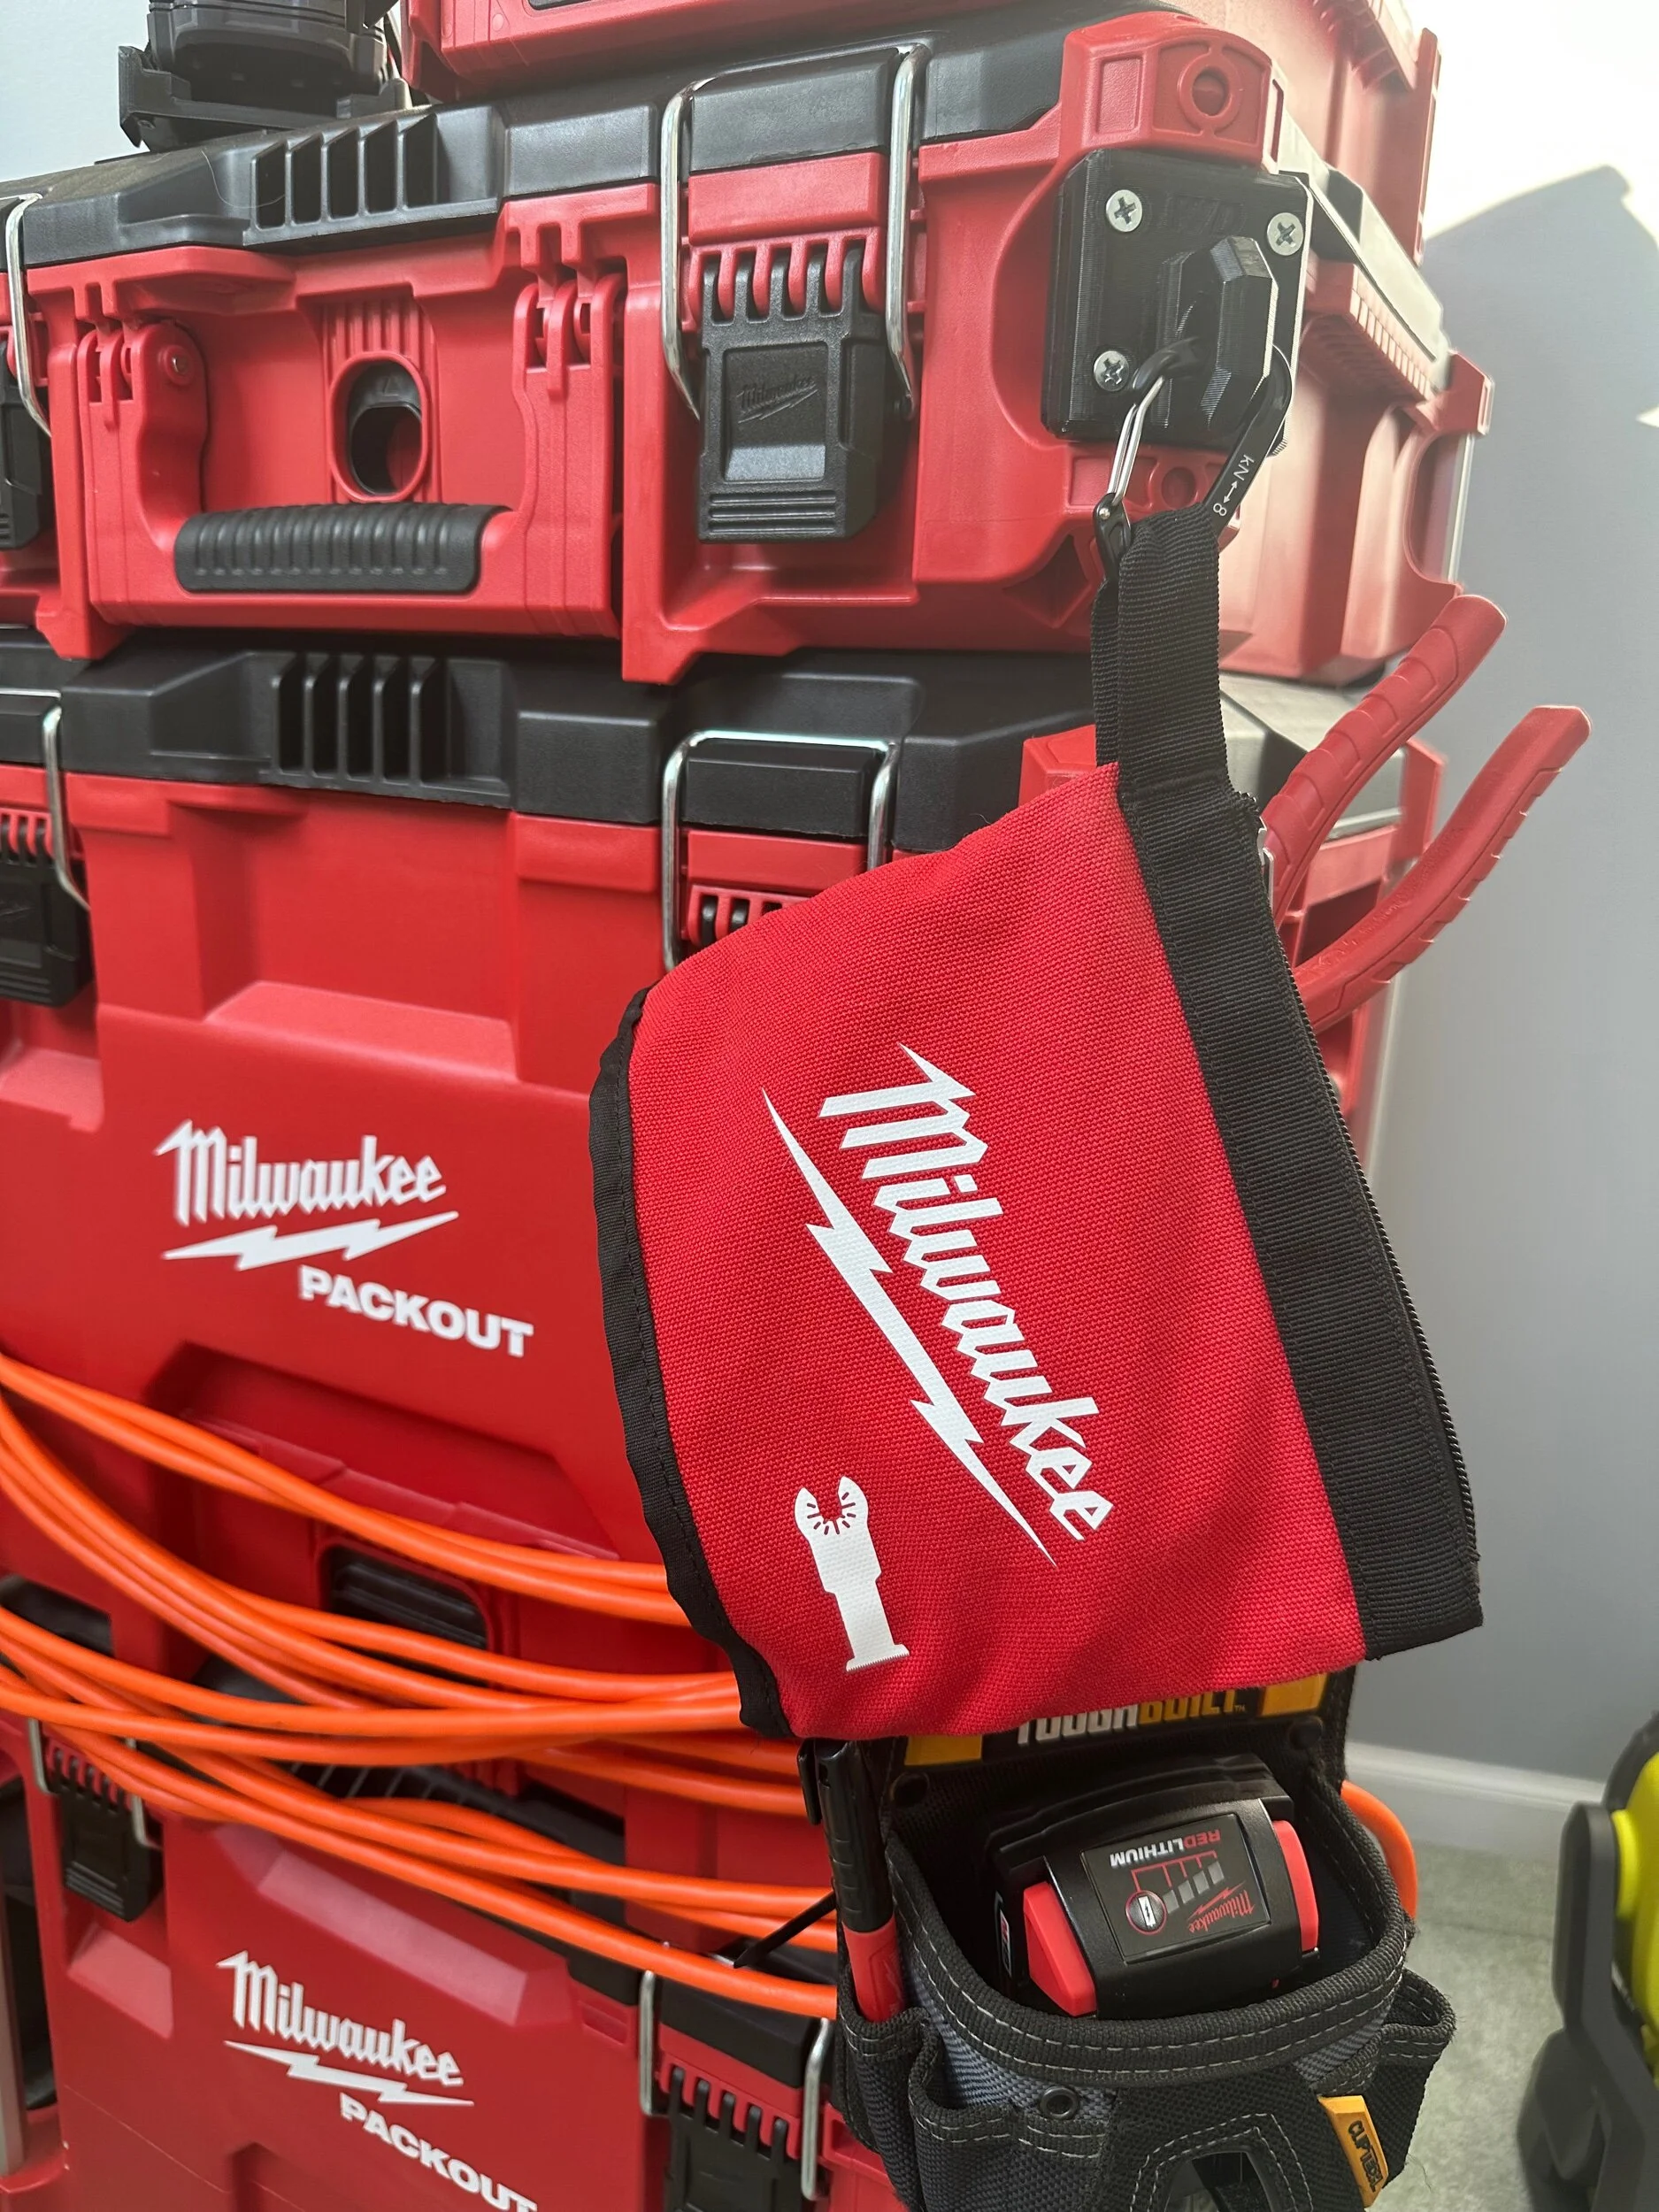
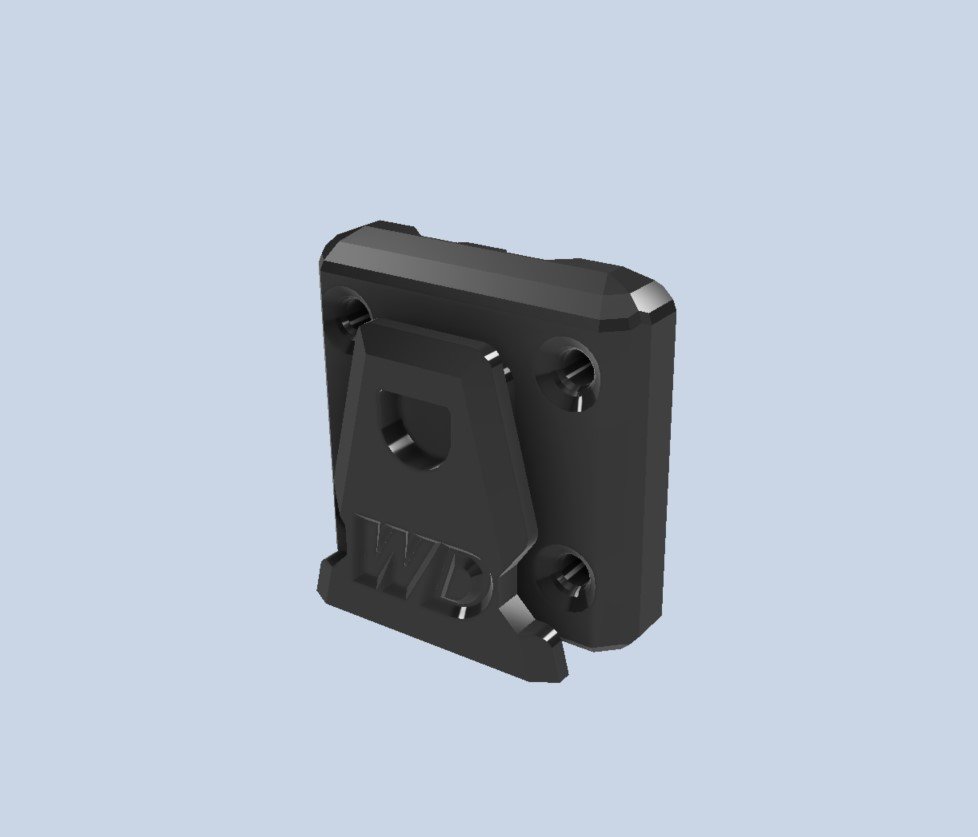
These PRA’s allow you to easily attach a variety of Packout Boxes to a flat surface!
These PRAs are designed to be a lower profile, less costly, and easy-to-use alternative to Milwaukee’s Packout Wall Plates and Packout Shelf!
Our entire line of PRAs can be secured to Packout’s aluminum rails in seconds, without damaging, altering, or needing to remove the existing rails!
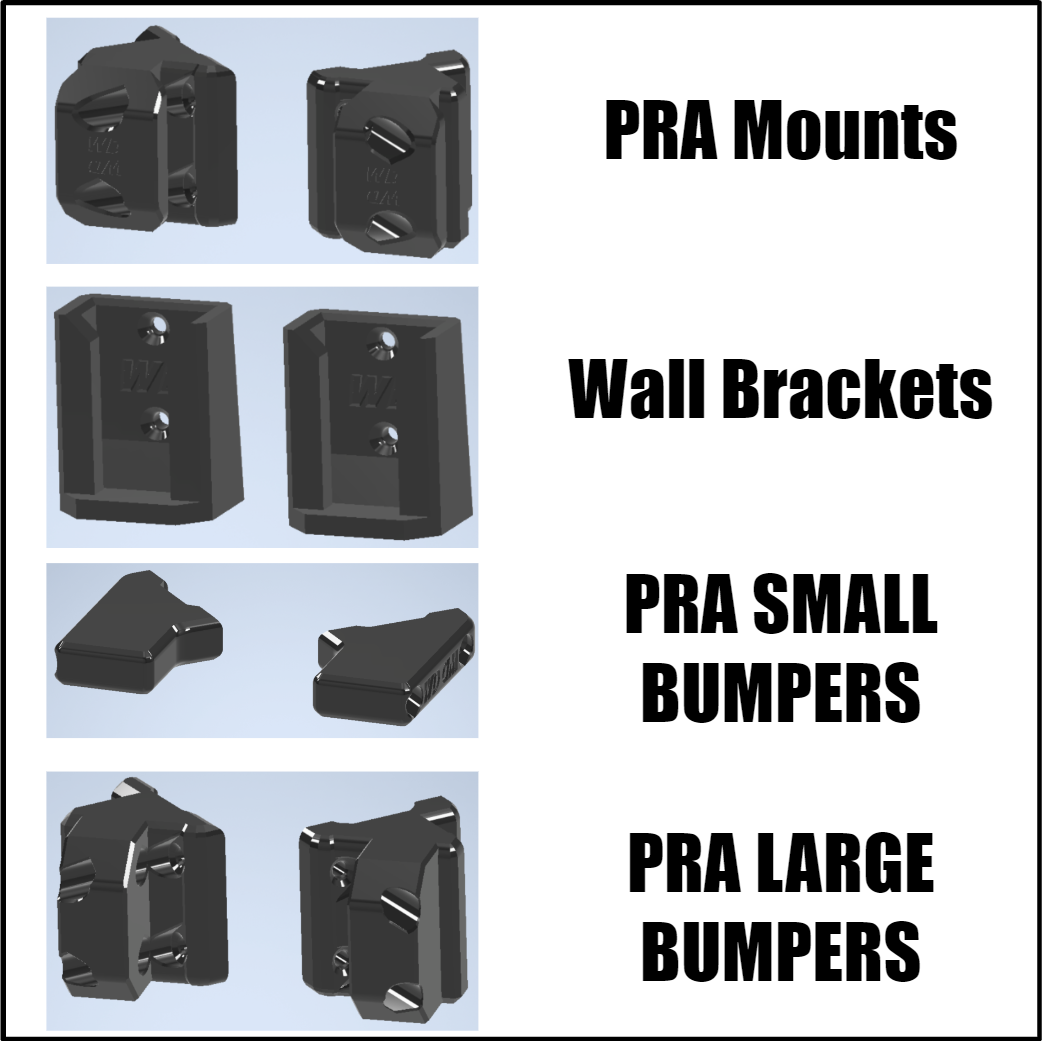
Kit Descriptions:
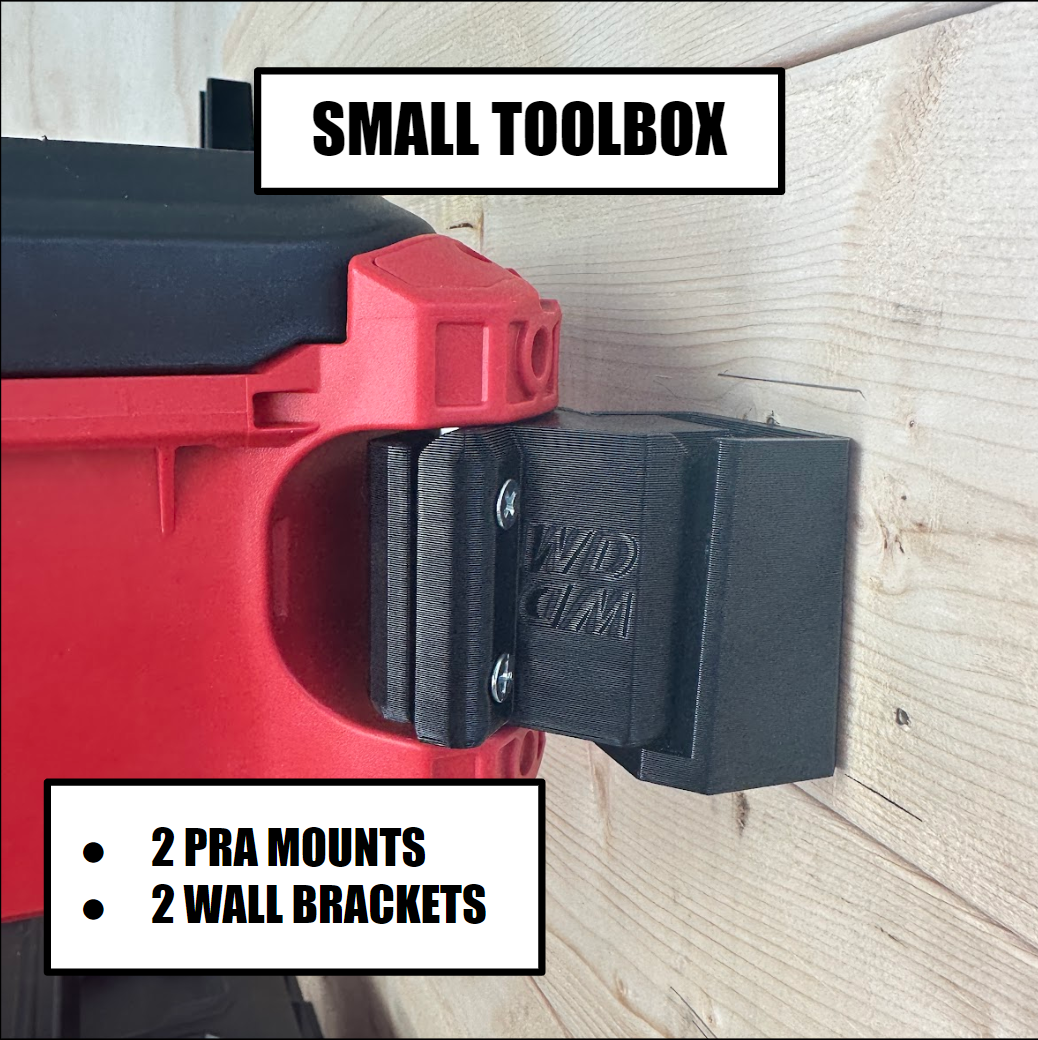
Small Box: 2 PRA Mounts, 2 Wall Brackets
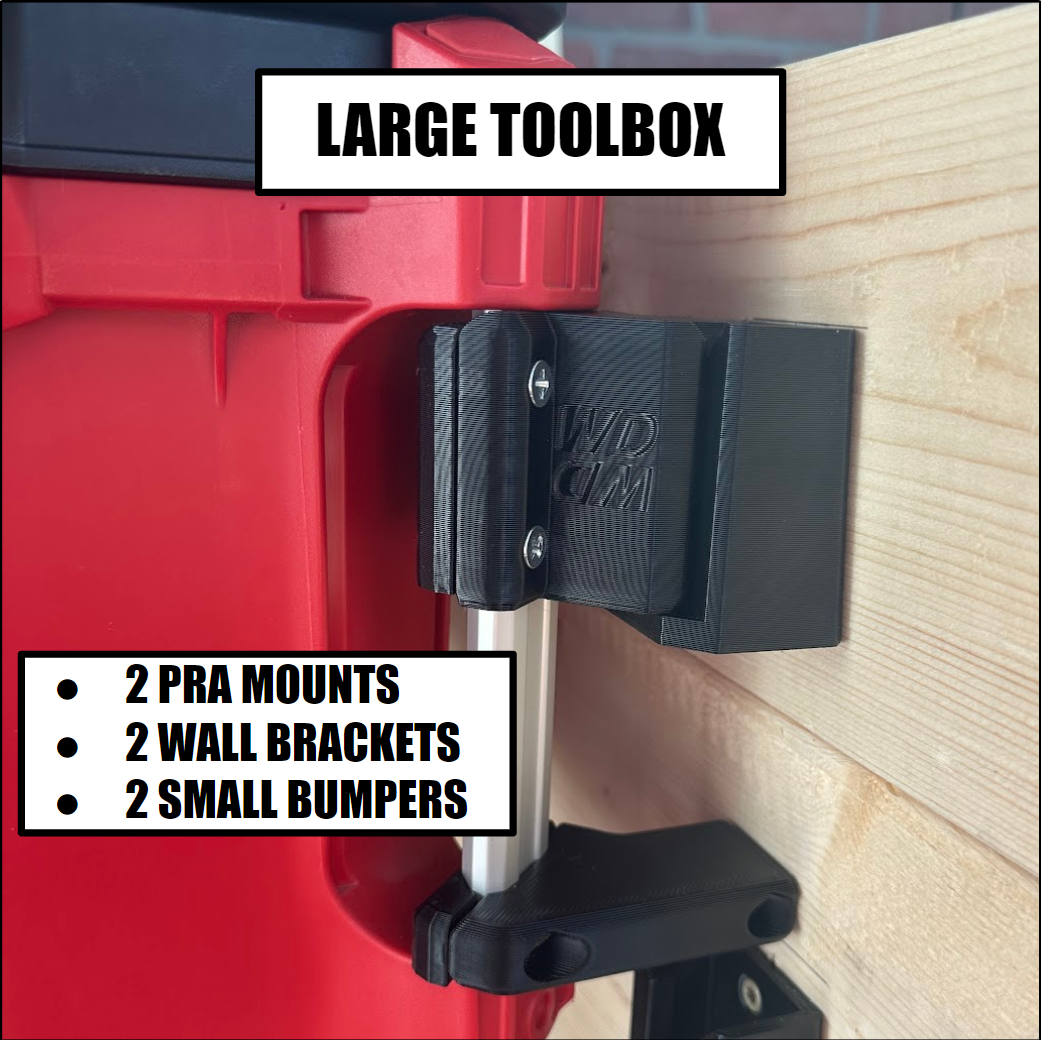
Large Toolbox: 2 PRA Mounts, 2 PRA Small Bumpers, 2 Wall Brackets
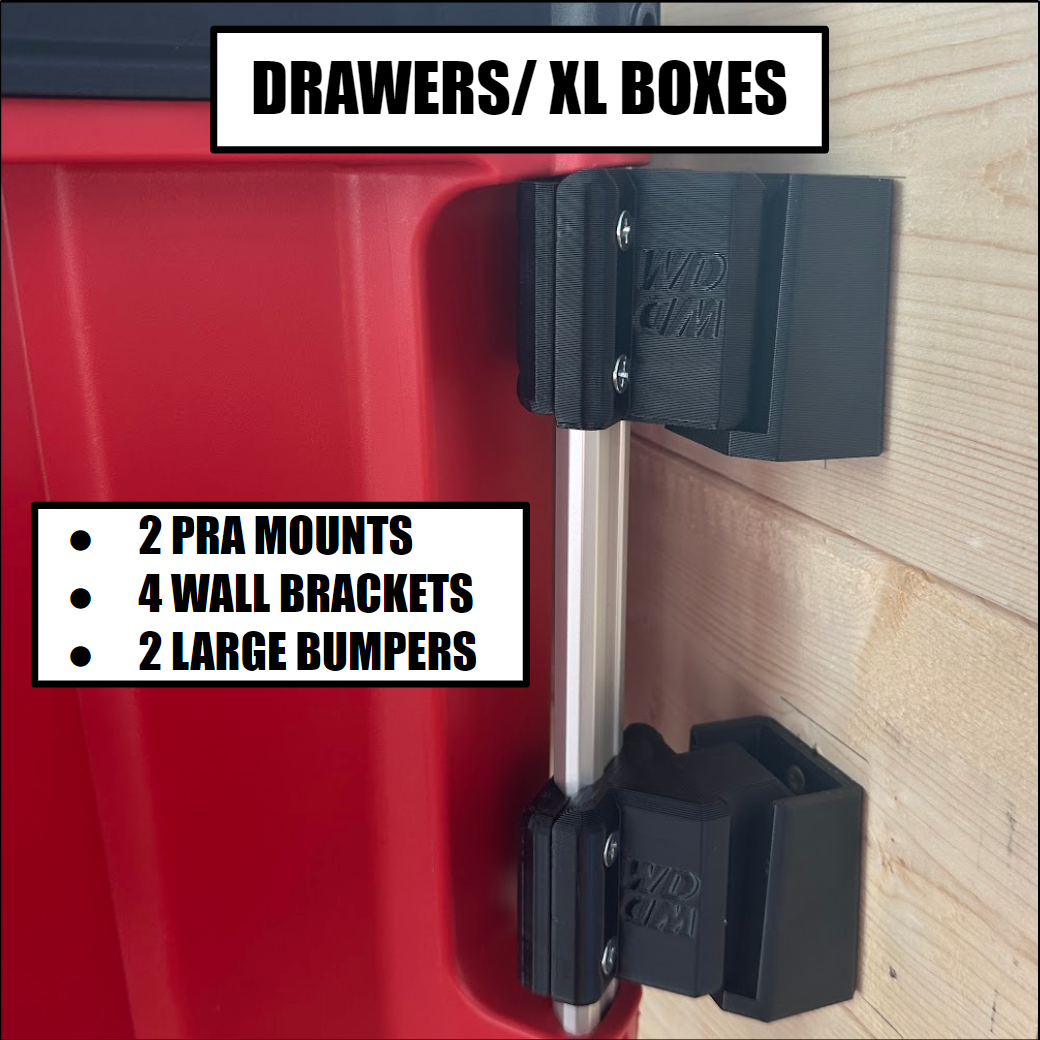
Drawer Boxes: 2 PRA Mounts, 2 PRA Large Bumpers, 4 Wall Brackets
XL Box/ Cooler: 2 PRA Mounts, 2 PRA Large Bumpers, 4 Wall Brackets
WEIGHT LIMITS:
To ensure longevity and prevent damage to your Packout Boxes and new Mounts, stay under the maximum weight capacities:
Small box: 25 LBS
Large Box: 50 LBS
Drawers: 50 LBS
XL Box: 50 LBS
INSTALLATION GUIDE:
Attach PRA Mount Fronts to PRA Backs with included machine Screws
Place Mounts at top of rail and tighten until snug ( Brakcet will not slide up and down) *Screwdriver recommended*
Attach Wall Brackets to Wall using included Screws
Mark First Bracket Location A
Mark Second Bracket Location B ( 22inches away)
Mark Top Hole, Screw
Plumb First Bracket
Screw Lower Hole
Repeat 3-5 with the second bracket
FOR LARGER BOXES
Repeat Steps 1 & 2
Attach a Second Set of Wall Brackets
For Correct spacing, a 2x4 can be placed between the top and bottom set
Ensure the second set is IN LINE, and plumb with the set above or below
Attach PRA Bumpers
Large Box- Place the Bumper at the bottom of the rail and tighten until snug
Drawers/ XL Boxes
Place the Bumper in the middle of the rail (Tighten Screws but allow Movement)
Hang Box on Upper Mounts
Push Bumpers down until they are in full contact with the Lower Bracket
Remove the Box from wall and tighten the bumper until they no longer move
For questions please use the contact page
For More installation details please watch the following video:
VIDEO COMING SOON
These PRA’s allow you to easily attach a variety of Packout Boxes to a flat surface!
These PRAs are designed to be a lower profile, less costly, and easy-to-use alternative to Milwaukee’s Packout Wall Plates and Packout Shelf!
Our entire line of PRAs can be secured to Packout’s aluminum rails in seconds, without damaging, altering, or needing to remove the existing rails!
Kit Descriptions:
Small Box: 2 PRA Mounts, 2 Wall Brackets
Large Toolbox: 2 PRA Mounts, 2 PRA Small Bumpers, 2 Wall Brackets
Drawer Boxes: 2 PRA Mounts, 2 PRA Large Bumpers, 4 Wall Brackets
XL Box/ Cooler: 2 PRA Mounts, 2 PRA Large Bumpers, 4 Wall Brackets
WEIGHT LIMITS:
To ensure longevity and prevent damage to your Packout Boxes and new Mounts, stay under the maximum weight capacities:
Small box: 25 LBS
Large Box: 50 LBS
Drawers: 50 LBS
XL Box: 50 LBS
INSTALLATION GUIDE:
Attach PRA Mount Fronts to PRA Backs with included machine Screws
Place Mounts at top of rail and tighten until snug ( Brakcet will not slide up and down) *Screwdriver recommended*
Attach Wall Brackets to Wall using included Screws
Mark First Bracket Location A
Mark Second Bracket Location B ( 22inches away)
Mark Top Hole, Screw
Plumb First Bracket
Screw Lower Hole
Repeat 3-5 with the second bracket
FOR LARGER BOXES
Repeat Steps 1 & 2
Attach a Second Set of Wall Brackets
For Correct spacing, a 2x4 can be placed between the top and bottom set
Ensure the second set is IN LINE, and plumb with the set above or below
Attach PRA Bumpers
Large Box- Place the Bumper at the bottom of the rail and tighten until snug
Drawers/ XL Boxes
Place the Bumper in the middle of the rail (Tighten Screws but allow Movement)
Hang Box on Upper Mounts
Push Bumpers down until they are in full contact with the Lower Bracket
Remove the Box from wall and tighten the bumper until they no longer move
For questions please use the contact page
For More installation details please watch the following video:
VIDEO COMING SOON

 Image 1 of 9
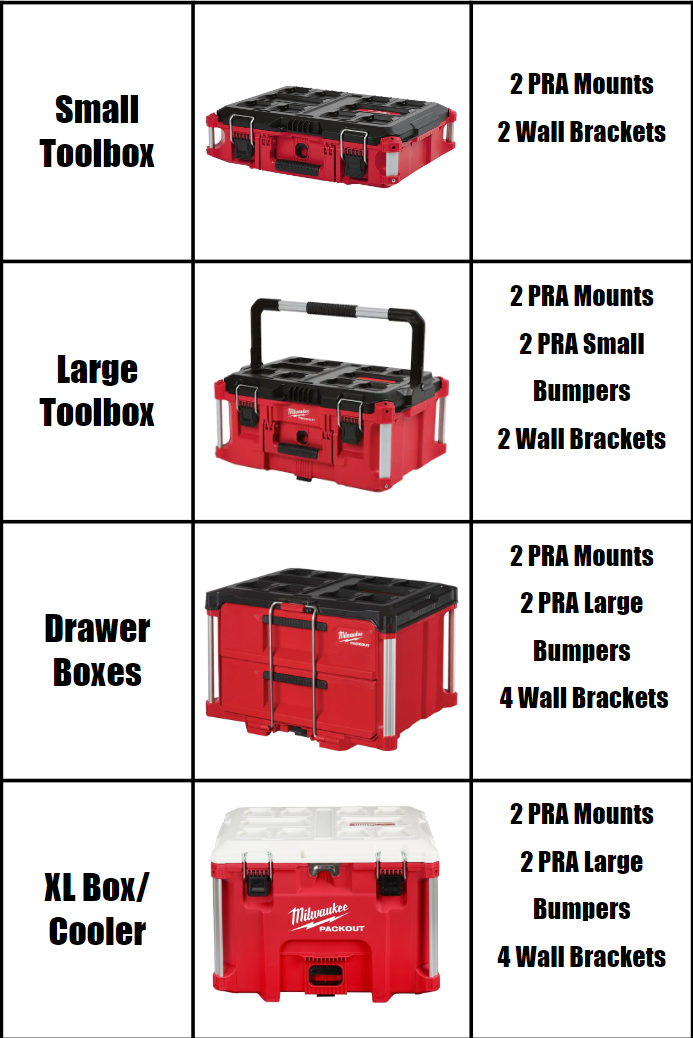 Image 2 of 9
 Image 3 of 9
 Image 4 of 9
 Image 5 of 9
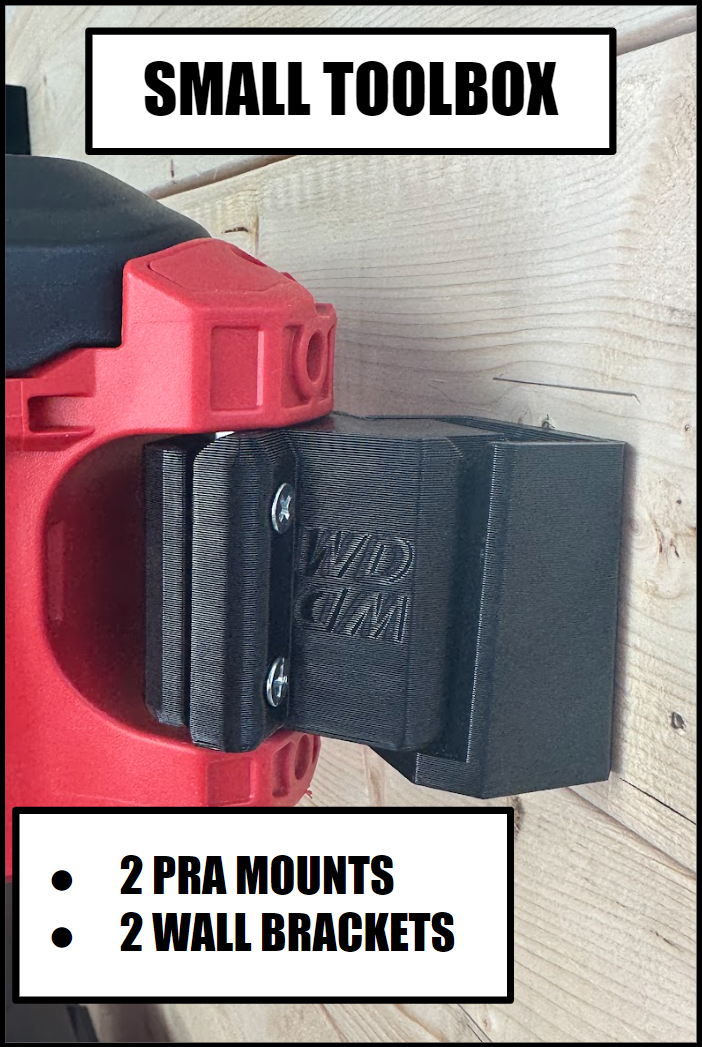 Image 6 of 9
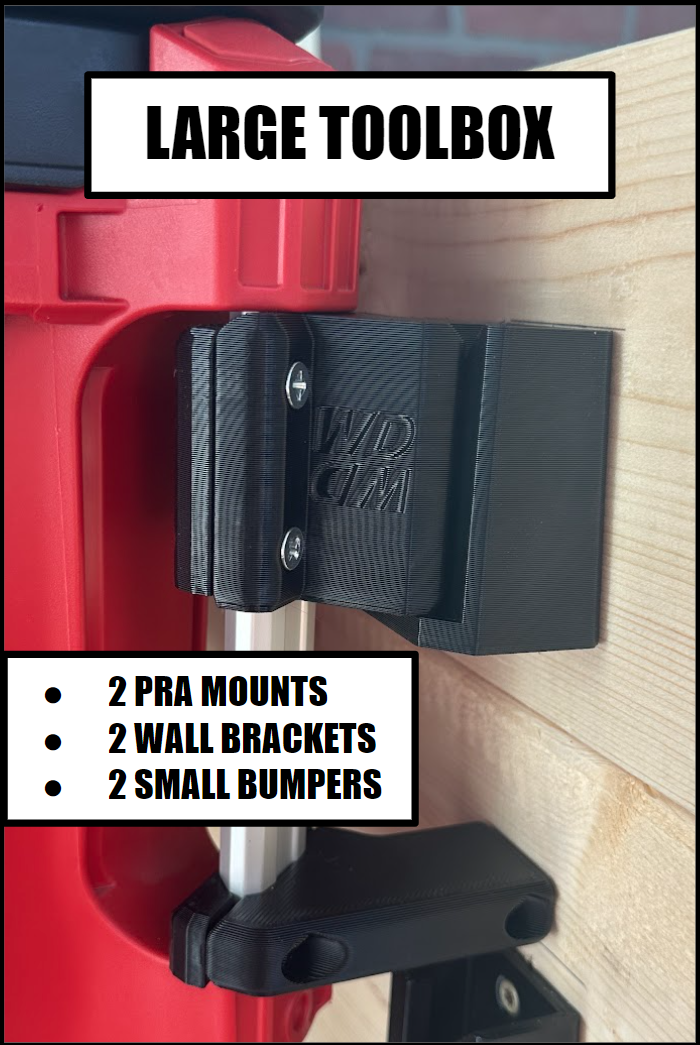 Image 7 of 9
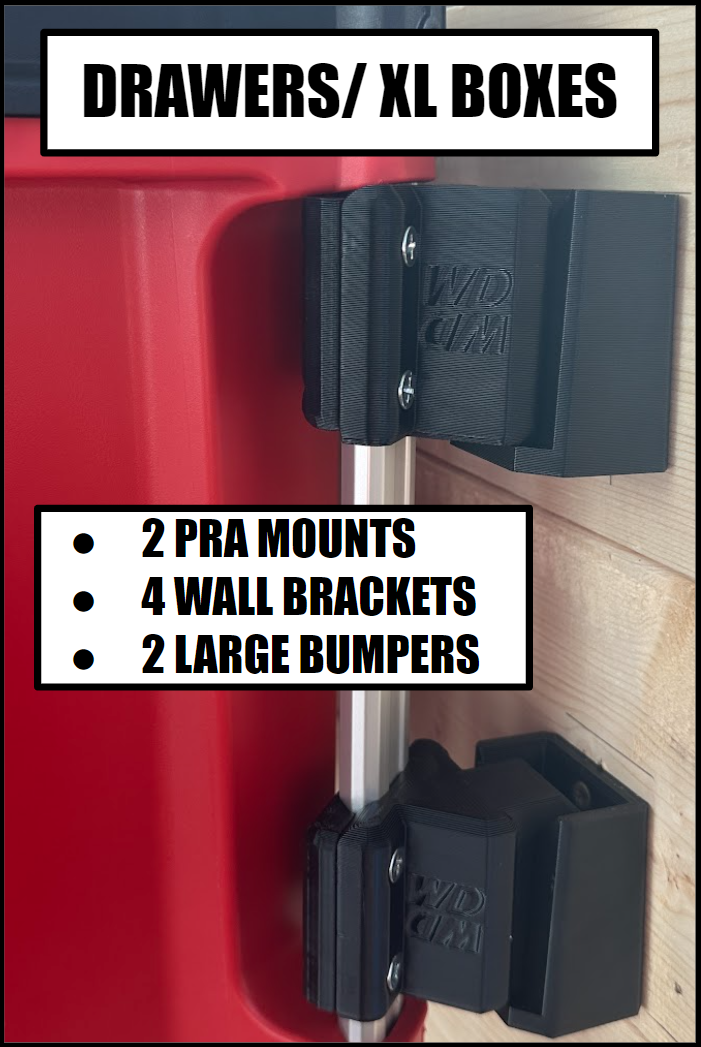 Image 8 of 9
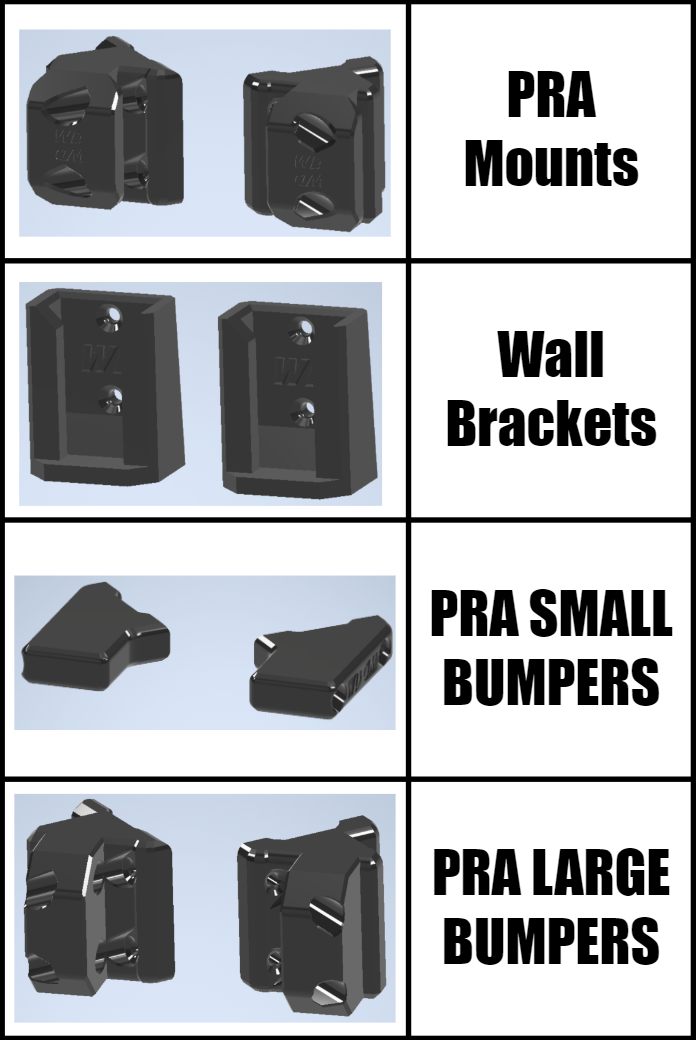 Image 9 of 9