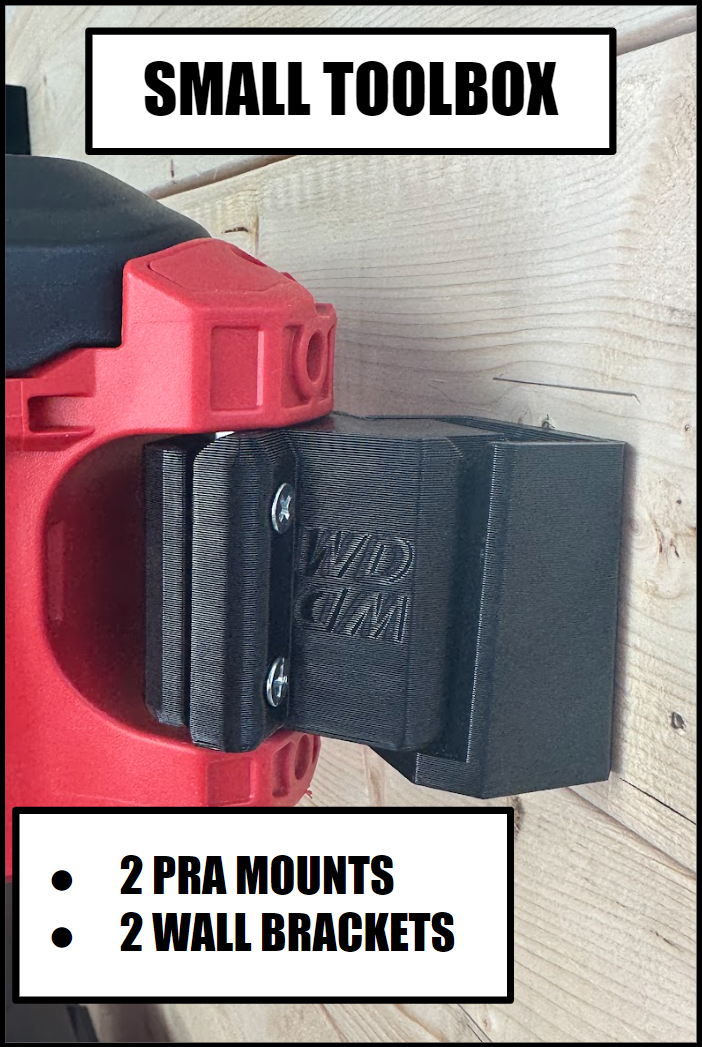
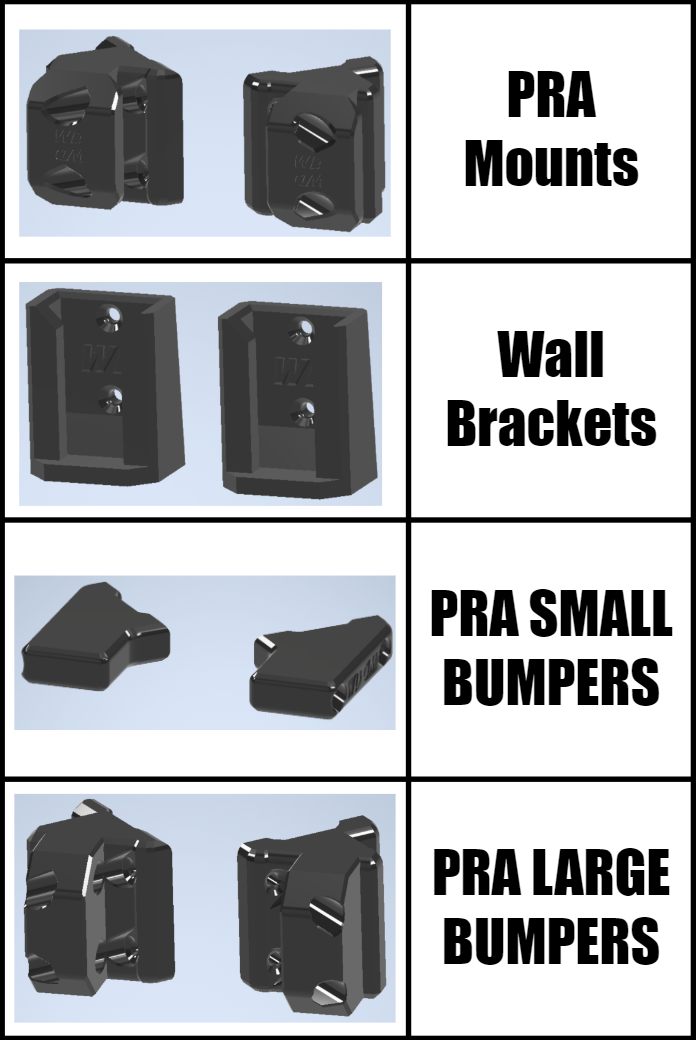
 Image 1 of 3
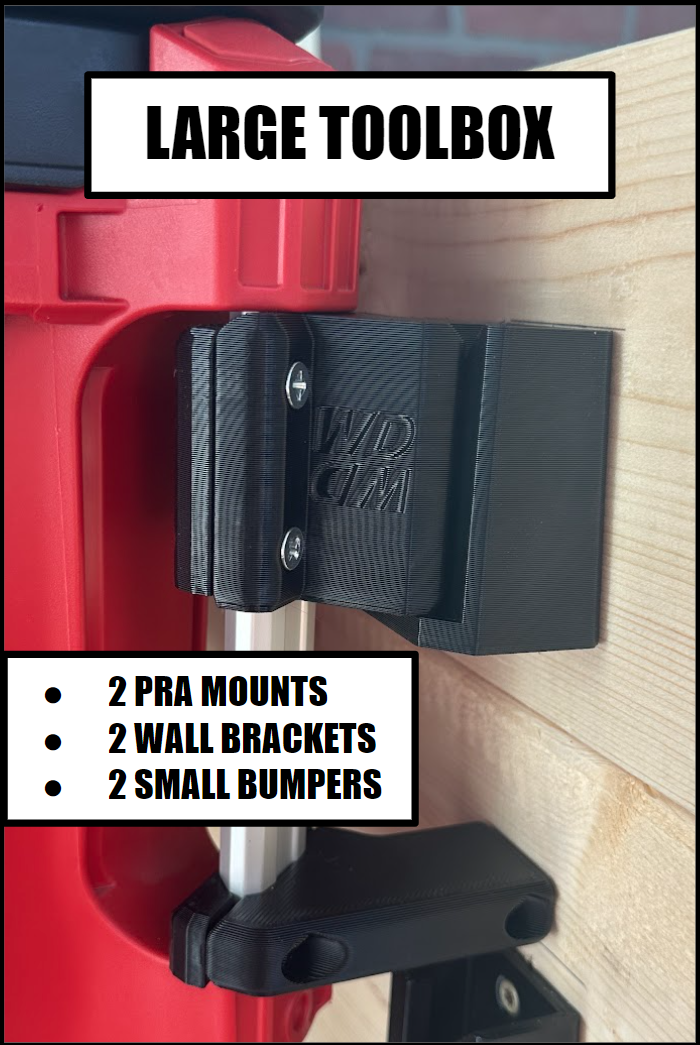
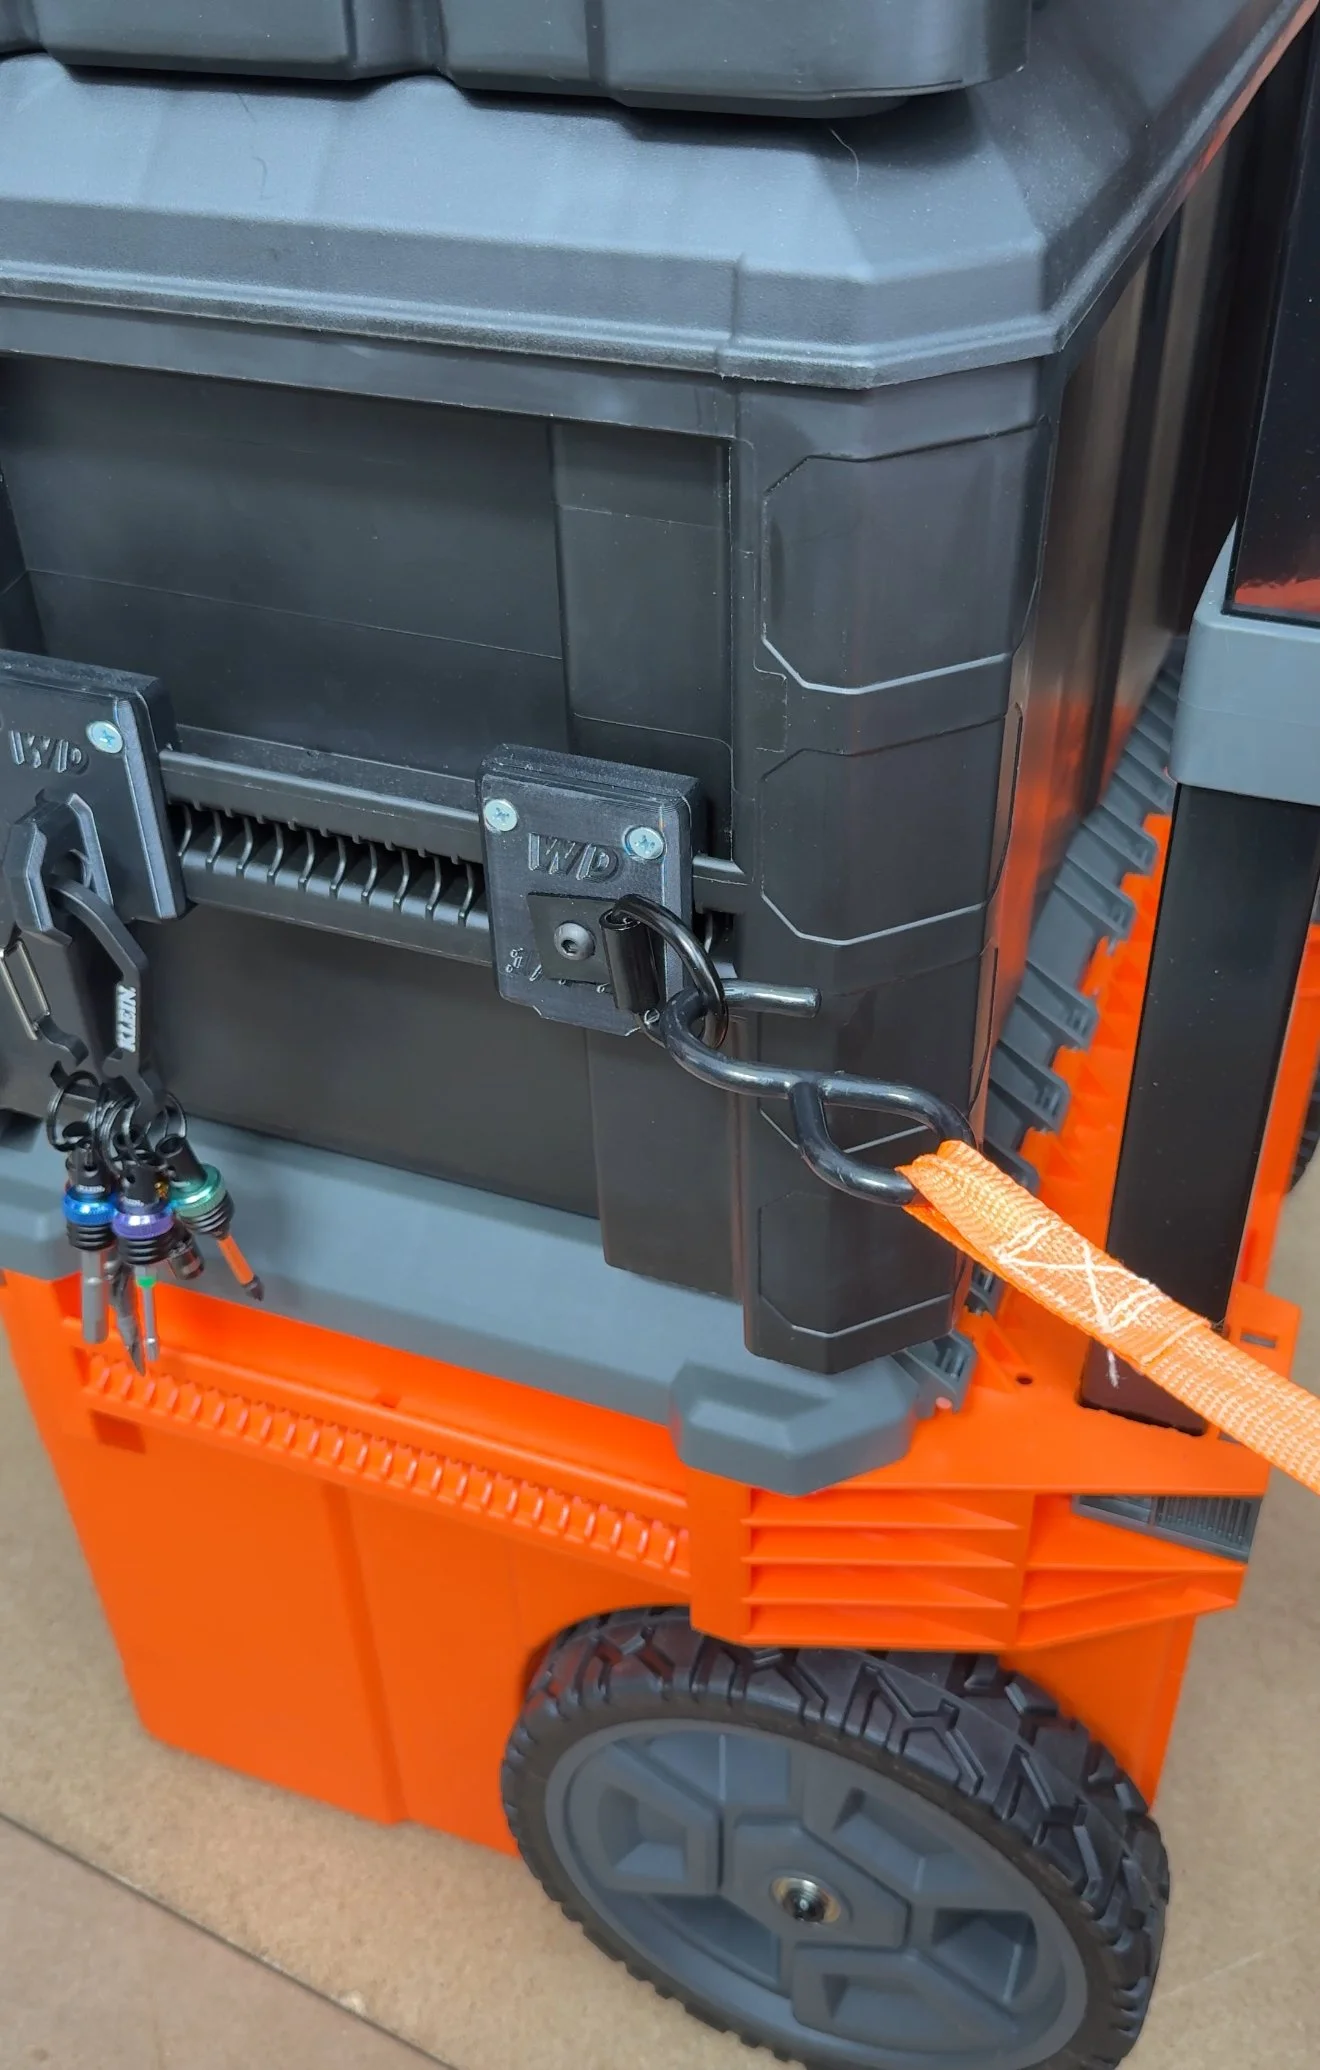 Image 2 of 3
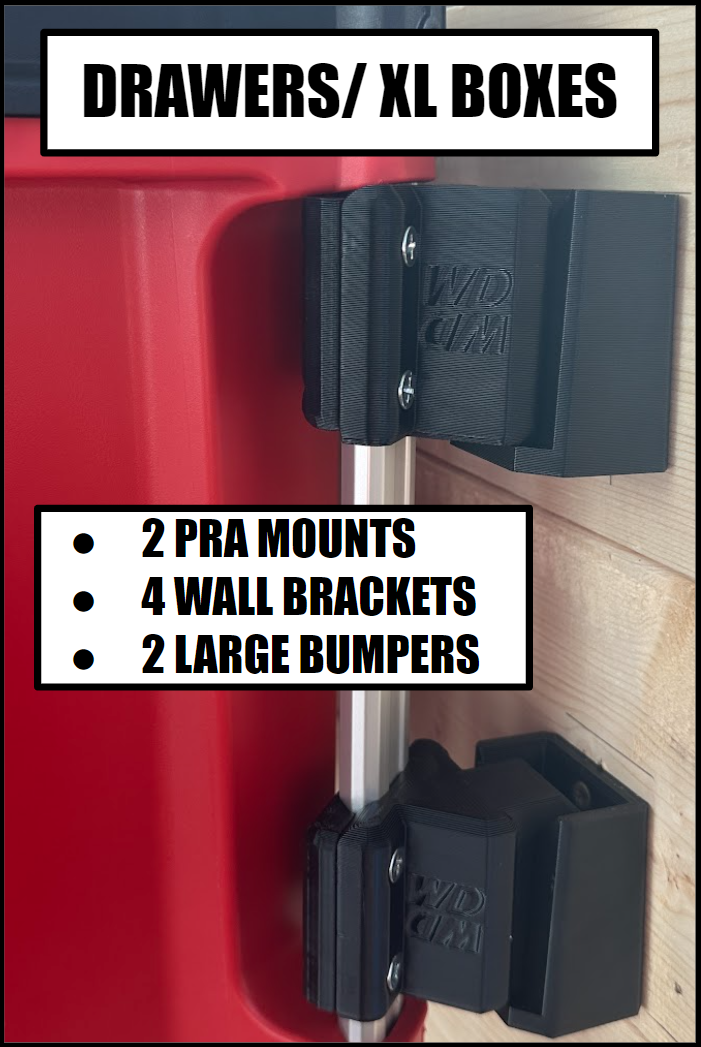
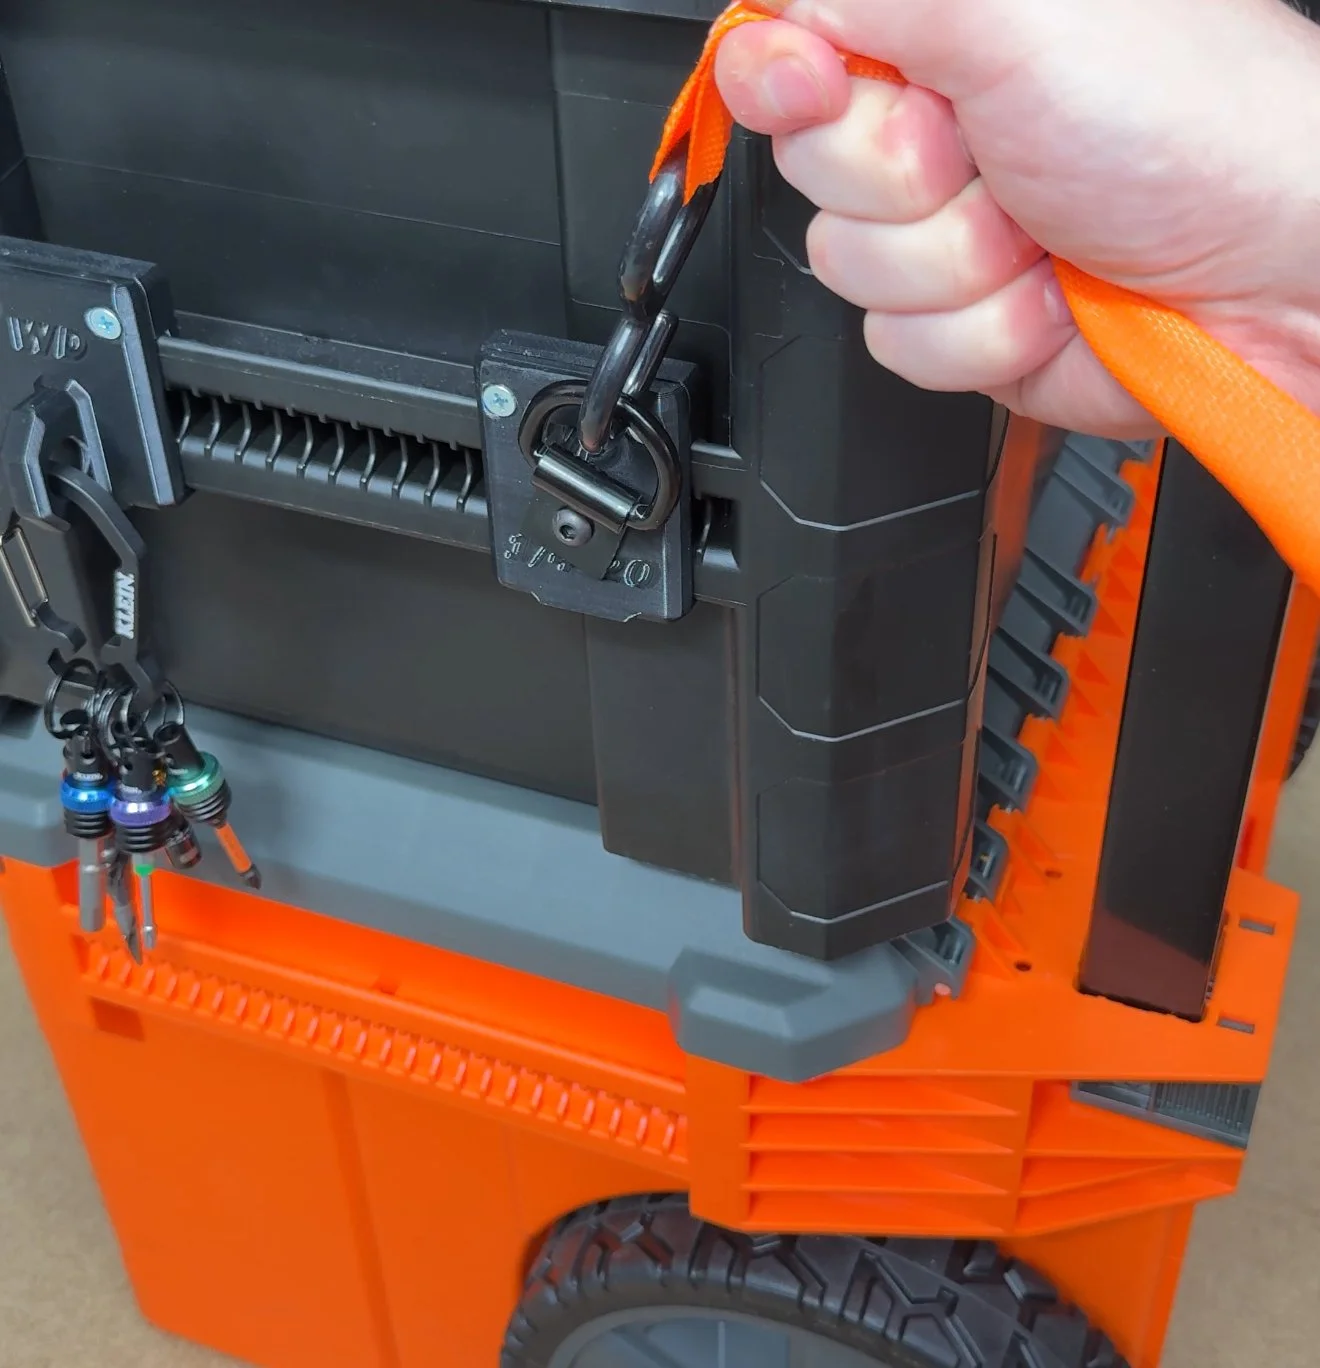 Image 3 of 3
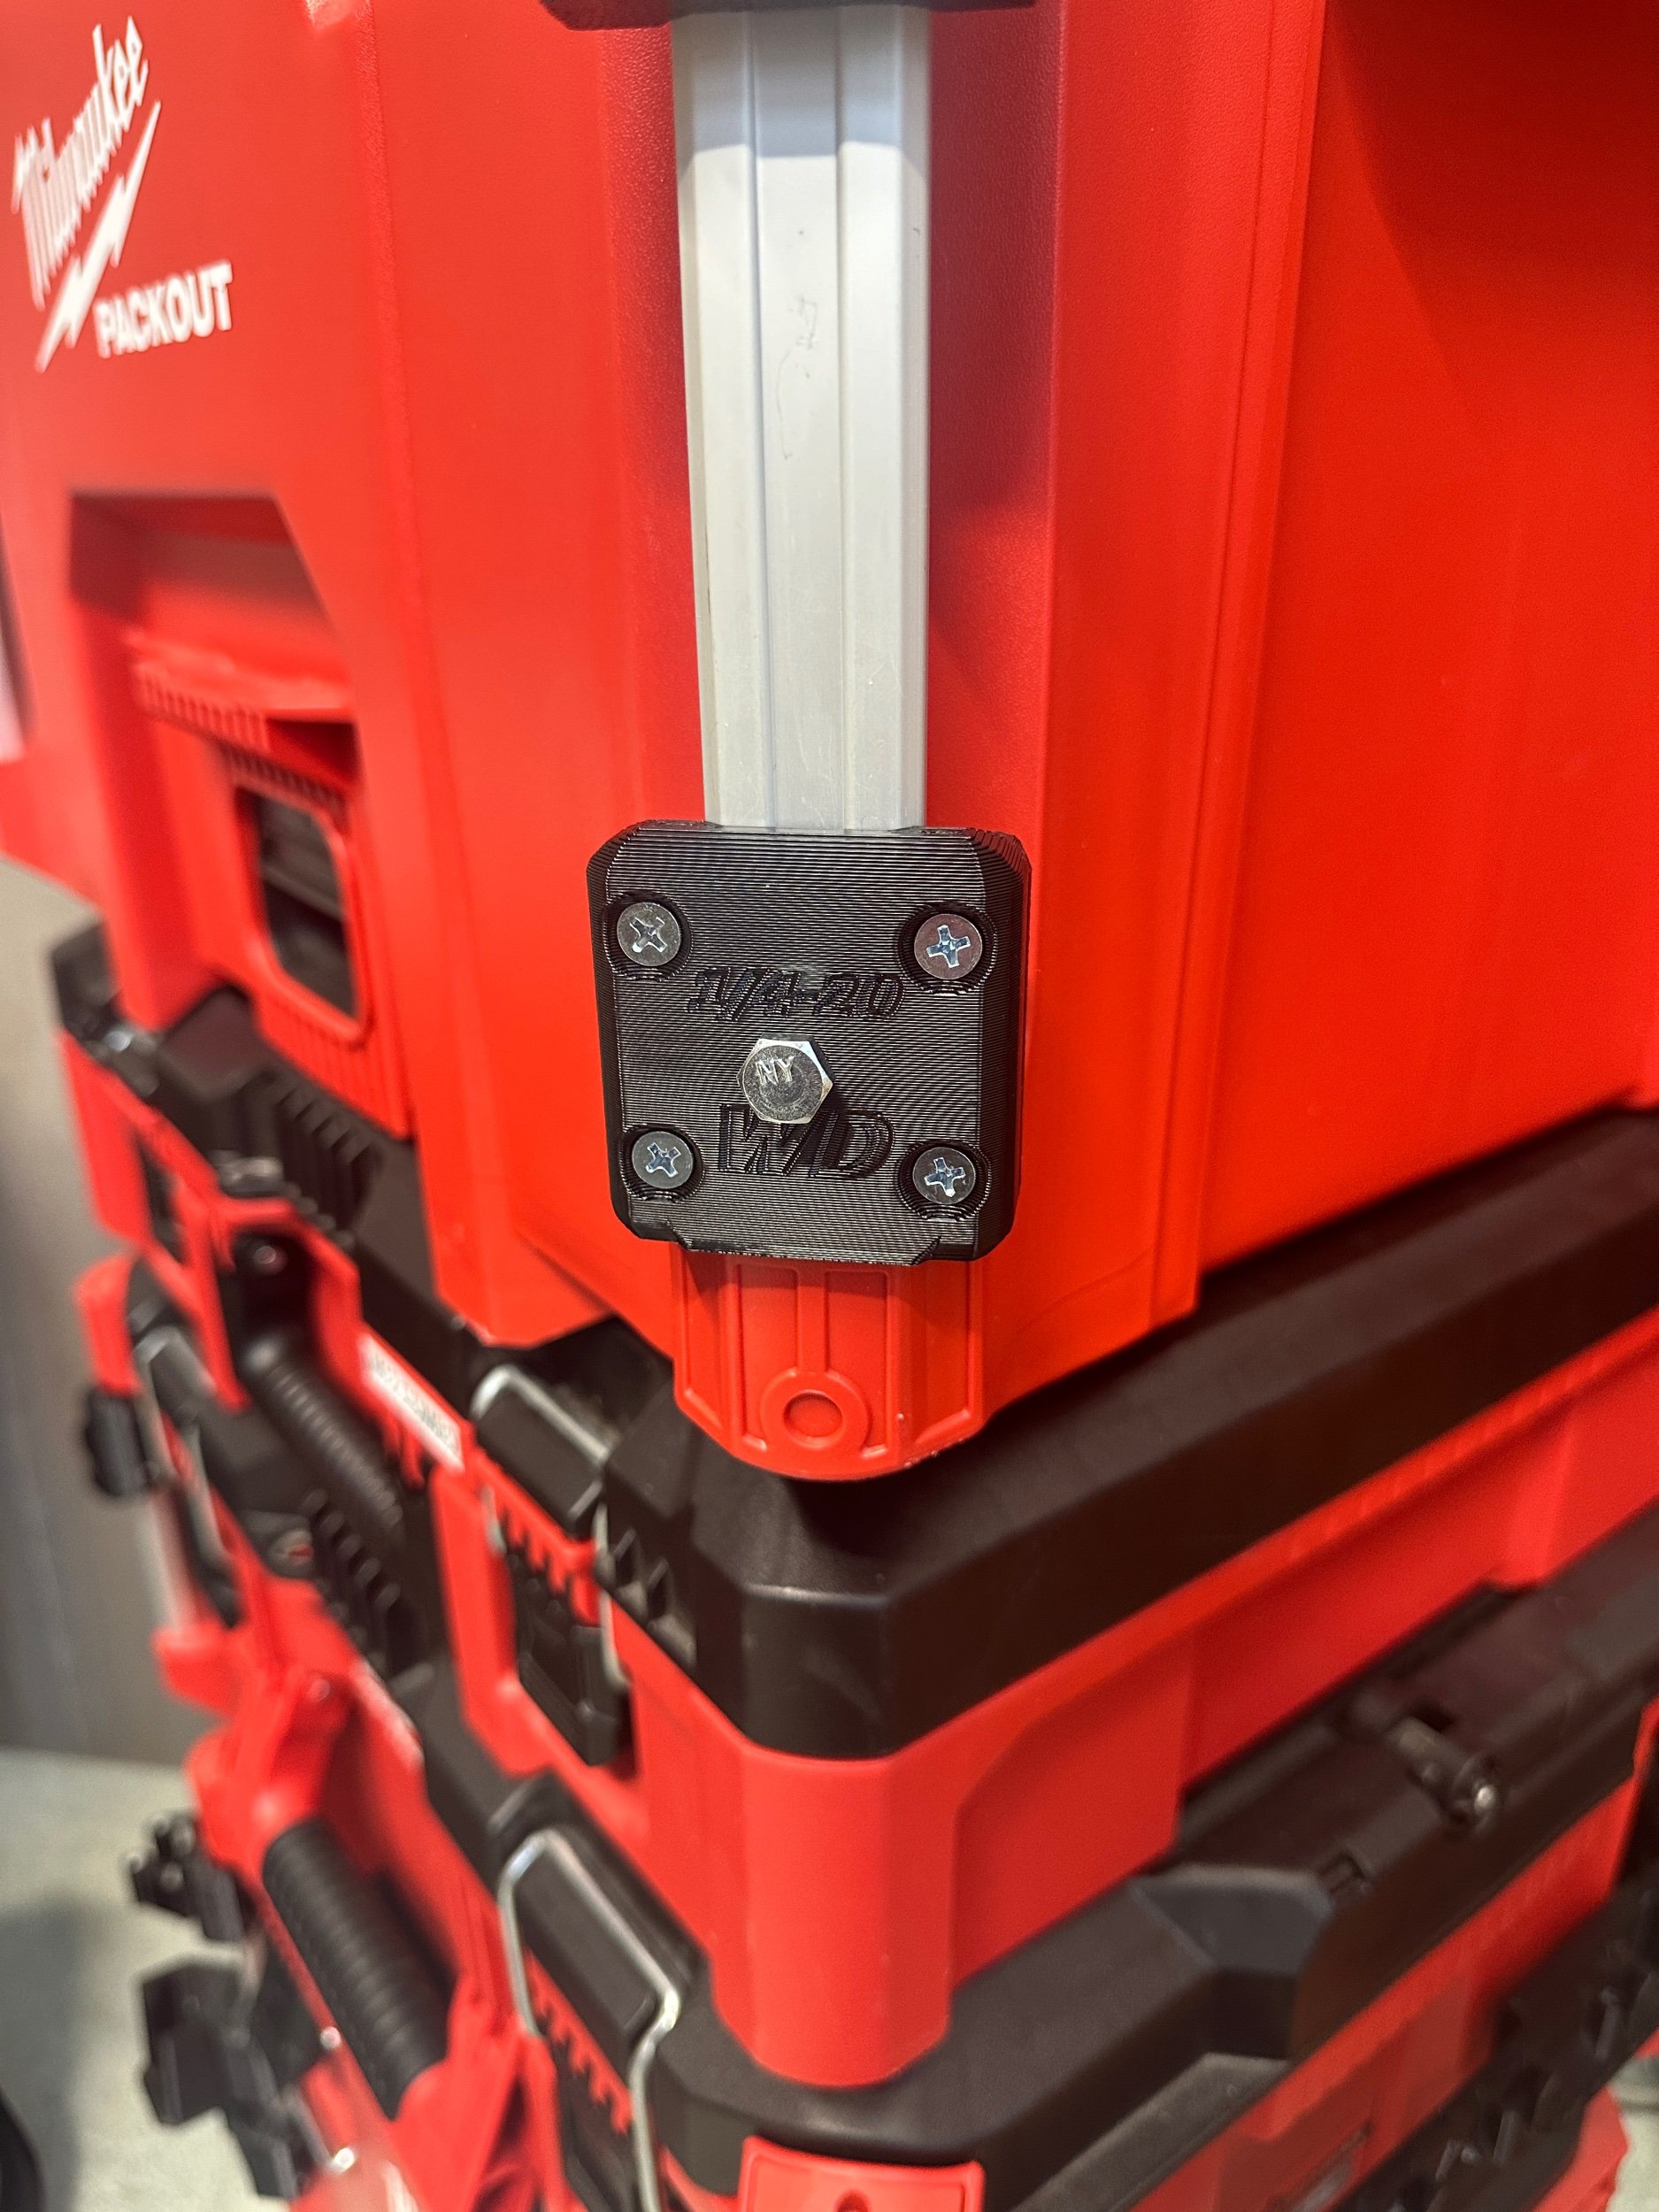
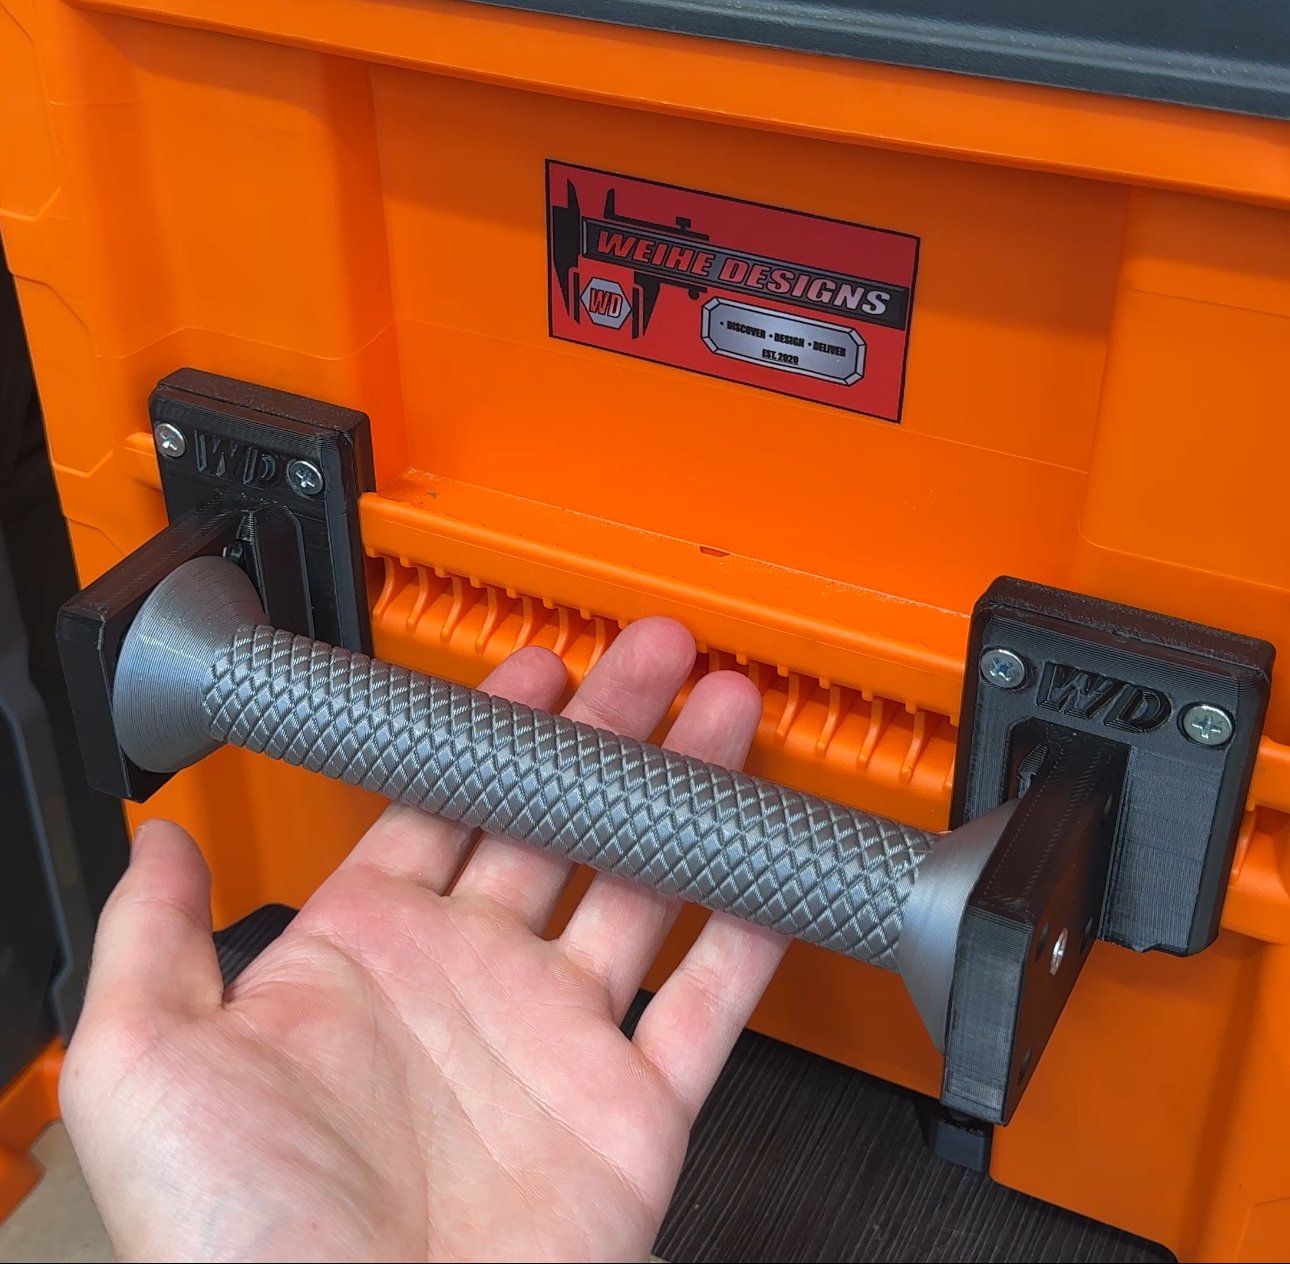
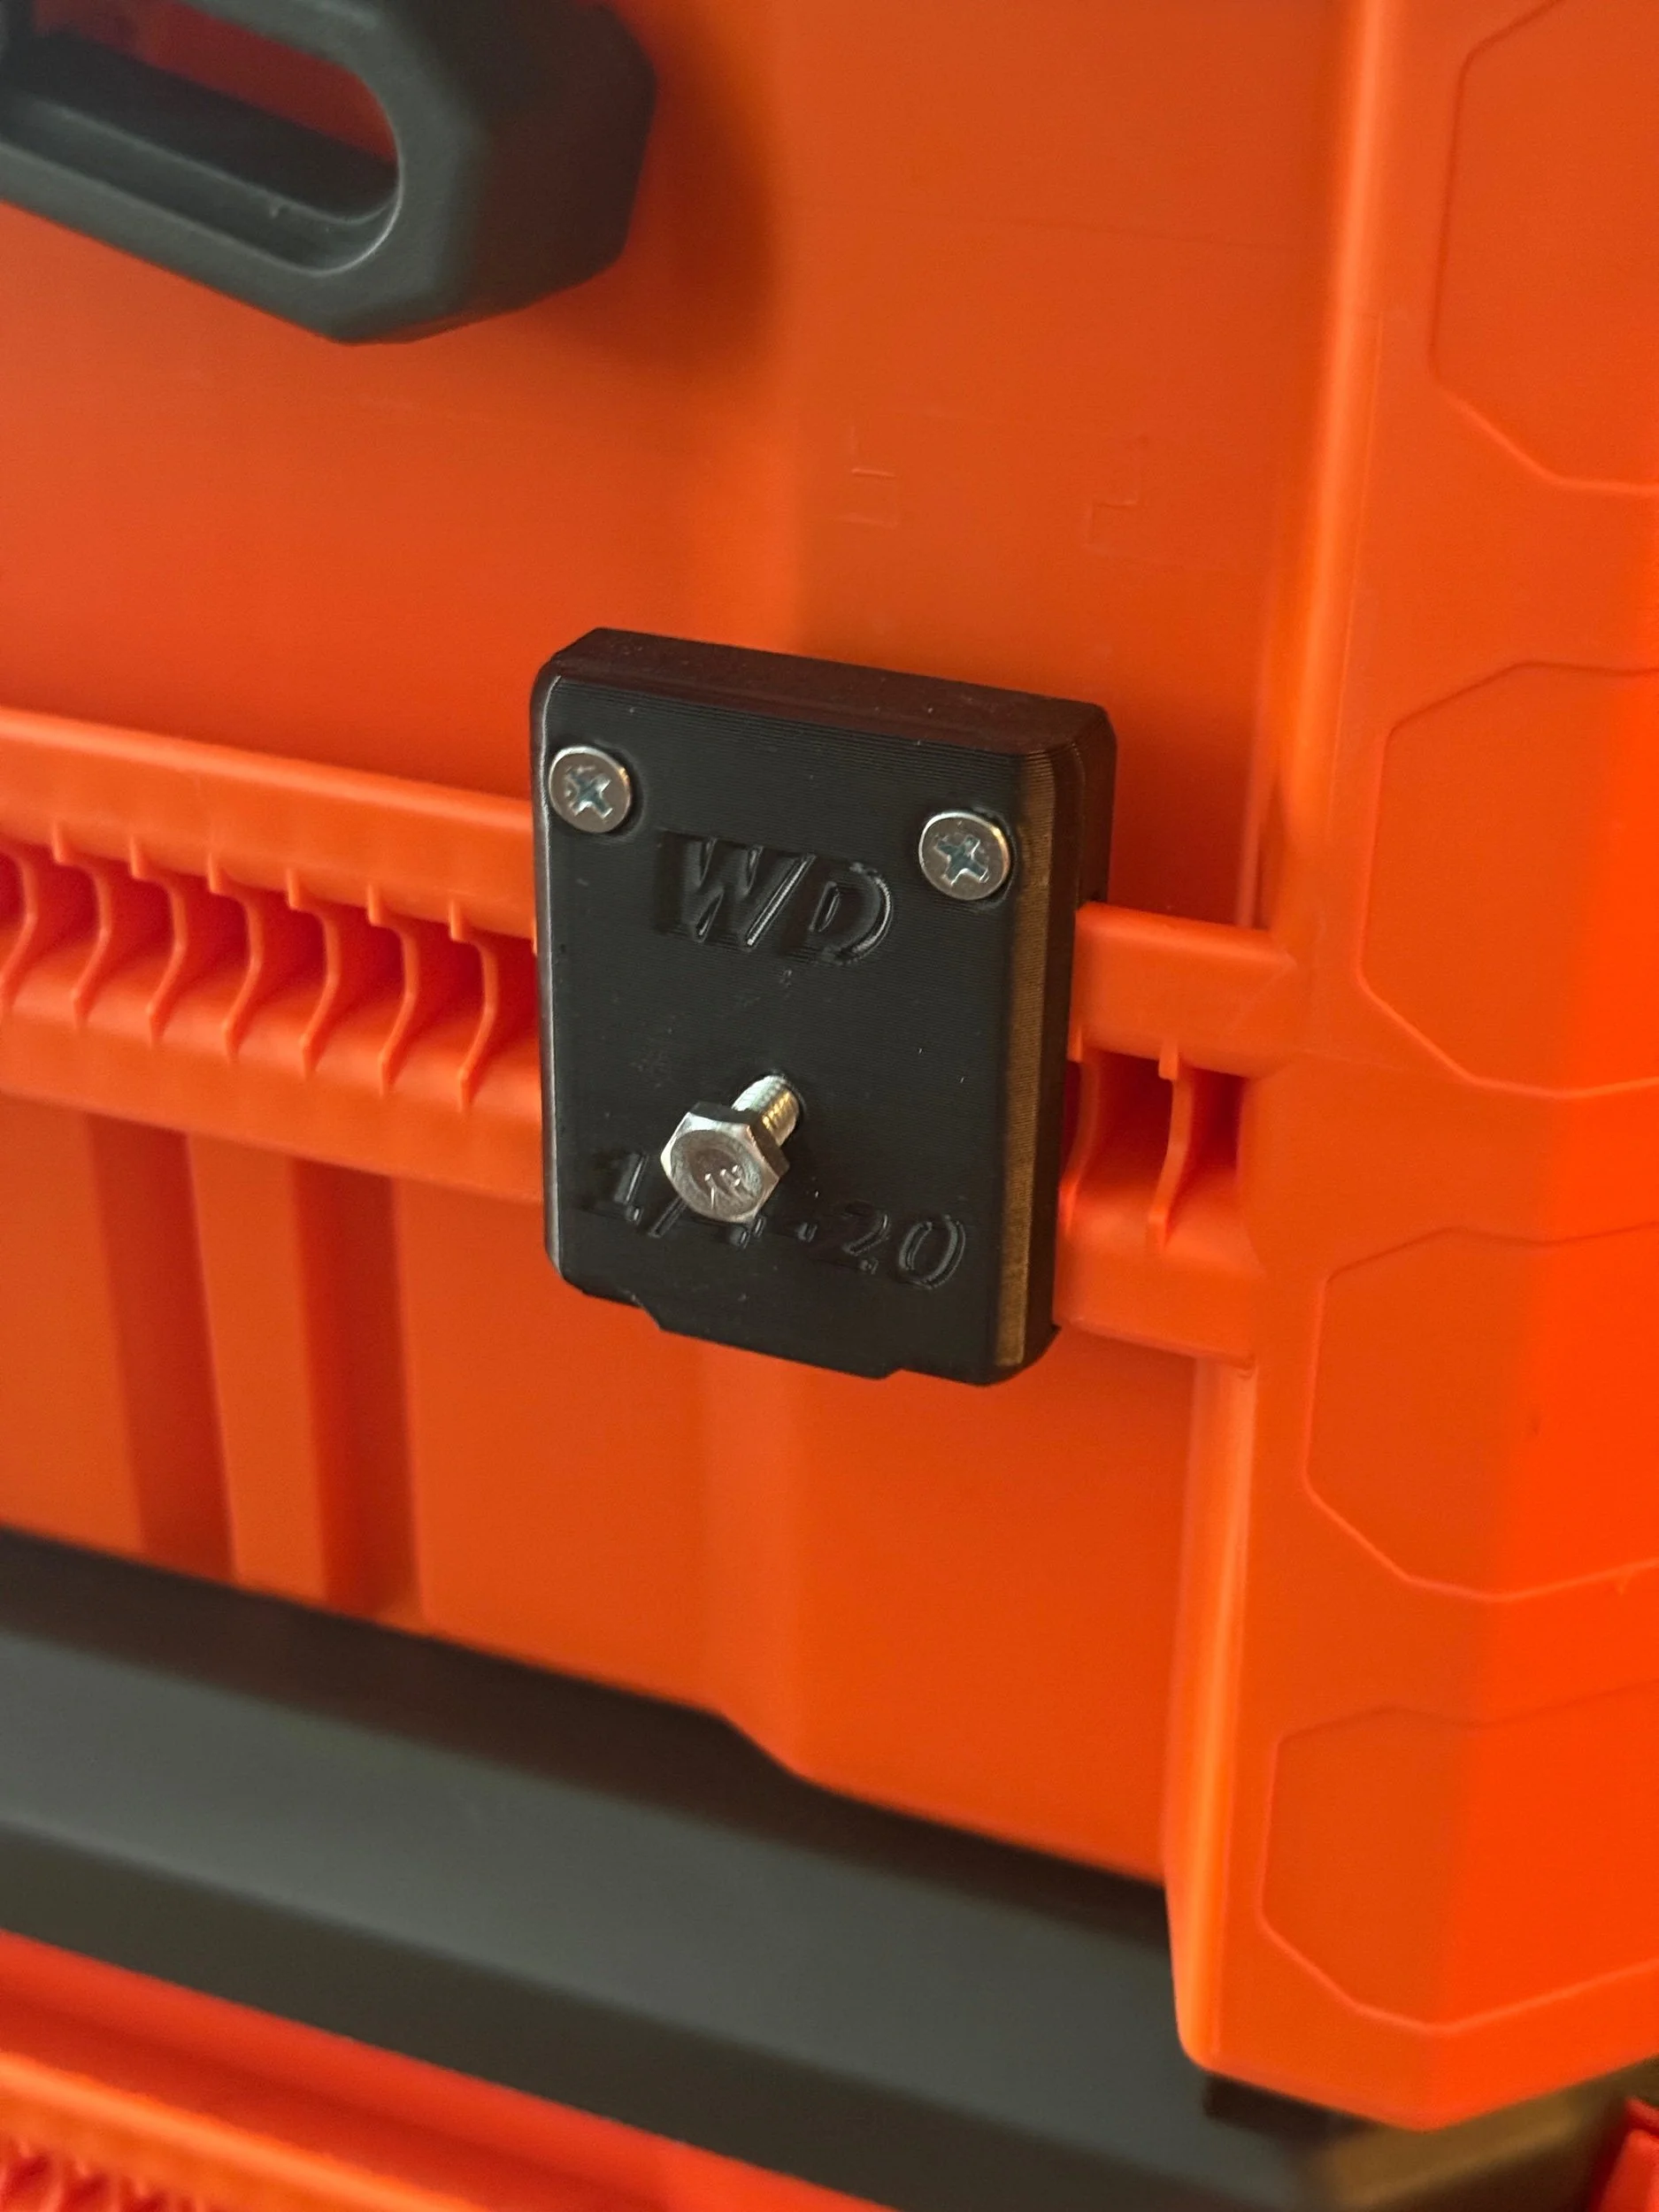
KRA- 1/4-20
from $9.99
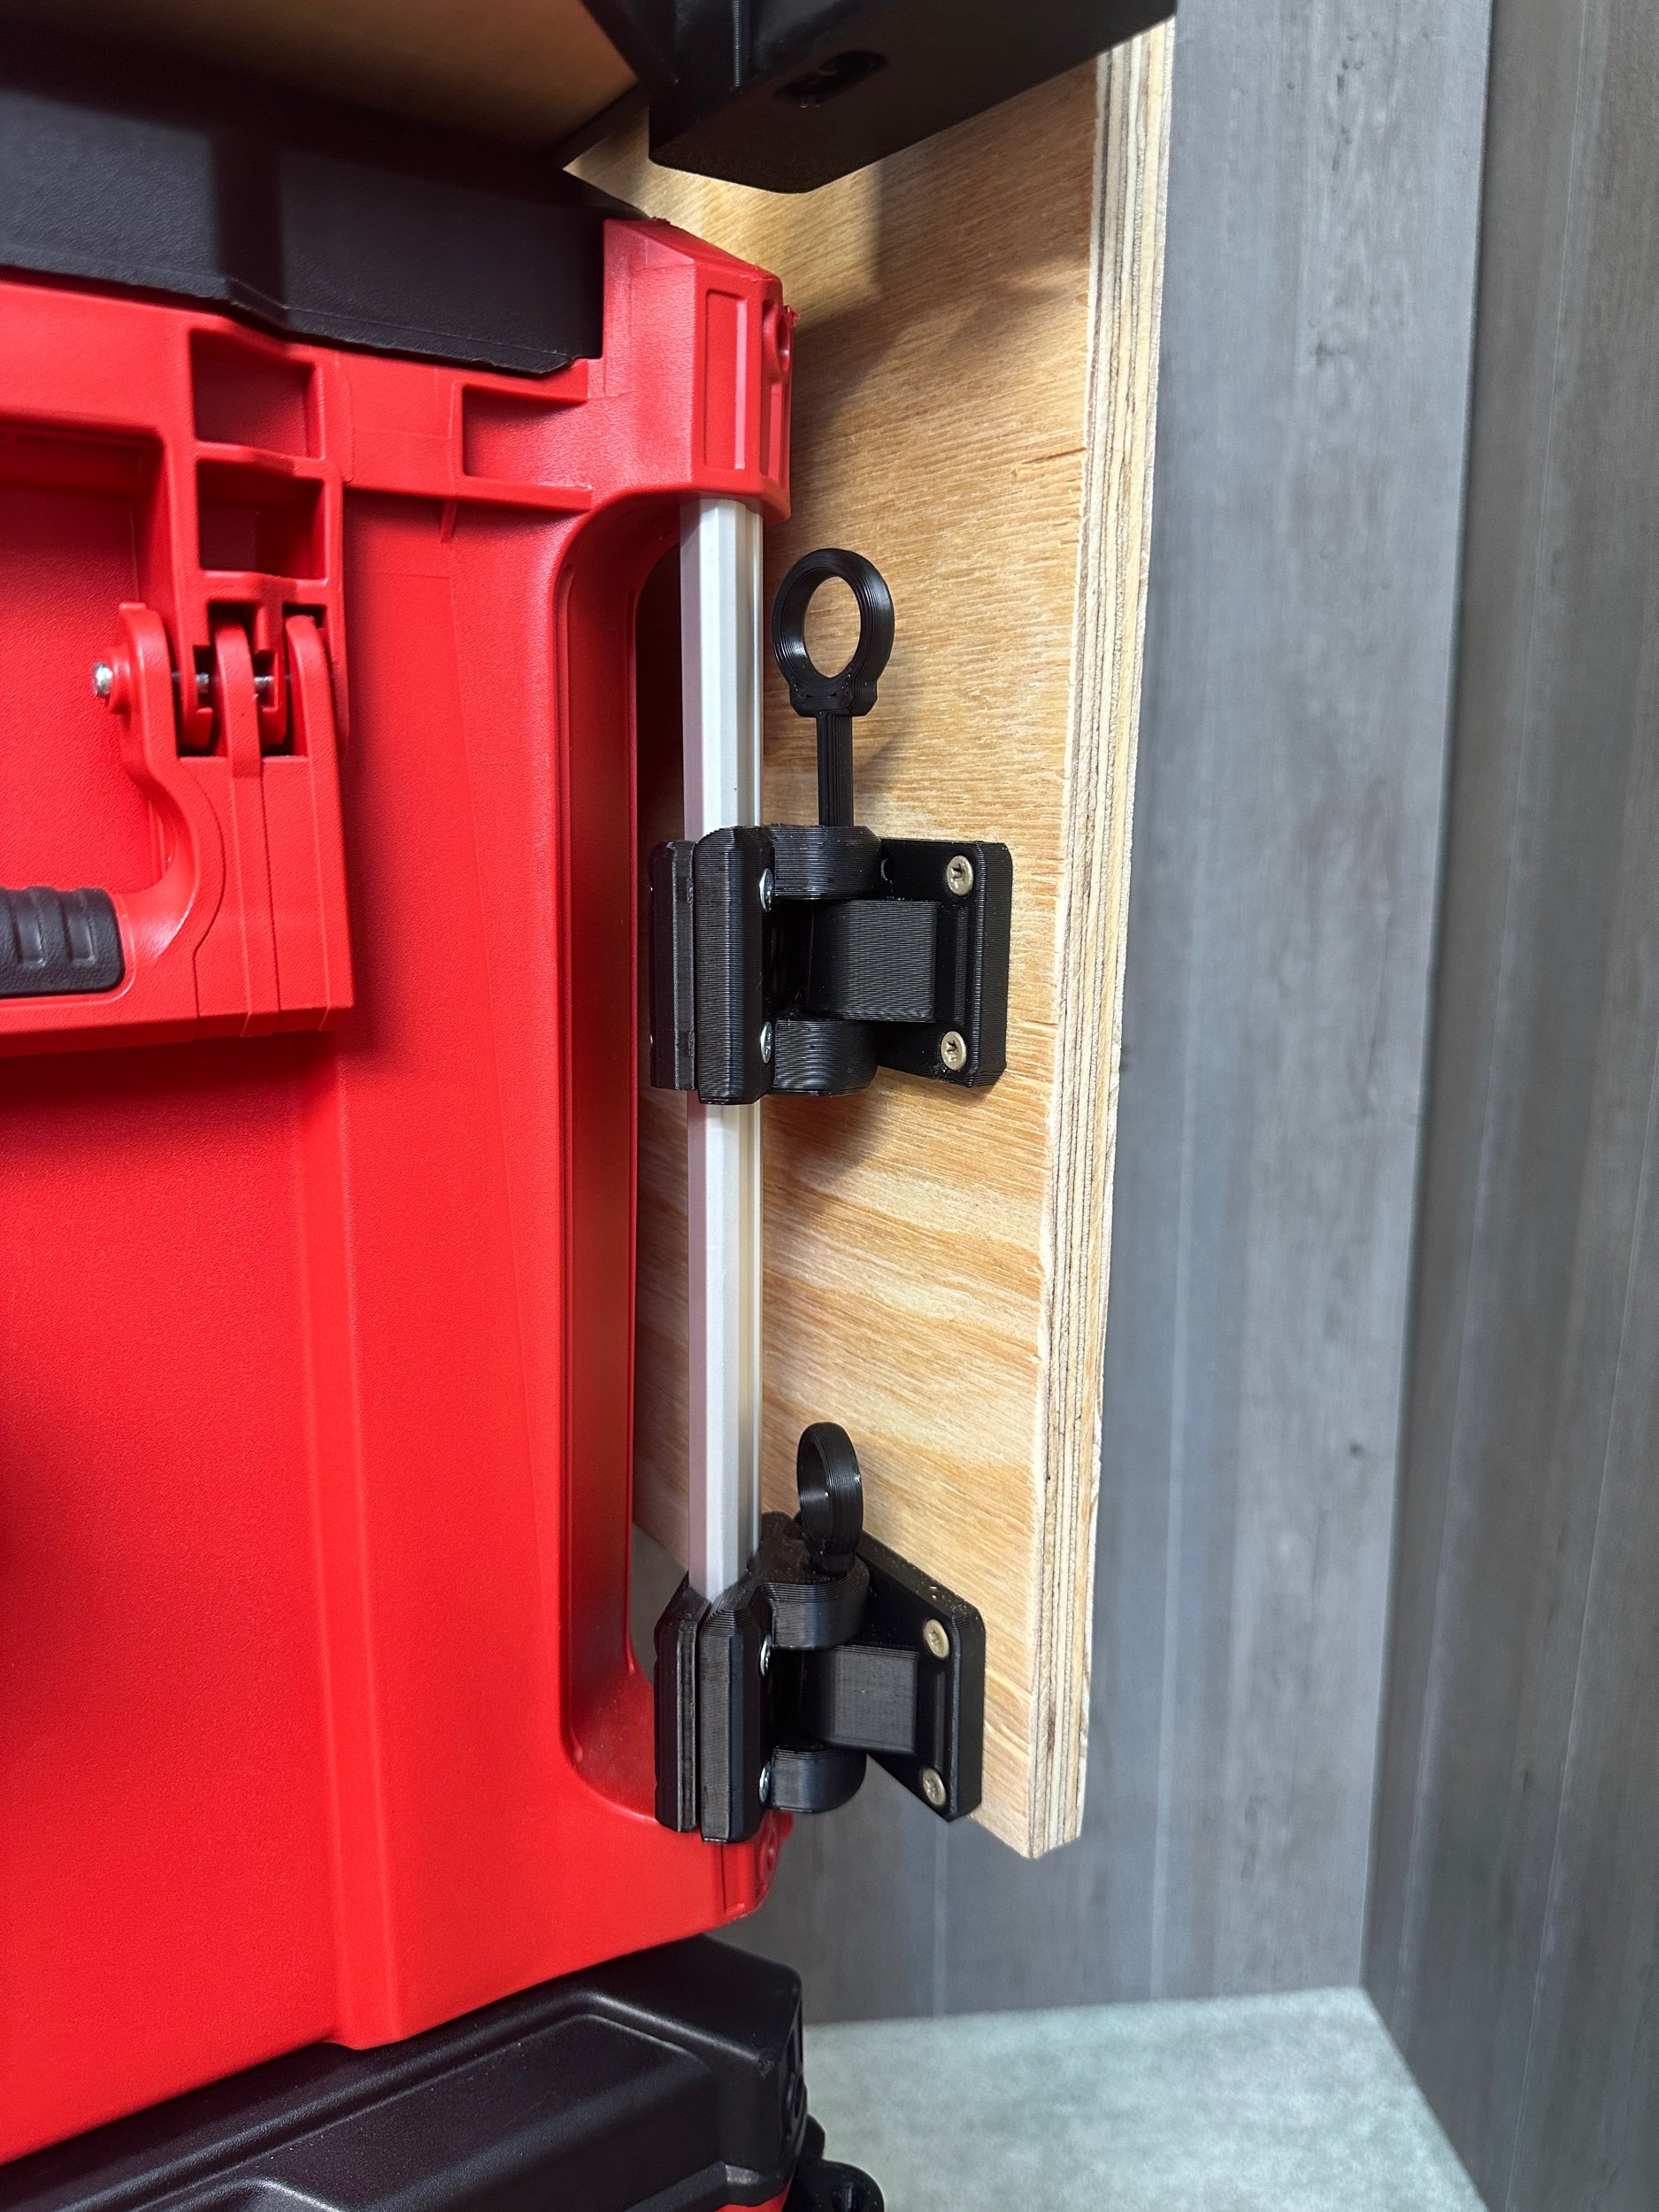
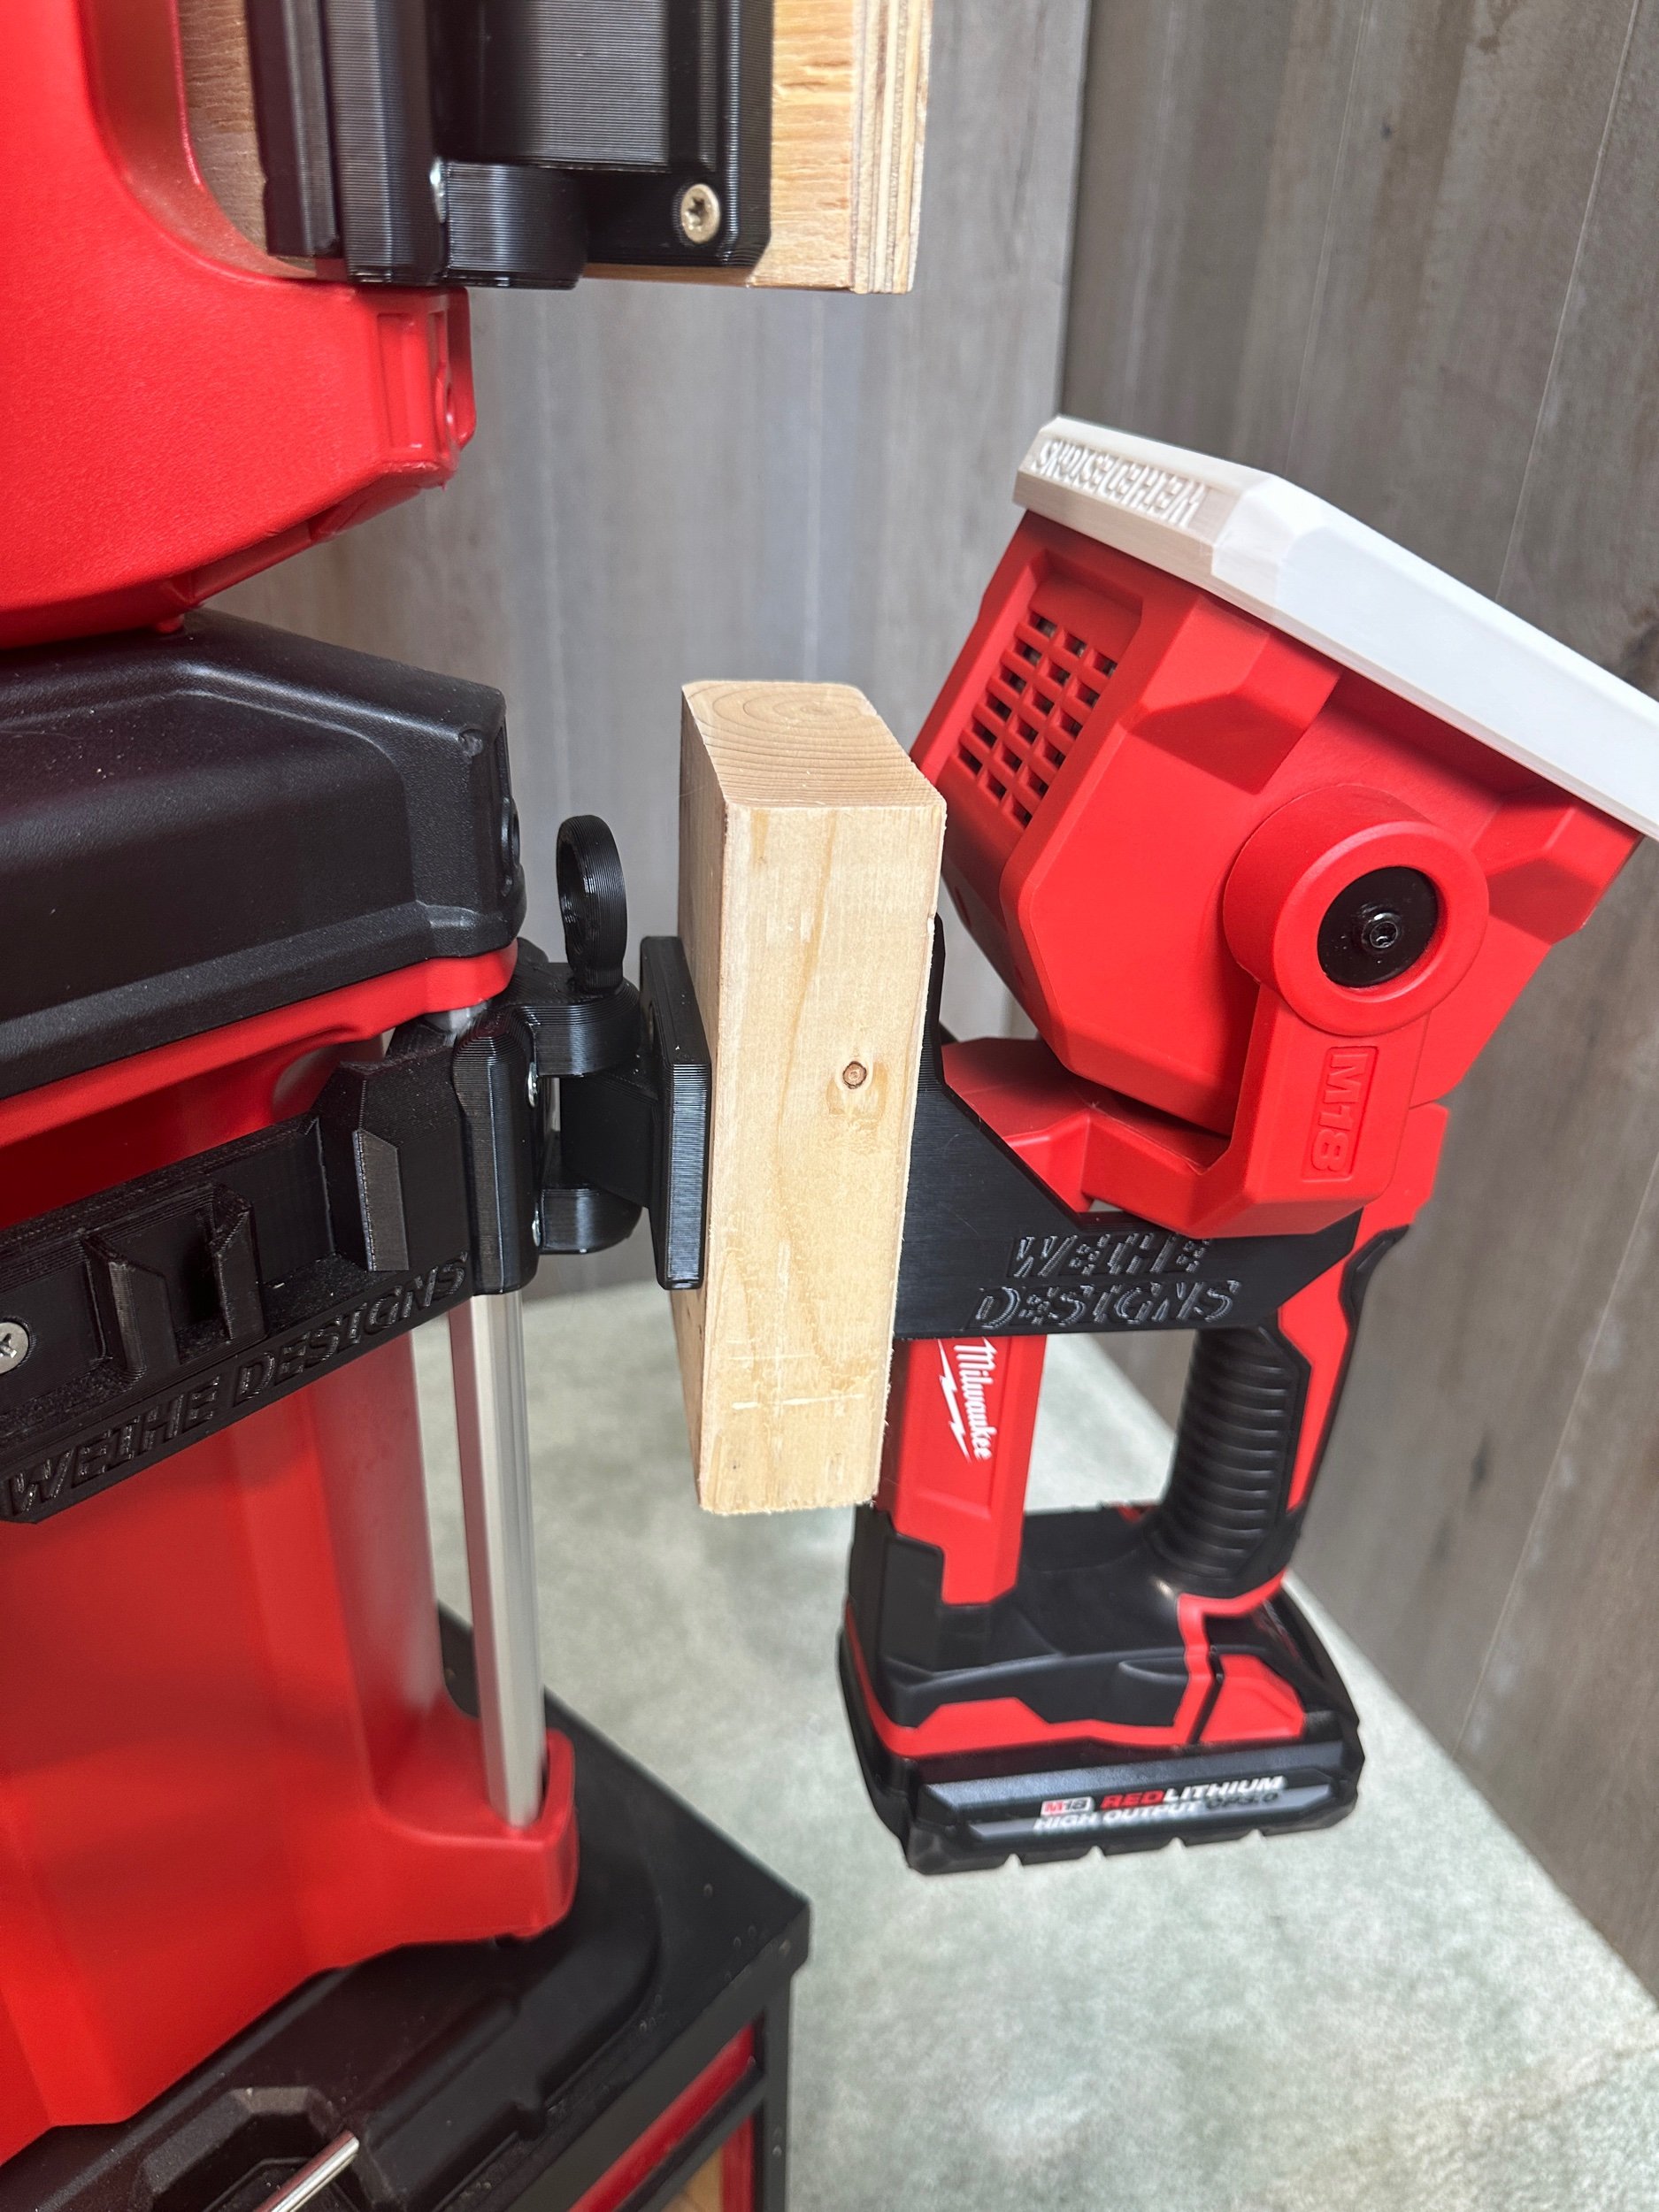
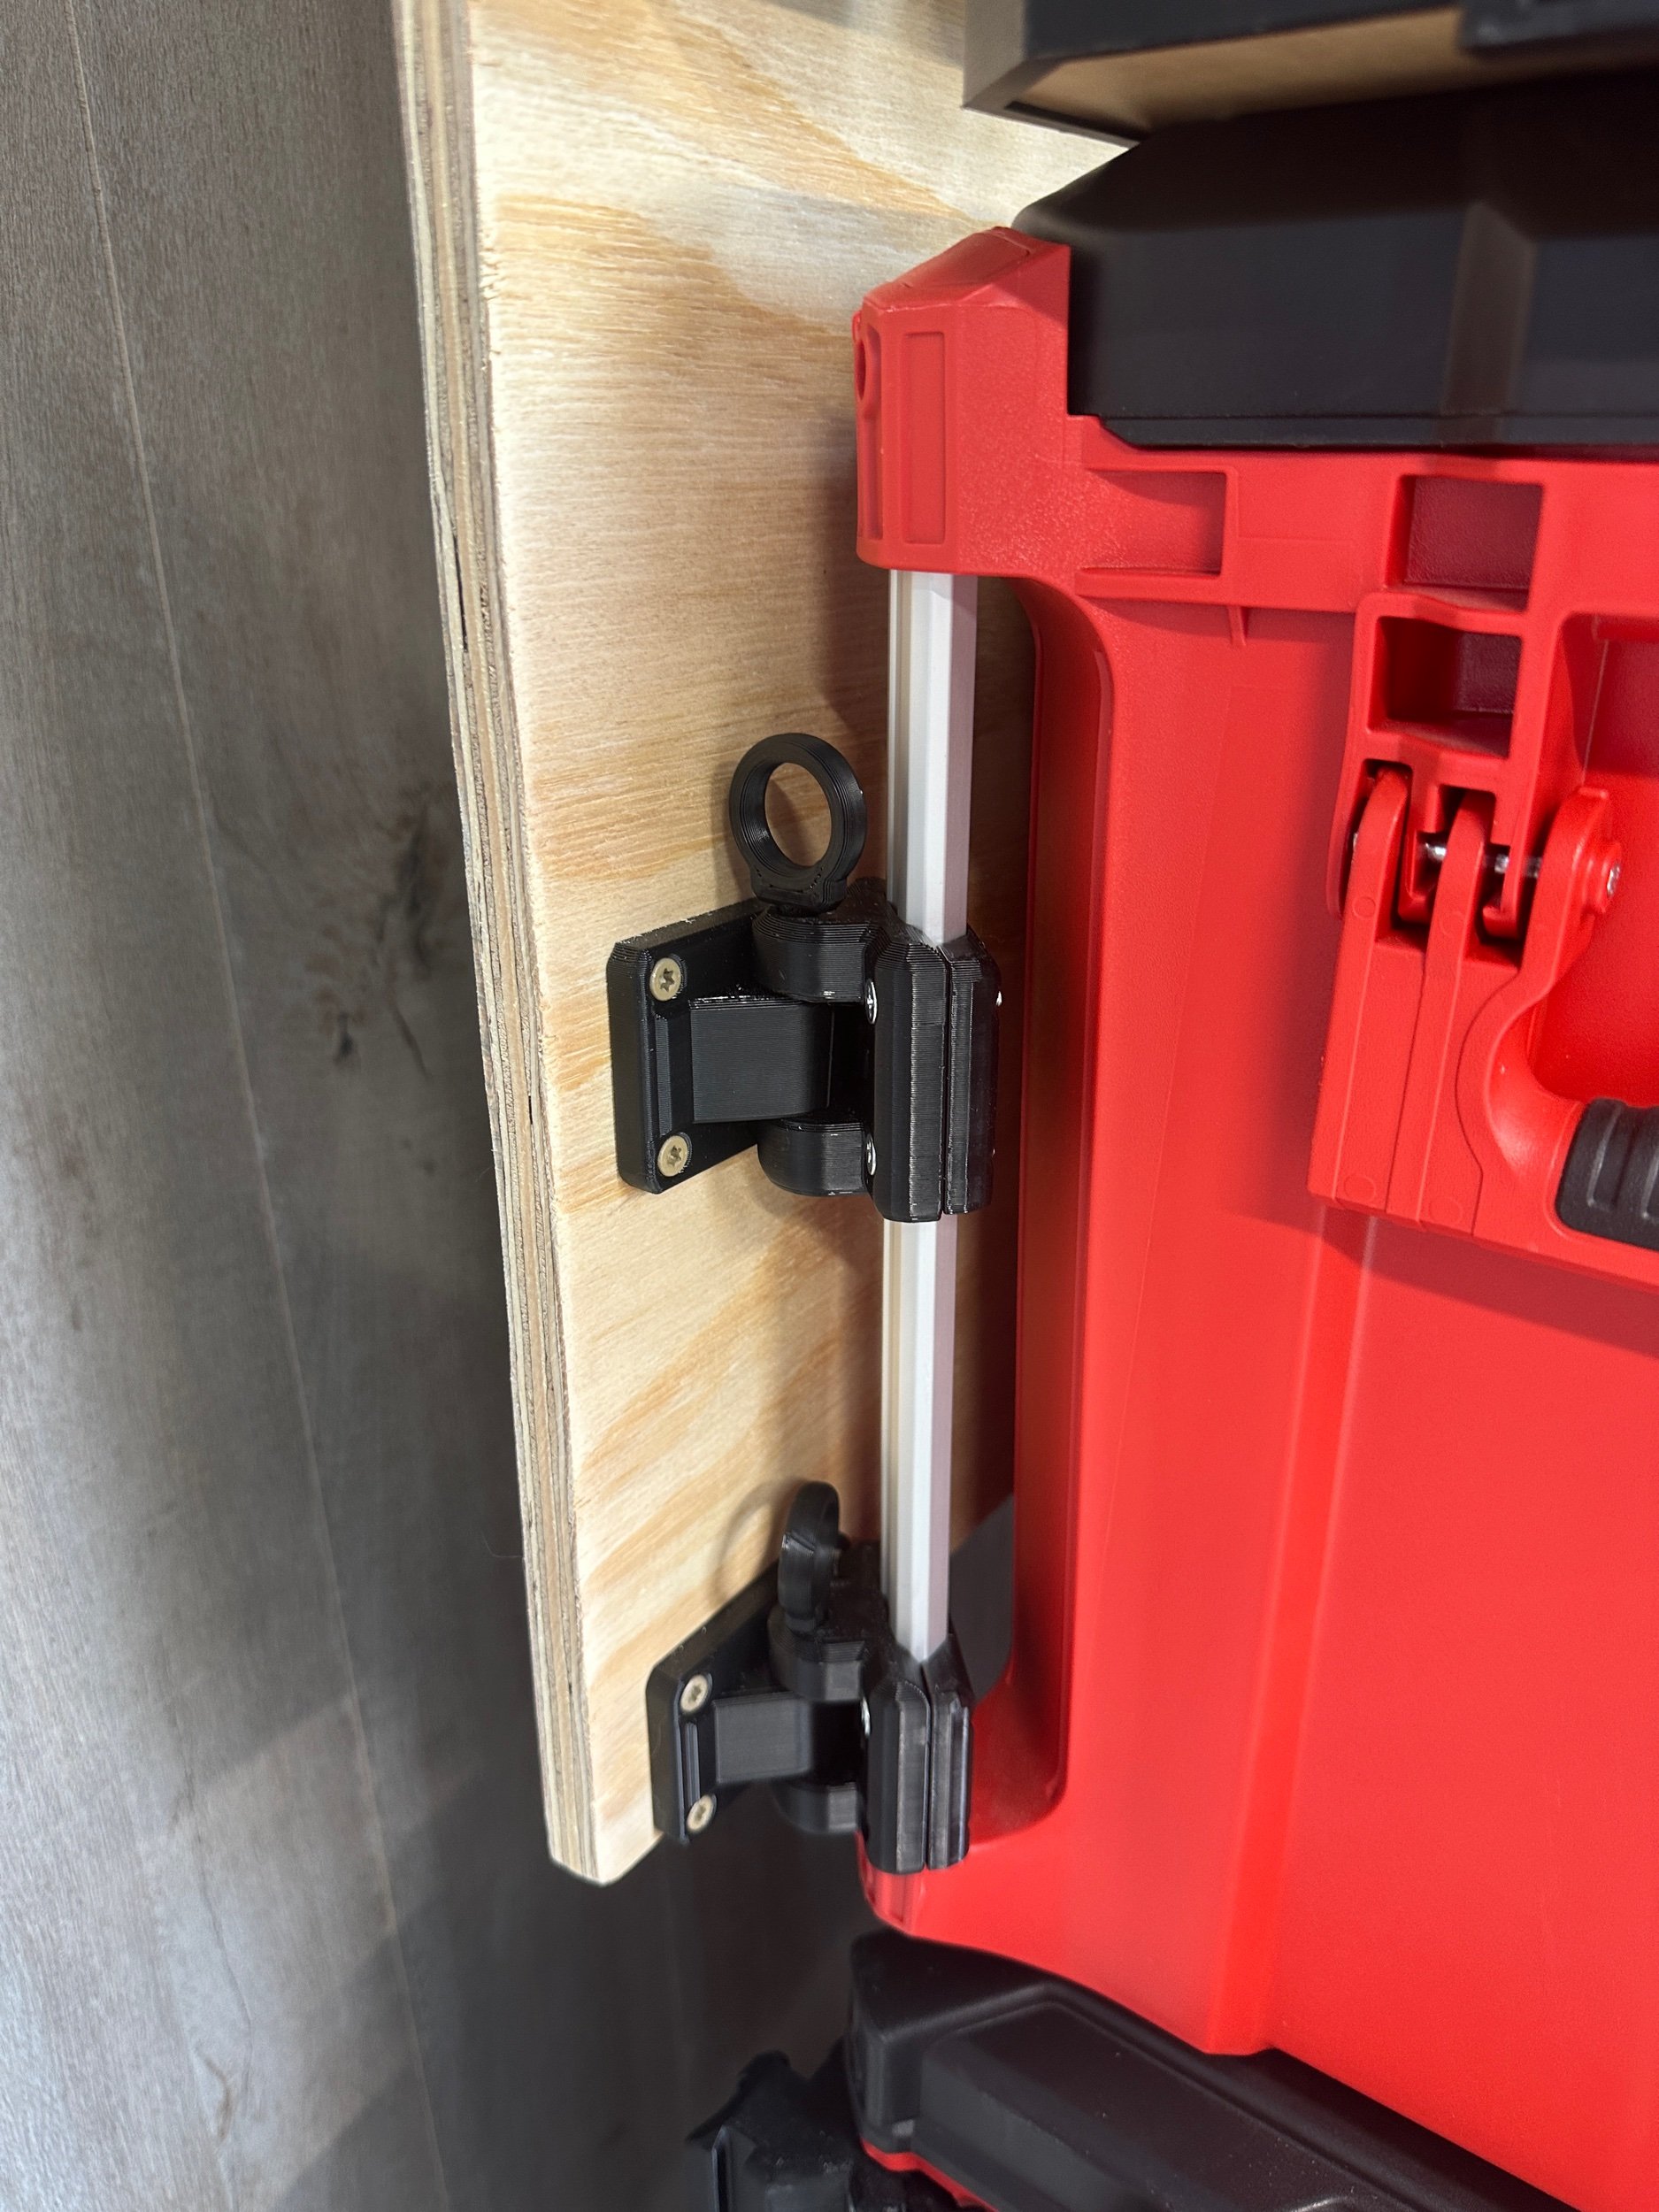
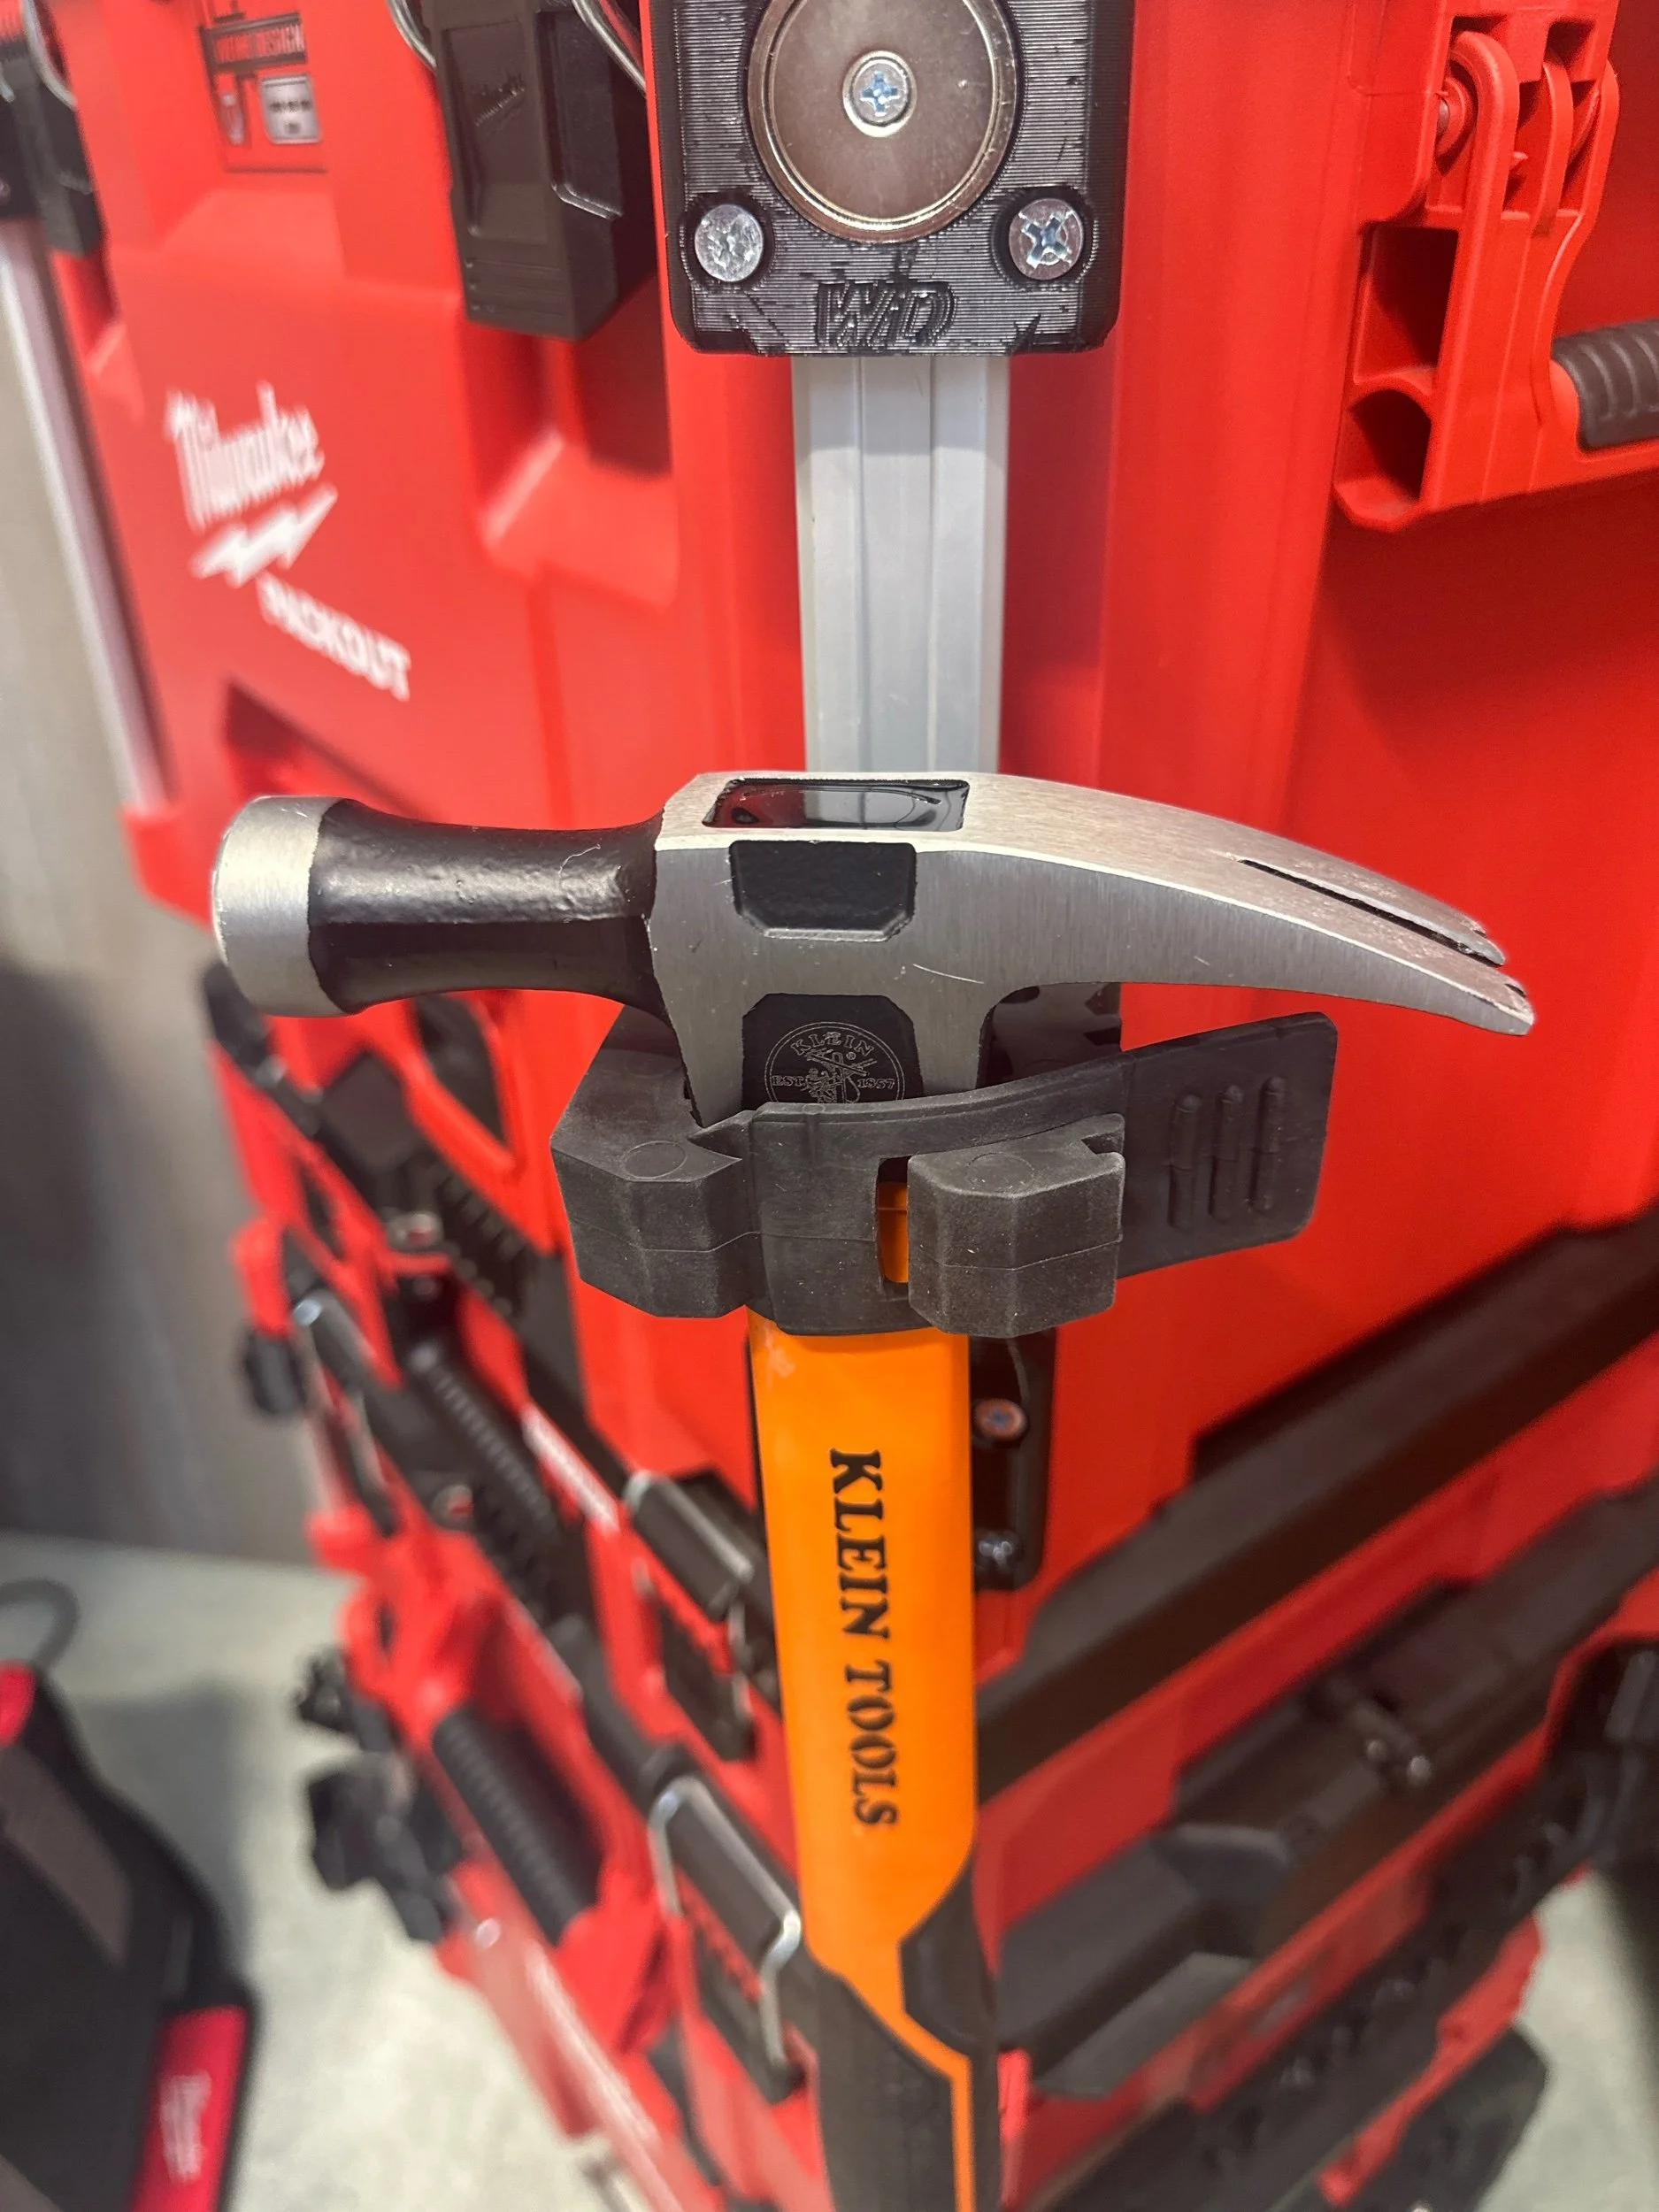
This product transforms the plastic rail of the MODbox toolboxes into a versatile mounting spot.
This product has an embedded 1/4-20 nut that allows you to attach various items to your MODBox Rails. The nut can also be removed and switched with the bolt so the threads can stick out of the rail.
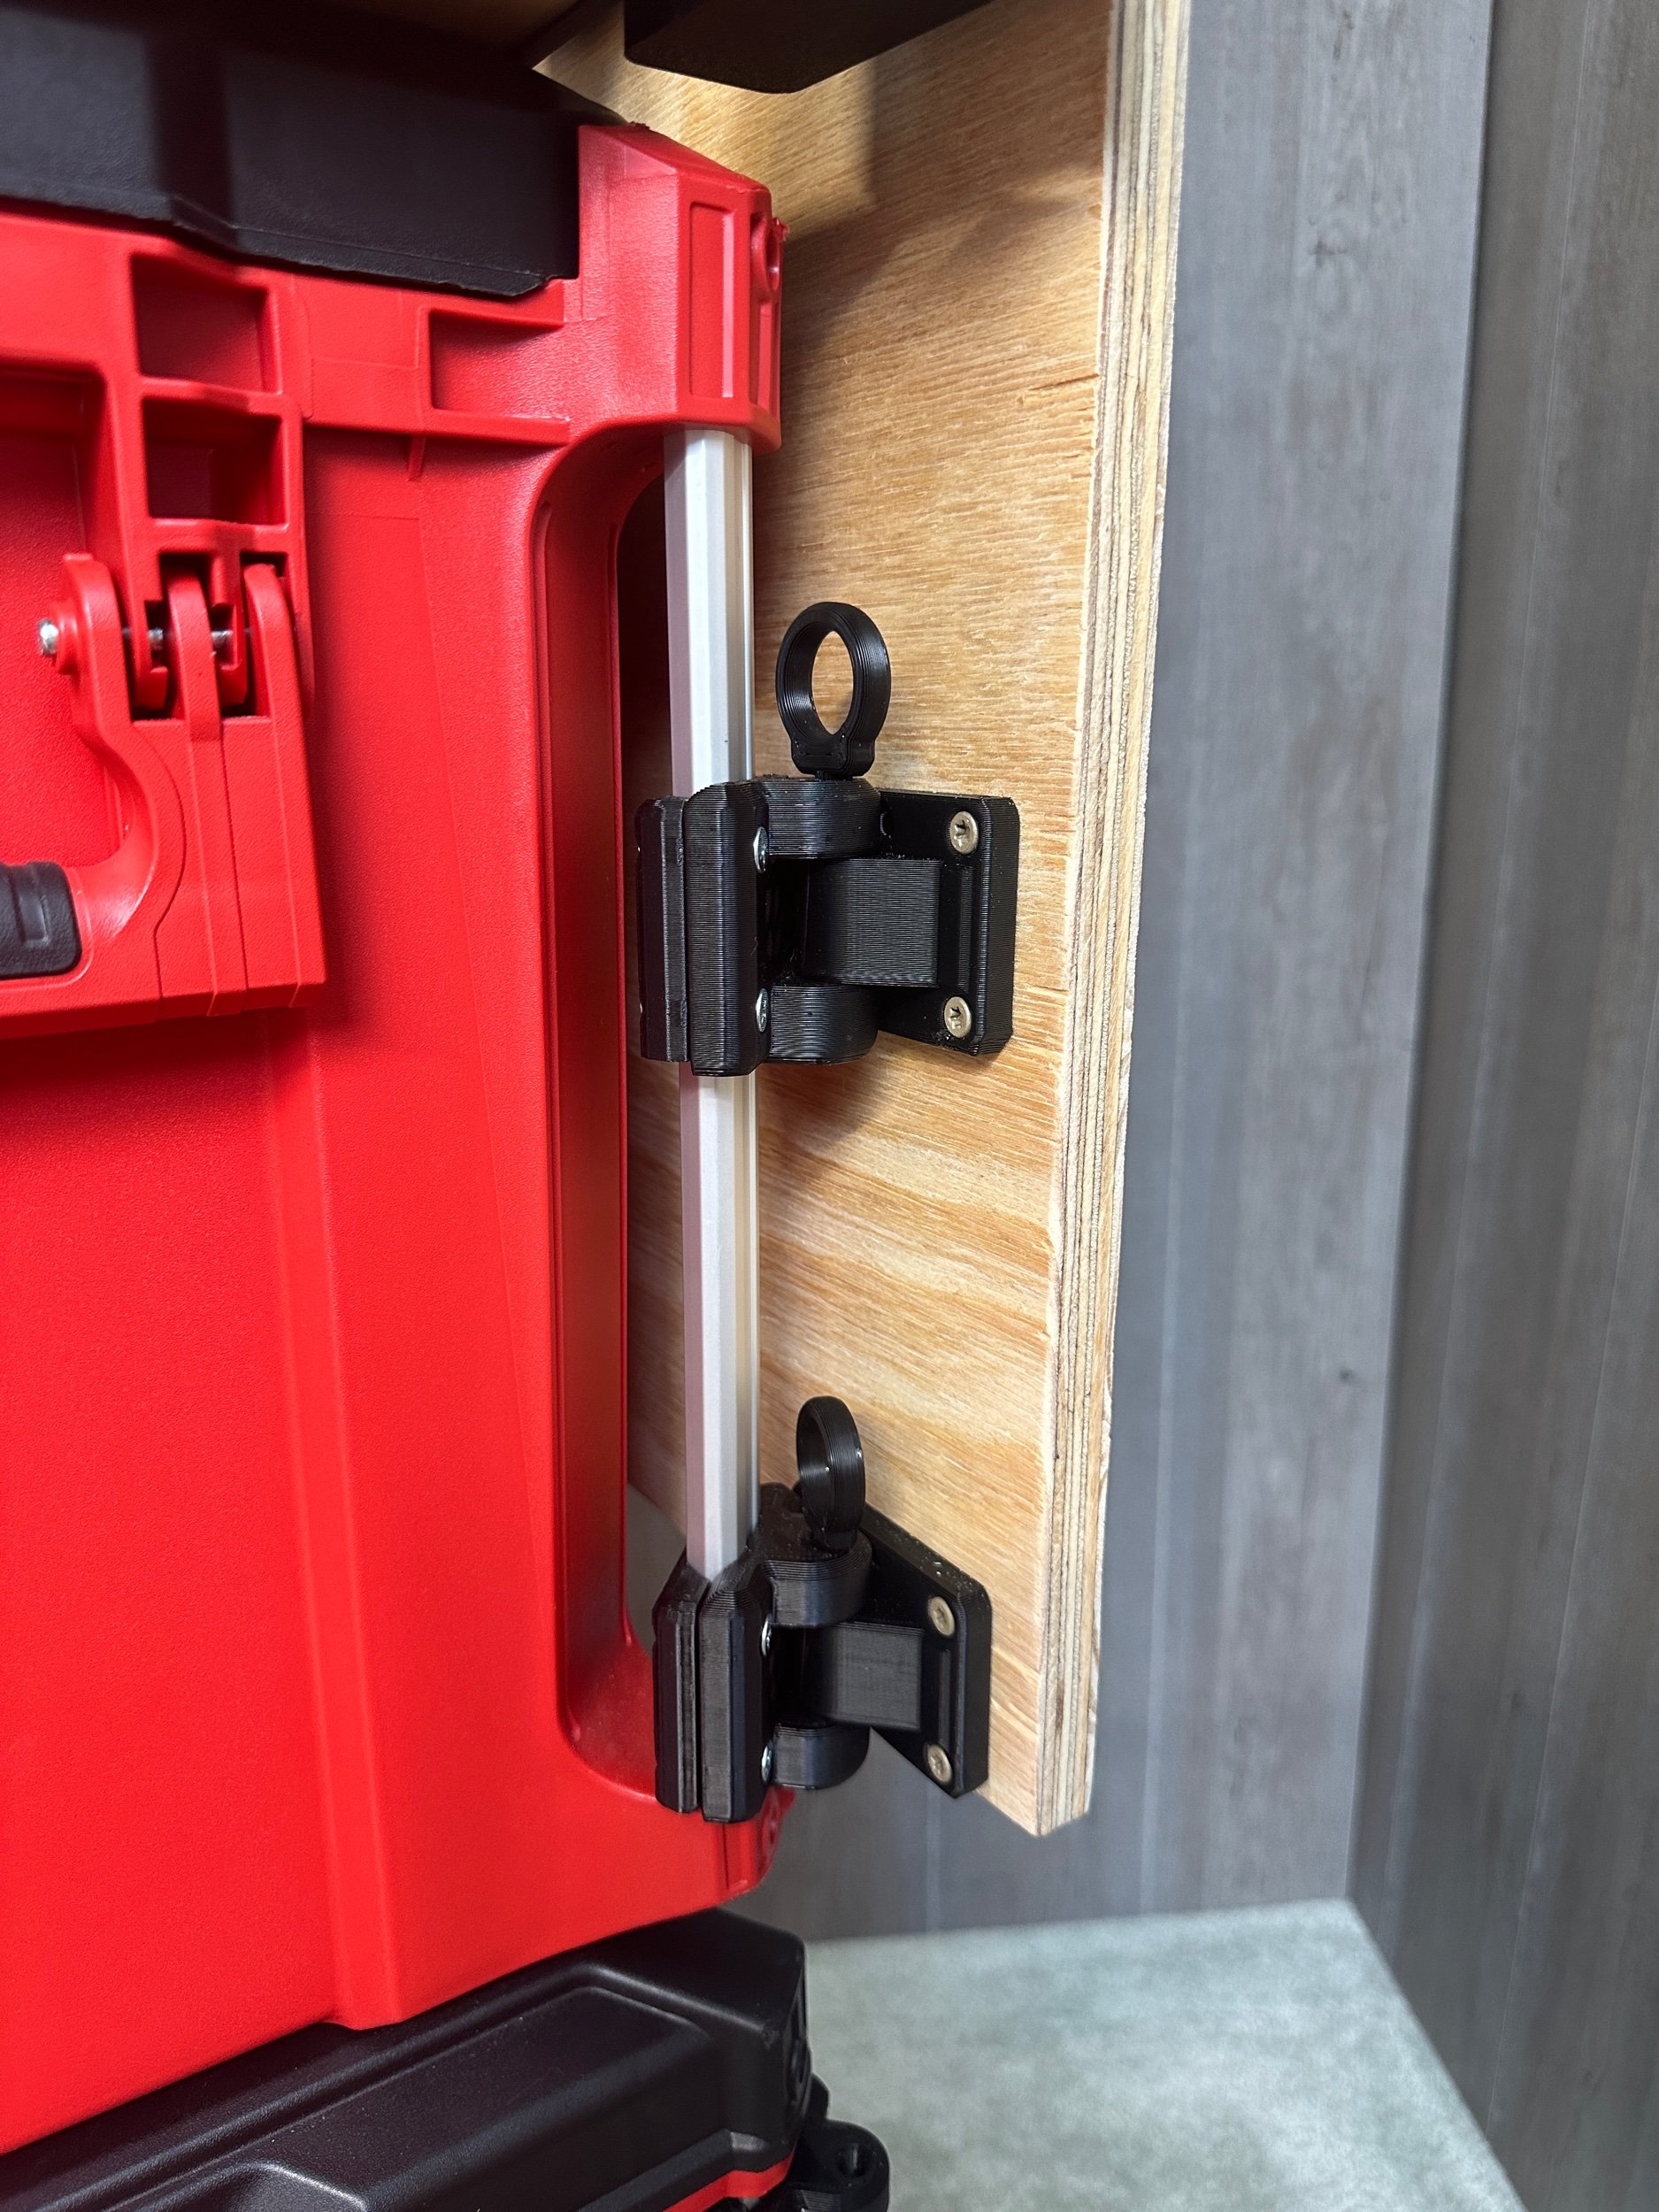
D-Ring Shown in the example photos is only included in the D-Ring Kit. Transforms MOdbox rail into heavy duty, omnidirectional lashing/ Anchor Point.
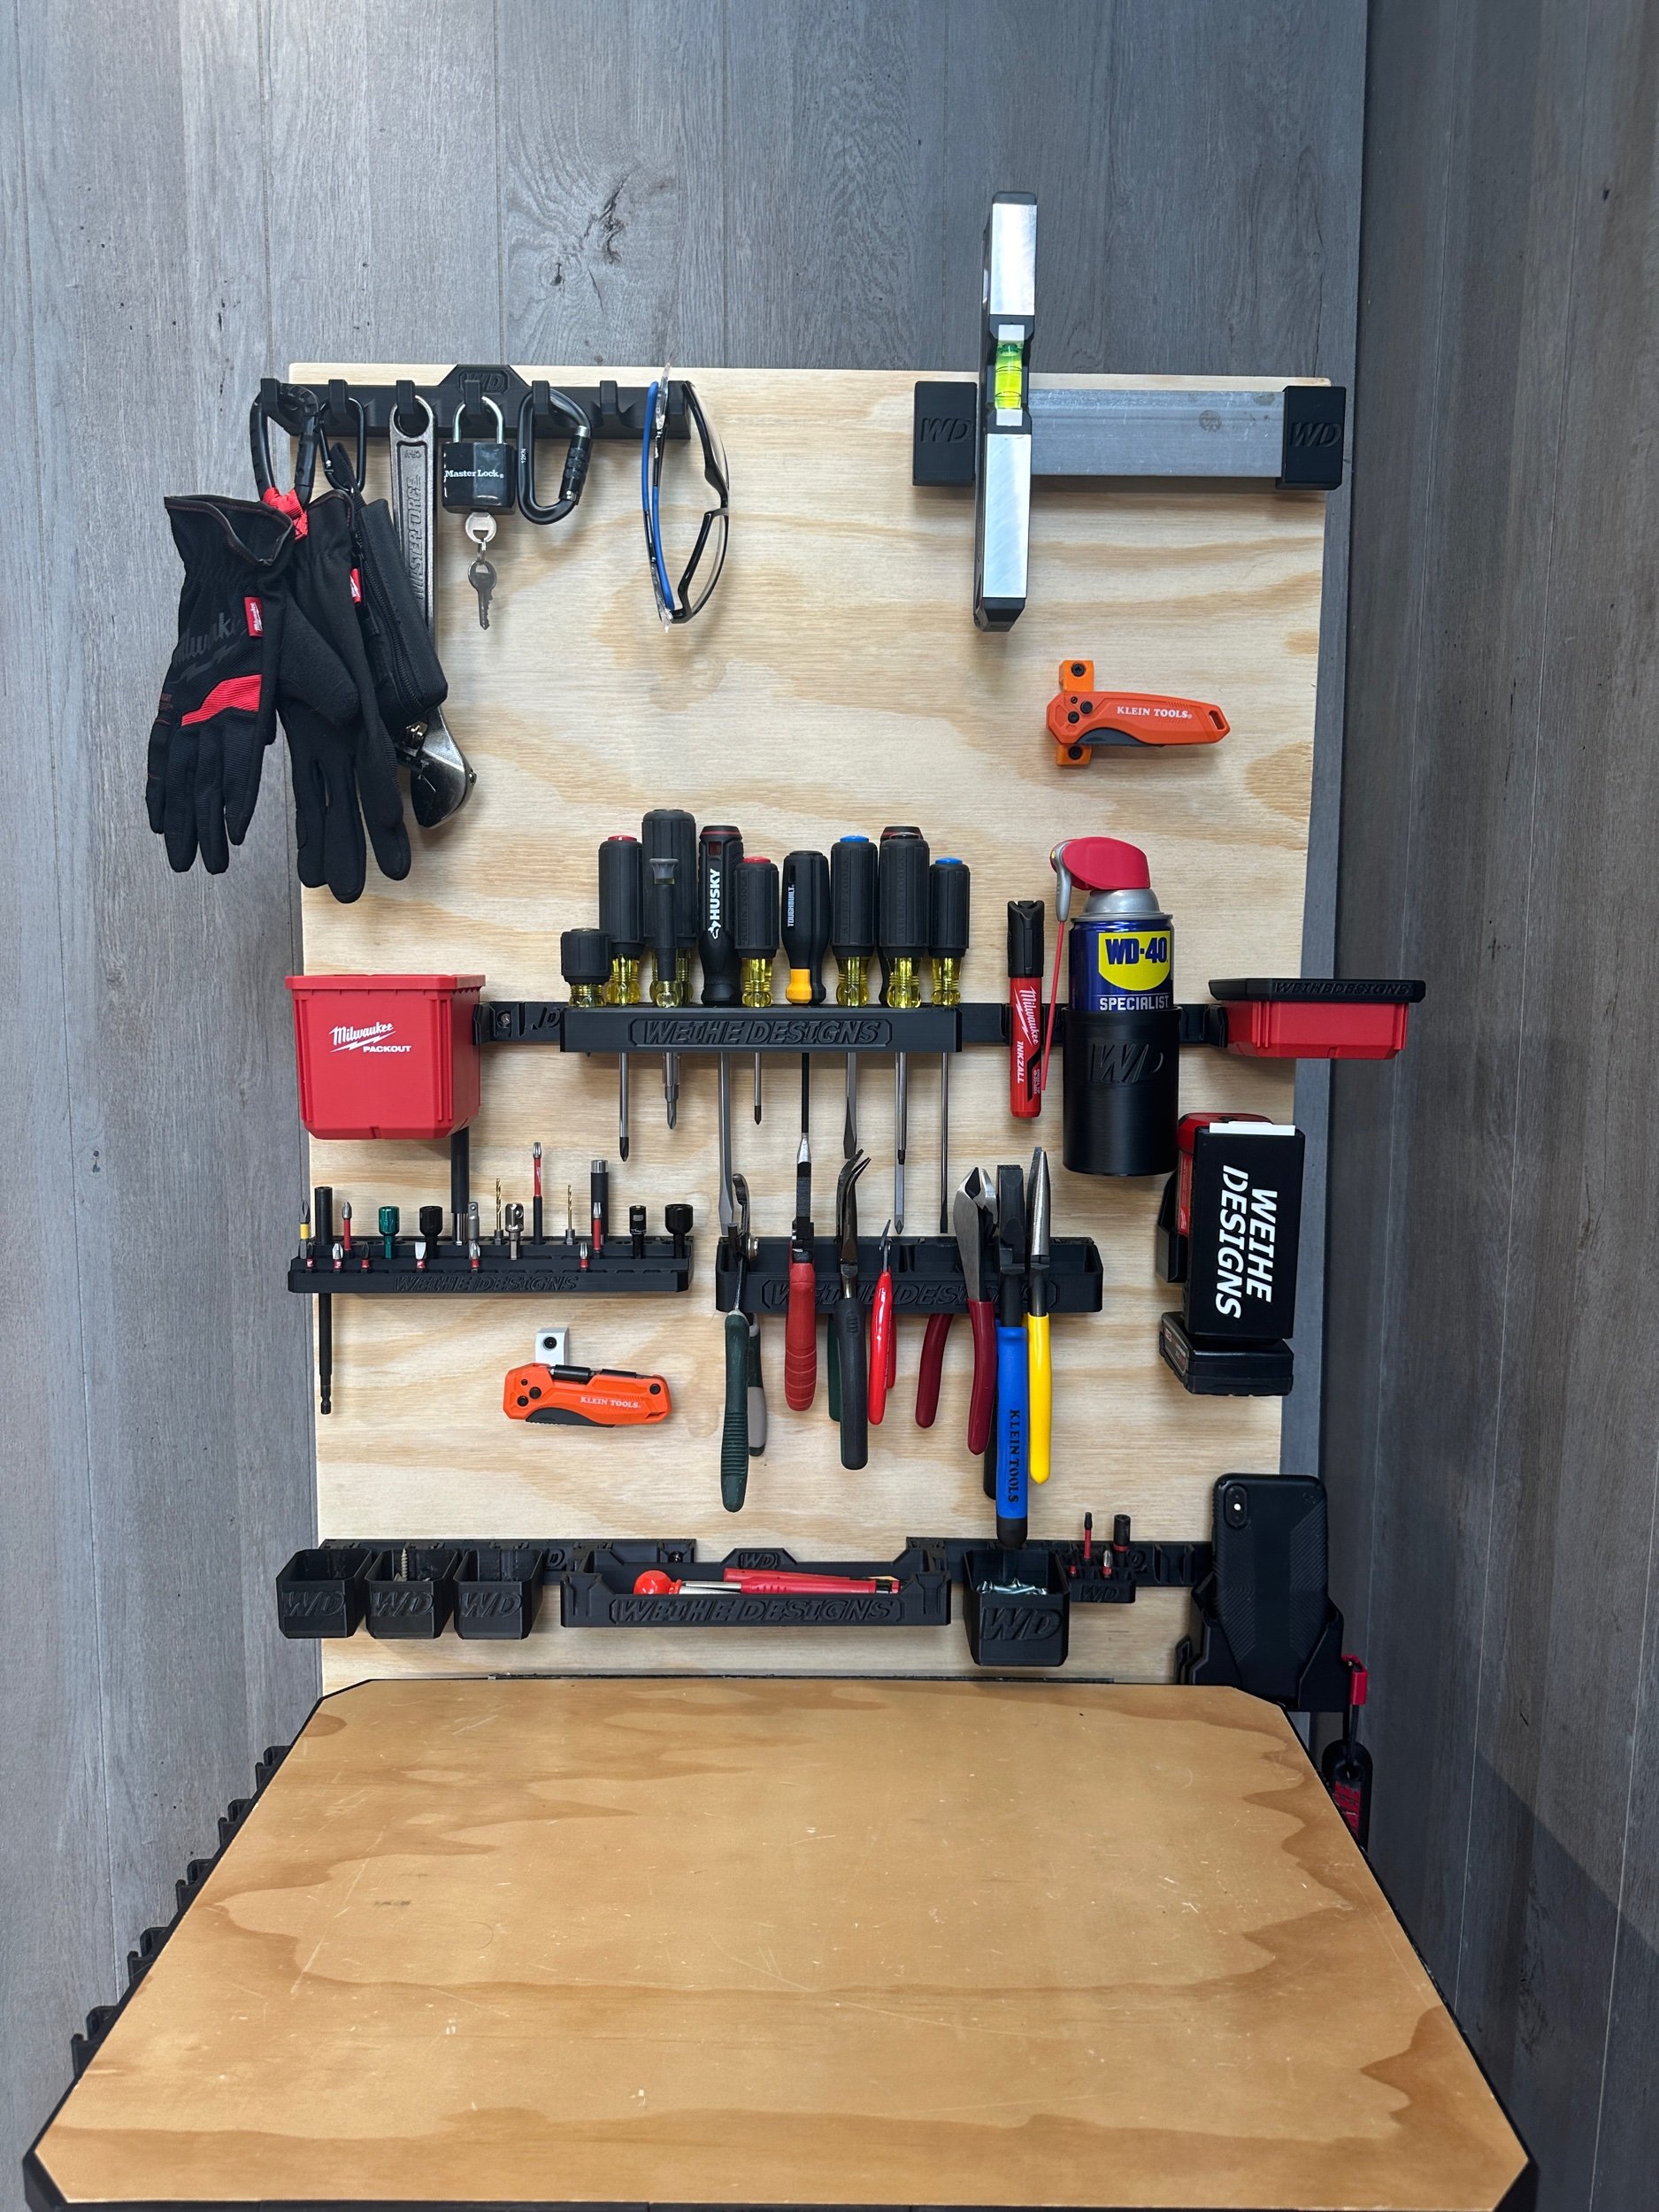
Examples:
Camera Gear (with 1/4-20 Nut)
Hooks*
Fishing Rod Holder*
Umbrella Holder*
Metal Plate*
AND MORE*
**The 1/4-20 Nut can hold virtually any object with a 1/4inch diameter hole or larger.
*** Any length 1/4-20 Bolt can be used to accommodate thicker objects (i.e., longer ones from the hardware store)
Includes:
Front Plate, Back Plate, a nut, a 1/2 in bolt, and 2 machine screws for attaching the plates around the aluminum rails
Damage-free & Quick Installation with #2 Philips driver
*Important Installation Note:
When screwing the plates together, set your drill to a lower clutch setting, or do the final tighten by hand.
This product transforms the plastic rail of the MODbox toolboxes into a versatile mounting spot.
This product has an embedded 1/4-20 nut that allows you to attach various items to your MODBox Rails. The nut can also be removed and switched with the bolt so the threads can stick out of the rail.
D-Ring Shown in the example photos is only included in the D-Ring Kit. Transforms MOdbox rail into heavy duty, omnidirectional lashing/ Anchor Point.
Examples:
Camera Gear (with 1/4-20 Nut)
Hooks*
Fishing Rod Holder*
Umbrella Holder*
Metal Plate*
AND MORE*
**The 1/4-20 Nut can hold virtually any object with a 1/4inch diameter hole or larger.
*** Any length 1/4-20 Bolt can be used to accommodate thicker objects (i.e., longer ones from the hardware store)
Includes:
Front Plate, Back Plate, a nut, a 1/2 in bolt, and 2 machine screws for attaching the plates around the aluminum rails
Damage-free & Quick Installation with #2 Philips driver
*Important Installation Note:
When screwing the plates together, set your drill to a lower clutch setting, or do the final tighten by hand.